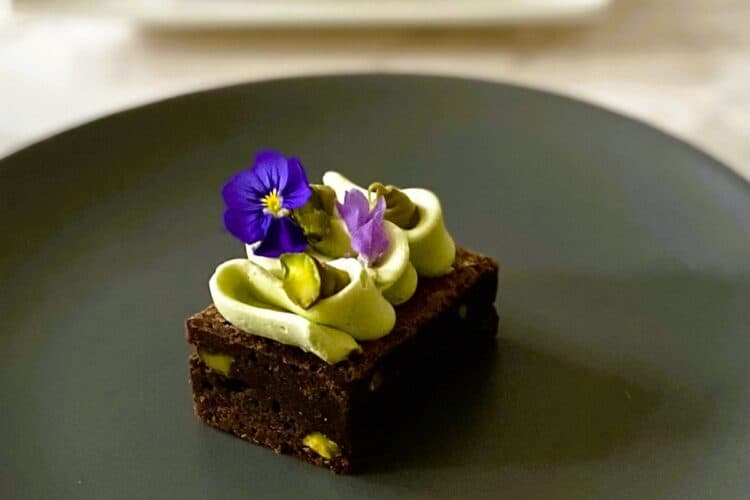
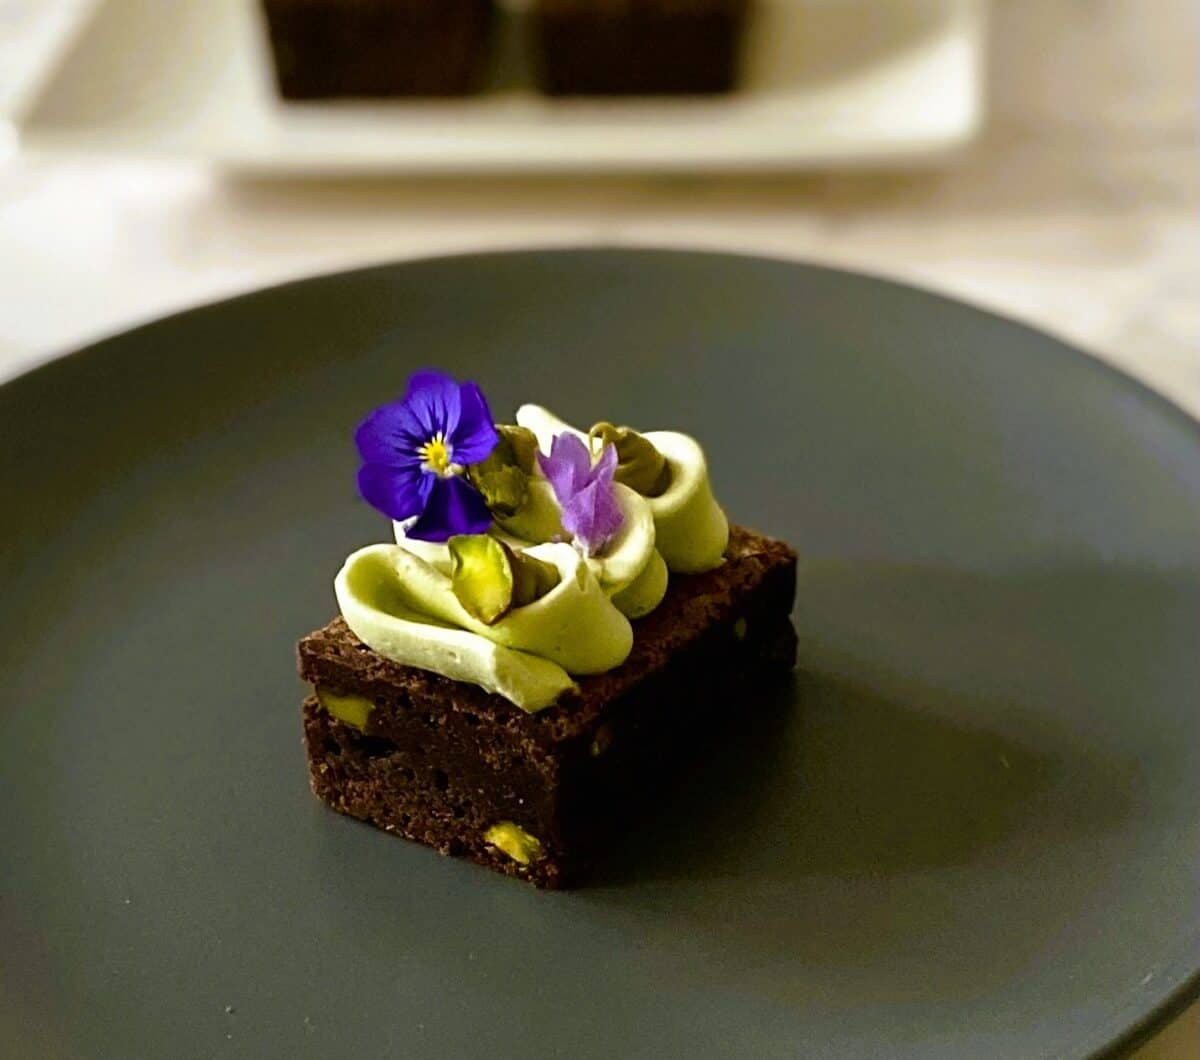
Fudgy and fancy these pistachio brownies with pistachio buttercream are a decadent and beautiful addition to your afternoon tea stand. Serve them whole or cut them into little bites – the choice is yours!
Rich, gooey and beautiful – a brownie worth celebrating
I have to admit, my fellow afternoon tea fans—I haven’t always been the biggest brownie lover. Most brownies I’ve had were either too grainy, overwhelmingly sweet, or just… too big. You know the ones: two bites in and you’re left with a sugar headache and regret.
For me, typical brownies suffer from three main flaws:
- Their size is excessive and out of proportion
- They lack any sort of crunchy contrast
- They’re often too dry and cake-like
But here’s the thing—French pâtisserie has a little rule that makes a lot of sense: every great dessert needs at least three textures. And let’s face it, the French know their way around a sweet treat.
So that’s what I aimed for here:
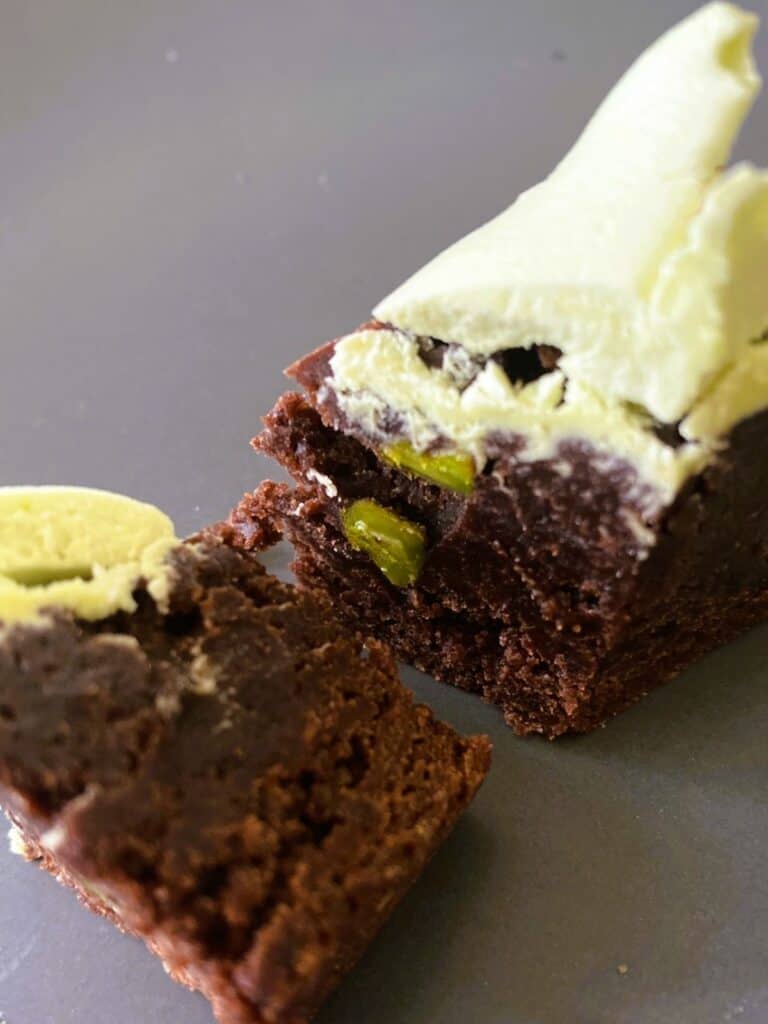
✅ A rich, chocolate brownie that’s not overwhelmingly sweet but still has a gooey, satisfyingly moist mouthfeel
✅ Delicious roasted pistachios scattered throughout for crunch, flavour and added texture, plus…
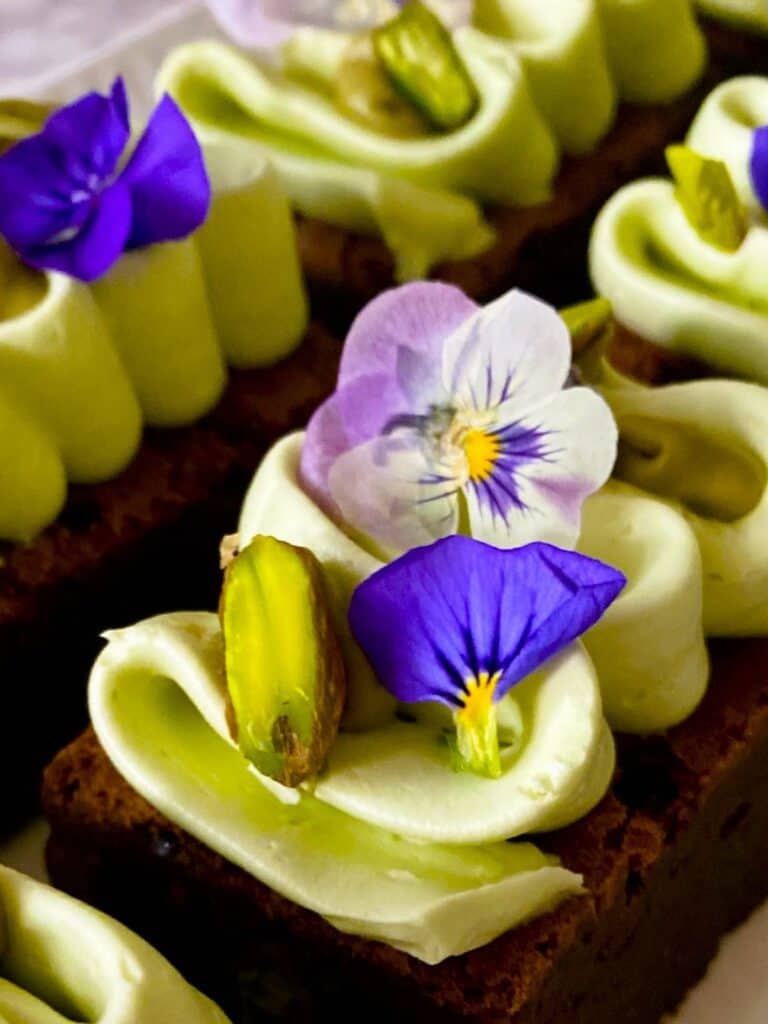
✅ A layer of creamy, luscious pistachio flavoured Swiss meringue buttercream on top to tie it all together
These brownies hit all the right notes: indulgent without being sickly, interesting without being fussy, and the kind of thing you’ll actually want to finish—without the headache.
What’s great about these Pistachio Brownies with Pistachio Buttercream
- Different size options: You can serve them as pictured or cut them in half and make little bites (see below) – perfect for a tiered stand
- The work is split over two days: Make the brownies then chill overnight. The next day, cut the brownies and make the buttercream.
- Adaptable: You can just make the brownies and not the buttercream, or you can make the brownies without the pistachios or add almonds, hazelnuts or walnuts instead.
- Visual appeal: Elevate the brownie to something special with a little buttercream and some edible flowers


Good to know
You will need a stand mixer with a whisk and paddle attachment to make these. You will also need digital scales to ensure accuracy and success.
I’ve used Swiss meringue buttercream here because it’s not too sweet. You will need to use my step-by-step recipe post on how to make this luscious buttercream, then return to the brownie post for flavouring and piping instructions.
As with any recipe, make sure you read all the steps before you begin. This recipe is for the standard sized brownie in the main photo with instructions for cutting into bites in the How To Serve section towards the end of the step-by-step post.
Chill the brownies overnight so you can get clean cuts. If that’s not possible, then at least a minimum of 3 hours.
Other recipes to make
Raspberry White Chocolate Cheesecake – it uses the same Wiltshire Easybake Slice & Brownie Pan that I’ve used here
Ingredients for the pistachio brownies with pistachio buttercream


Brownies
Pistachios – Use whole shelled pistachios. Make sure to save some for the garnish.
Eggs – I’ve used fresh, large eggs for this recipe
Unsalted butter – You can also use salted butter, just omit the pinch of salt
Coffee – Any type will do. Pod, espresso machine, instant or French press/plunger.
Dark chocolate – Block or chocolate melts
Cocoa – Either standard cocoa or Dutch processed.
Caster sugar or superfine sugar – The finer the grain the more easily the sugar will dissolve during whisking and baking. This is important so you don’t get a grainy brownie.
Plus, Plain flour / all purpose flour and a pinch of fine table salt
Pistachio Buttercream & Garnish
Pistachios and Pistachio cream – Use a good quality smooth not crunchy pistachio cream. I used this one from Labo.
Swiss meringue buttercream – You will need to make the 3 egg white small version (use two whites leftover from the brownies)
Oil based food colouring – I used Colour Mill lime colouring for this recipe
Edible flowers or petals – I used fresh violas, lavender petals and rose petals. Pressed or dried flowers are also suitable as long as they are edible.
Make the brownies
Preparation
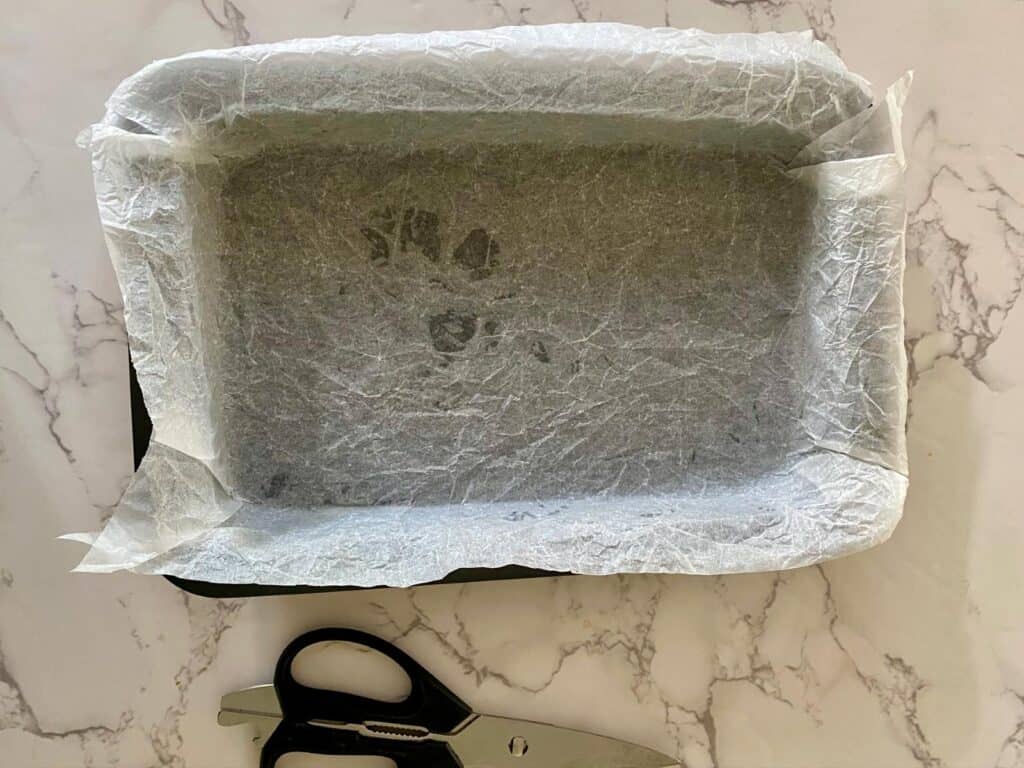
Grease a rectangular brownie/slice tin measuring 27.5 x 17.5 x 3.5cm (11” x 7” x 1 ½”) with a little butter. I used the popular Easybake Slice & Brownie Pan from Wiltshire.
Line with a piece baking paper: The easiest way to do this is to cut off a piece of paper a little bigger than the brownie tin, screw it up into a ball, smooth it out, cut a slit into each corner, then place it in your tin. Rub the bottom and each edge so it sticks to the pan.
Break up the chocolate (if using a block) and cube the butter.
Make a cup of coffee (with a pod, espresso machine, instant or French press) and measure out 60ml.
Fit your stand mixer with the whisk attachment.
Preheat the oven to 160 C fan / 320 F fan.
Toast the pistachios
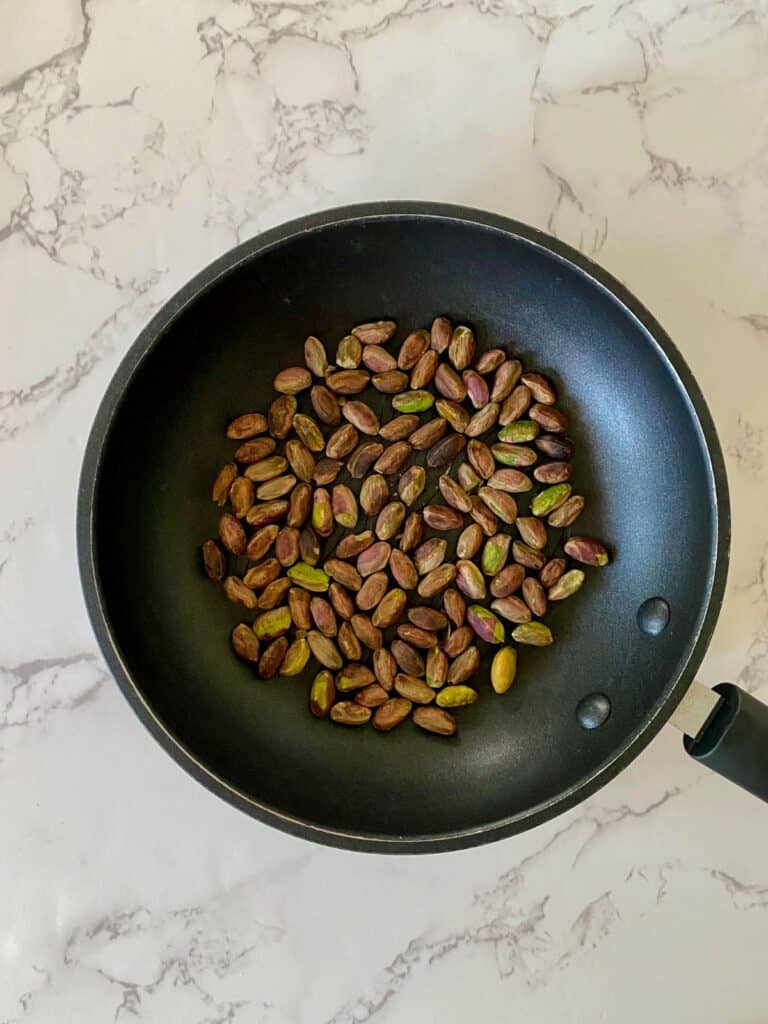
Toast the pistachios in a frying pan over low heat, shake the pan at regular intervals so they don’t burn. This should take about 5 minutes. Set aside to cool.
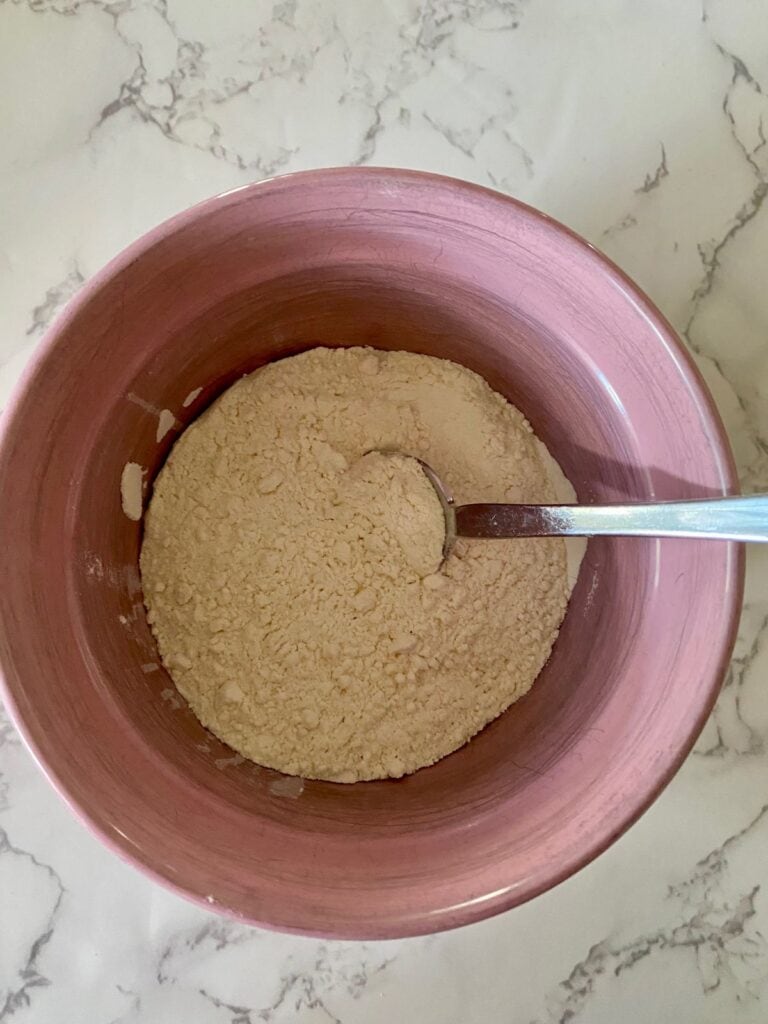
Sift the flour and the salt together into a bowl. Set aside for now.


Crack the two whole eggs into a jug.
Separate the yolks from the whites of the other two eggs – yolks in one small bowl, whites in the other (don’t throw them out).
Add the yolks to the jug and mix with a fork until the eggs are frothy.
Cover the egg white bowl with plastic wrap and place it in the fridge until you are ready to make the Swiss meringue buttercream.
Melt the butter with the coffee
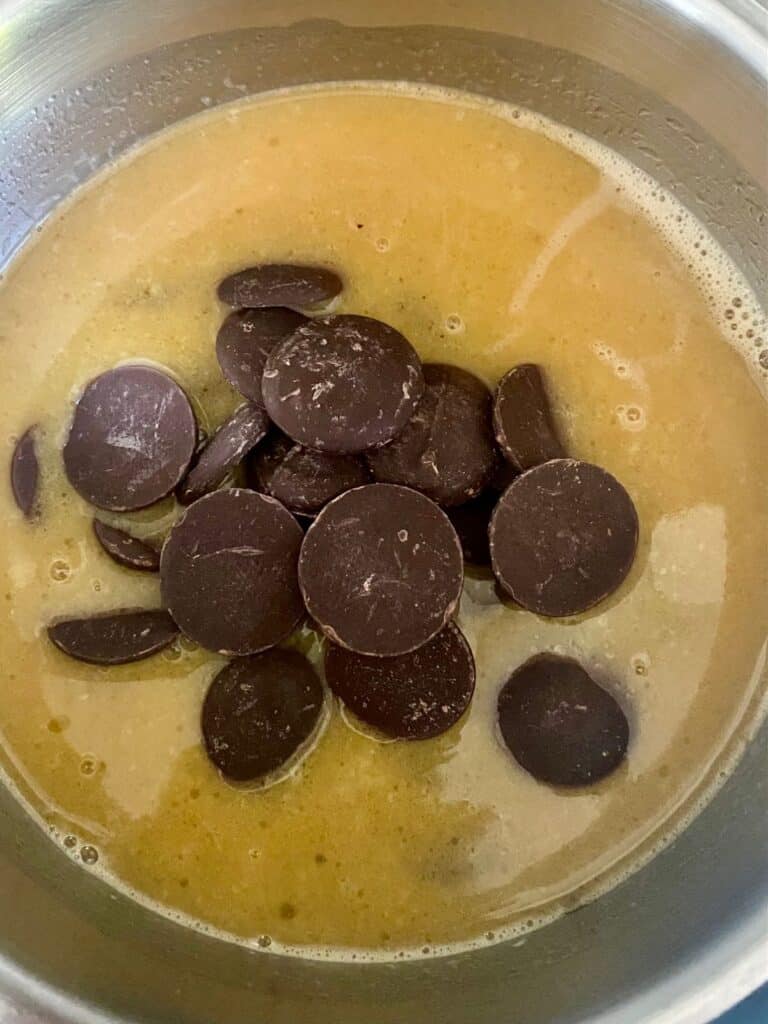
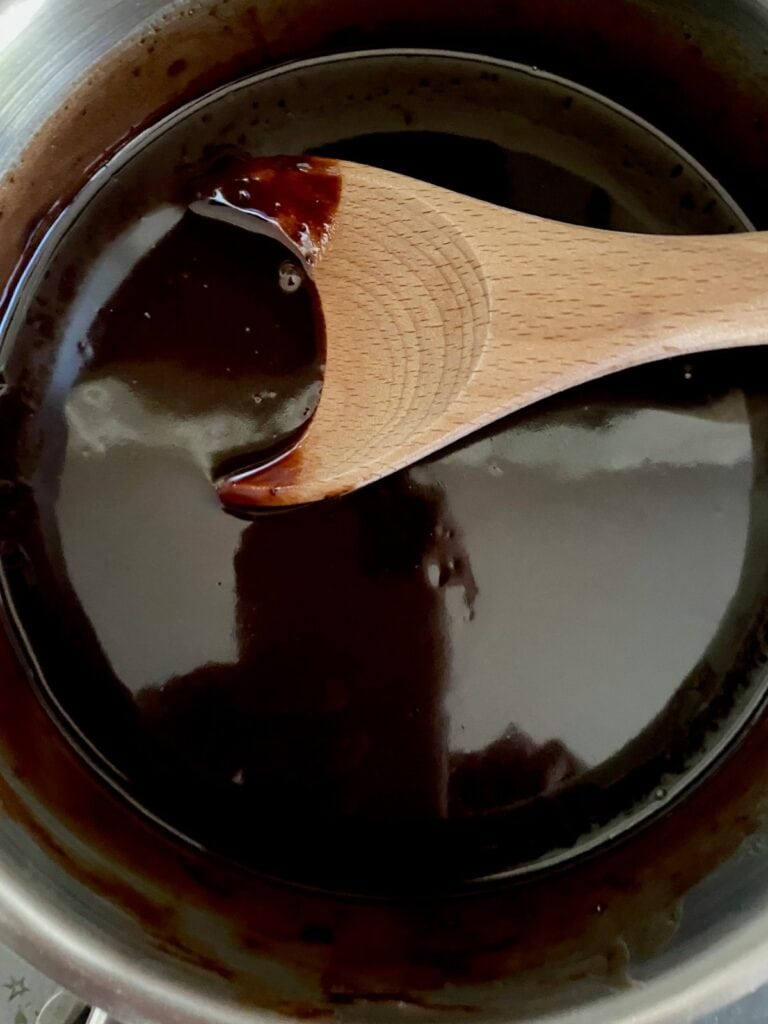
Put the butter and the coffee in a small saucepan over a low heat. Stir until the butter has melted.
Add the chocolate pieces and stir continuously (important) until the chocolate has completely melted and incorporated into the butter mixture.
Remove from the cooktop and pour the mixture into the stand mixer bowl. Use a spatula to get it all out!
Add the sugar and the cocoa
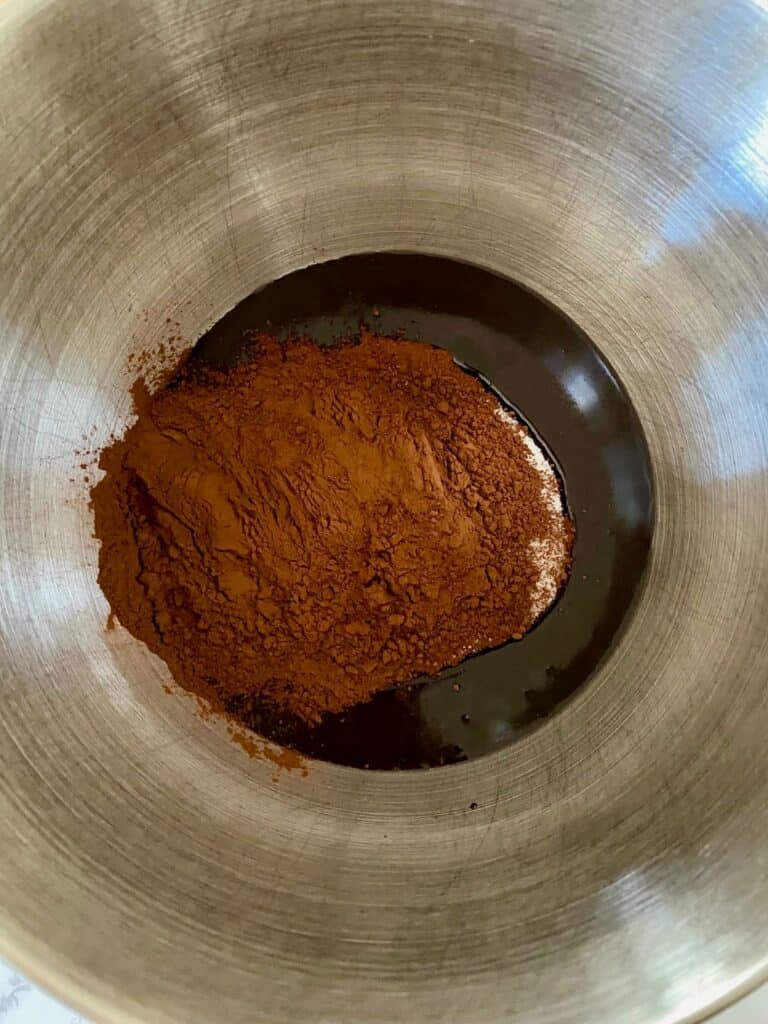

Add the sugar and the cocoa to the chocolate mixture then whisk on medium speed (KitchenAid level 4 or equivalent) for 2 minutes.
Stop the mixer/beaters and scrape down the sides of your bowl with the spatula.
Add the eggs
Pour in the eggs and whisk on low speed for 1 minute.
Remove the bowl from the stand mixer and place it on your bench.
Add the pistachios
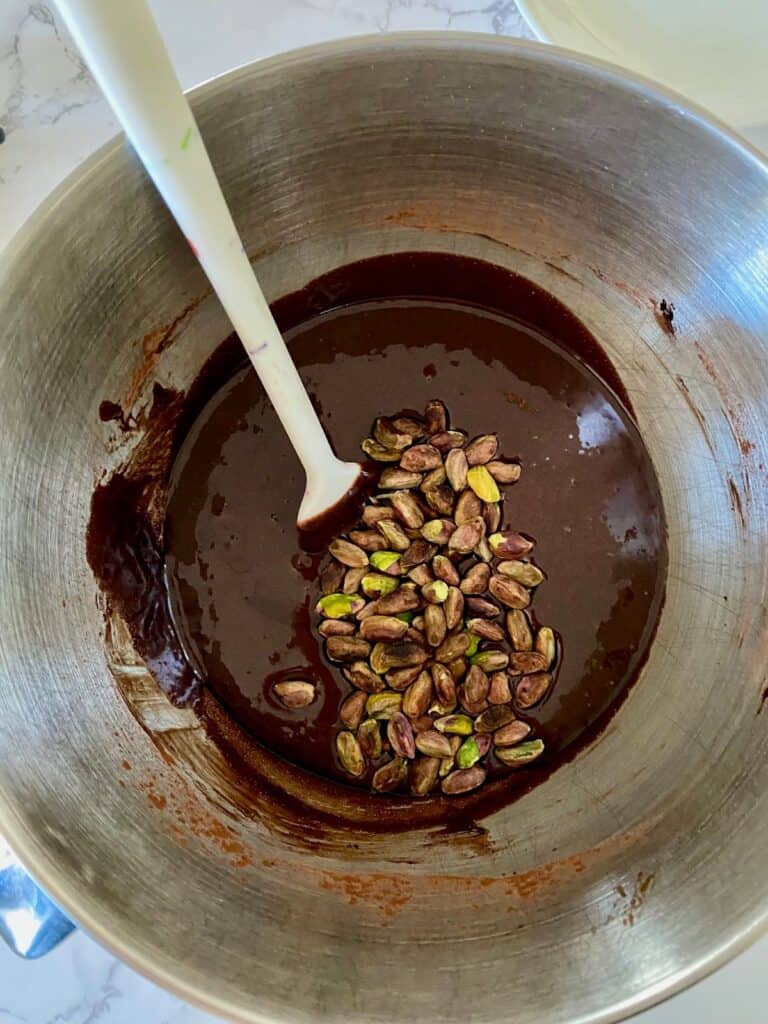
Fold the toasted pistachios through the chocolate mixture with a spatula.
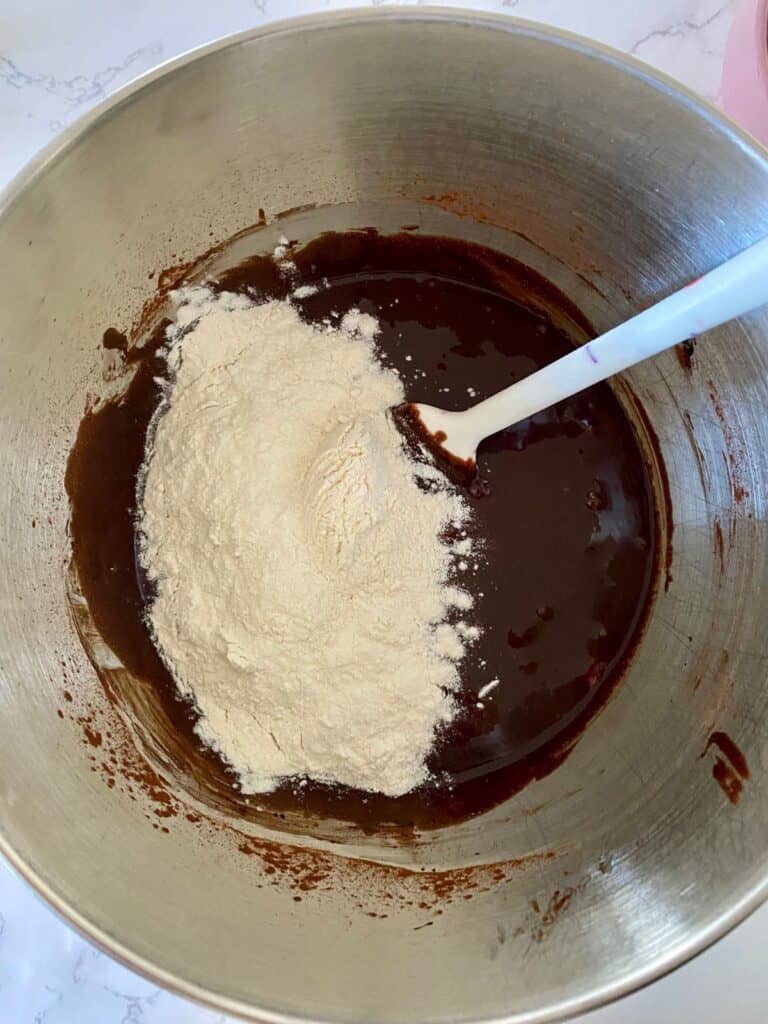
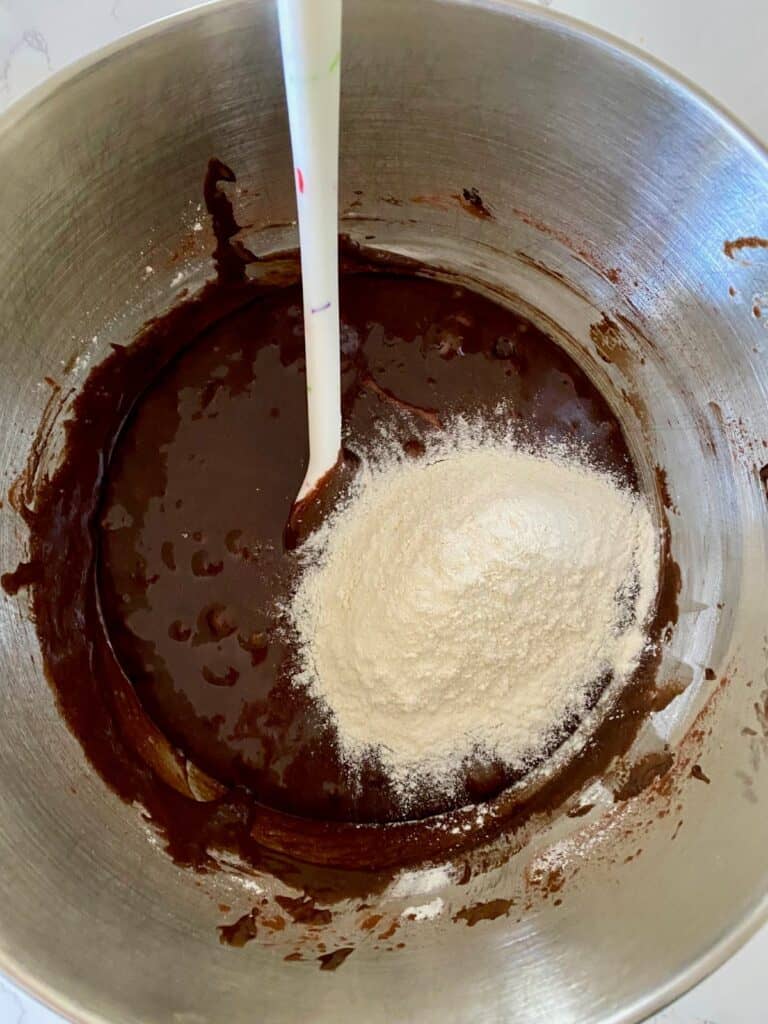
Add the flour
Now add half the flour and fold it through until combined. Add the remaining half and gently fold through again until no signs of flour remain.
Pour into the tin
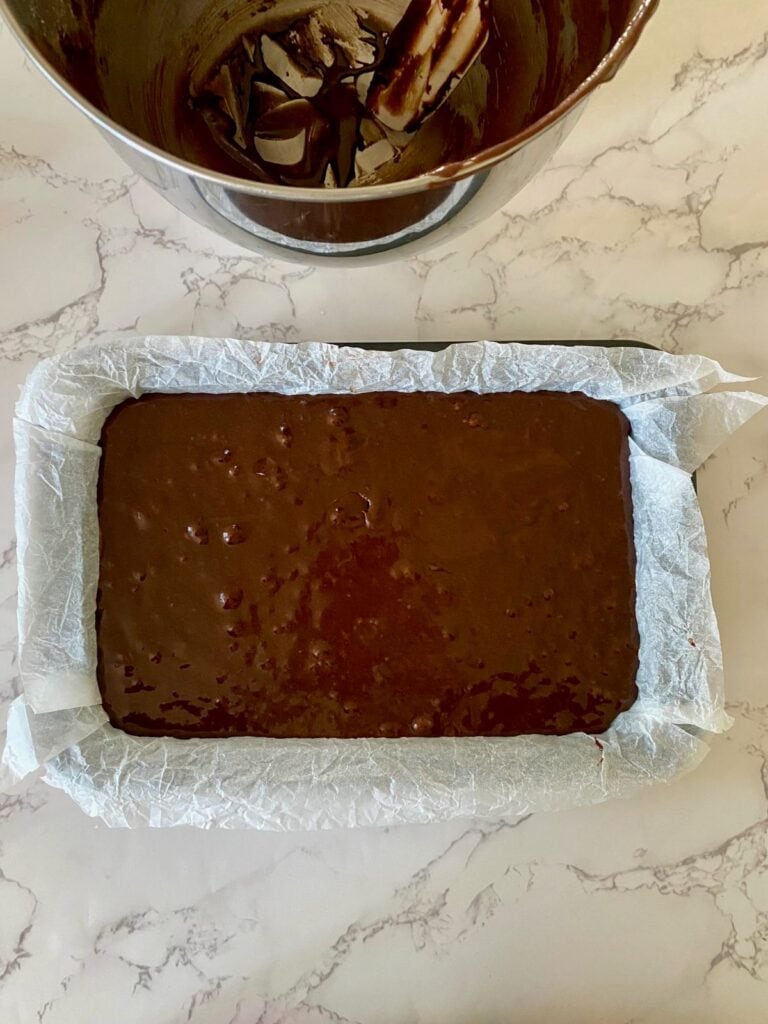
Pour the brownie mixture into the lined tin, use the spatula to get every last bit out of the bowl.
Gently shake the pan from side to side, up and down to distribute the mixture evenly.
Bake
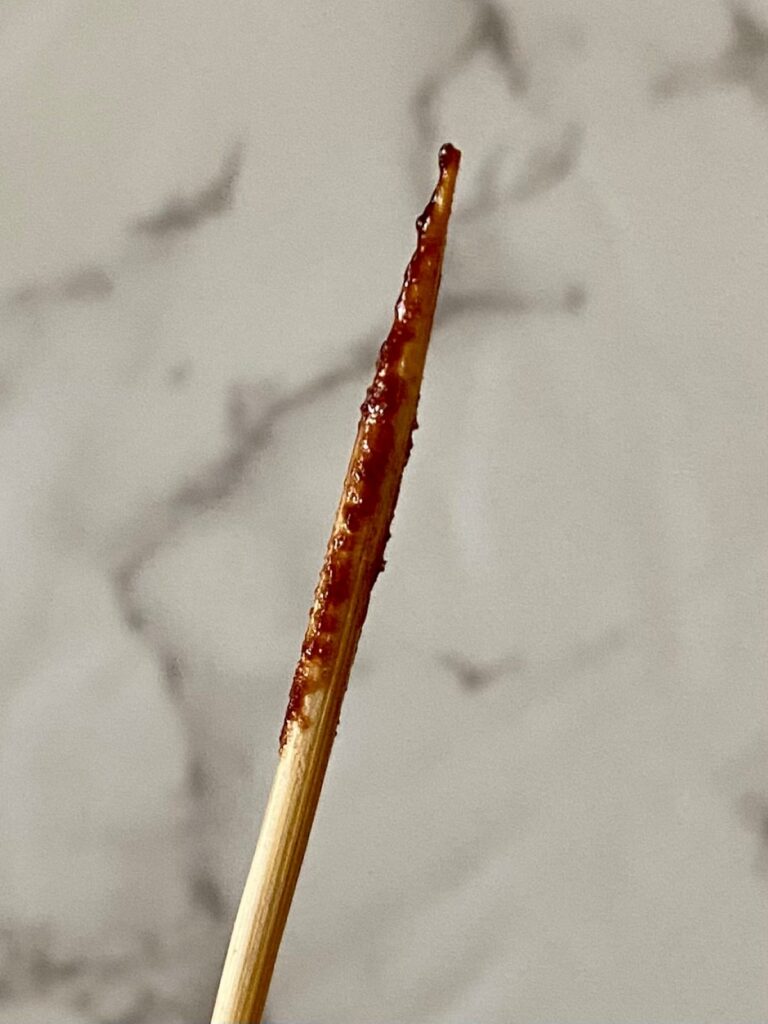
Place the tin on the centre shelf in the oven and bake for 30 minutes. Test with a skewer, it should leave behind traces of mixture when ready (see photo) – not too wet but not dry like a cake.
Cool & store

Cool in the pan then cover with foil and refrigerate overnight (or at least 3 hours). This will make it easier to cut.
THE NEXT DAY
Remove the brownie pan from the fridge. Discard the foil, then tip the brownie out onto a cutting board (give it a little tap if you need to).
Remove the baking paper. Carefully turn it right side up.
Preparation
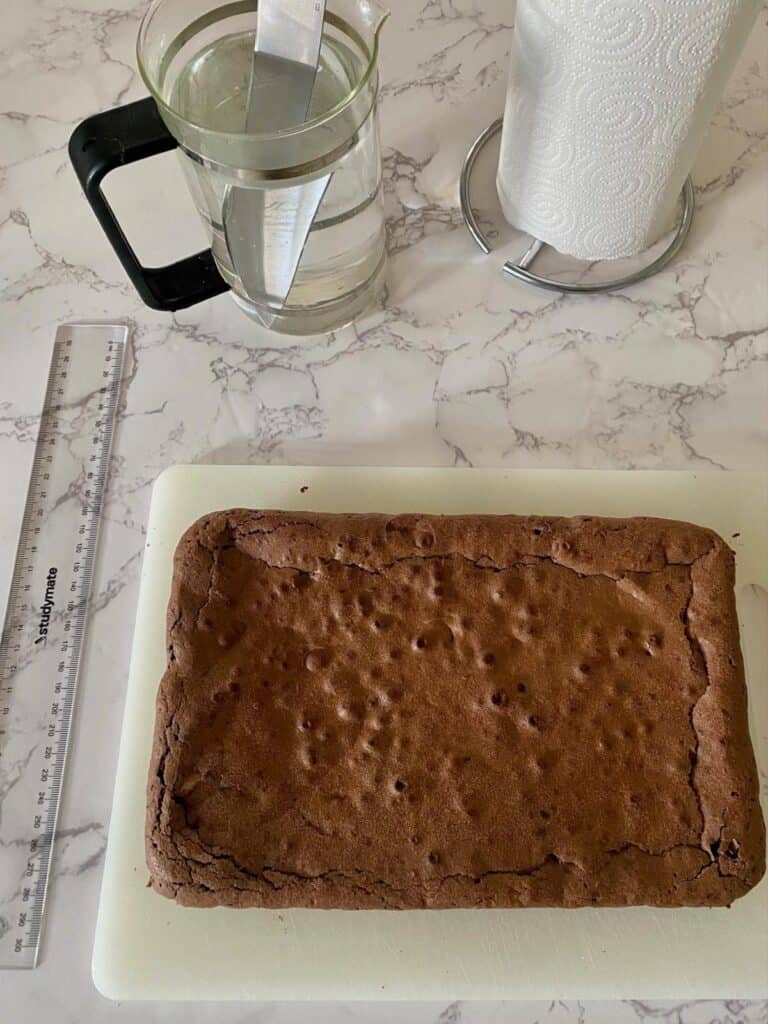
Fill a heatproof jug with hot water (I use a coffee plunger) and add your sharpest knife. Place a roll of paper towel as well as a ruler close by.
Place a large plate on your bench.
Square off the ends
*Only if your pan has rounded edges. If yours are square then skip this step.
Remove the knife from the hot water and wipe it clean with the paper towel.
Cut off the rounded short end of the brownie so you have a sharp edge. Re-dip and dry your knife, then repeat with the other side.
Clean your knife again for the next step.
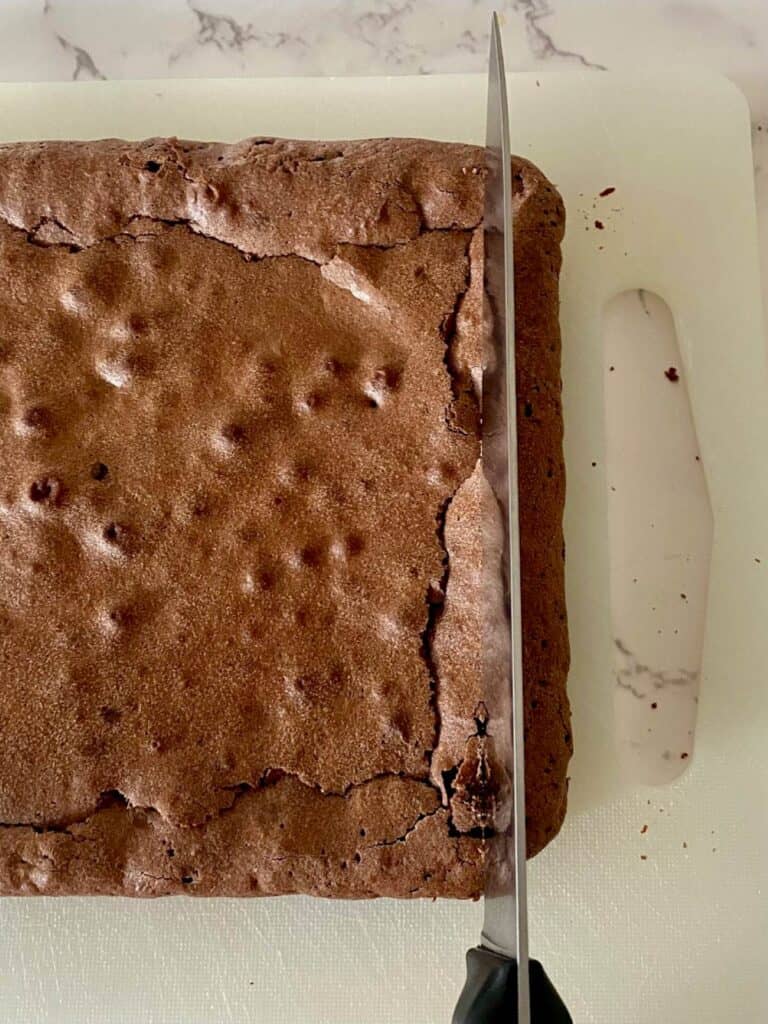
Cut the brownie
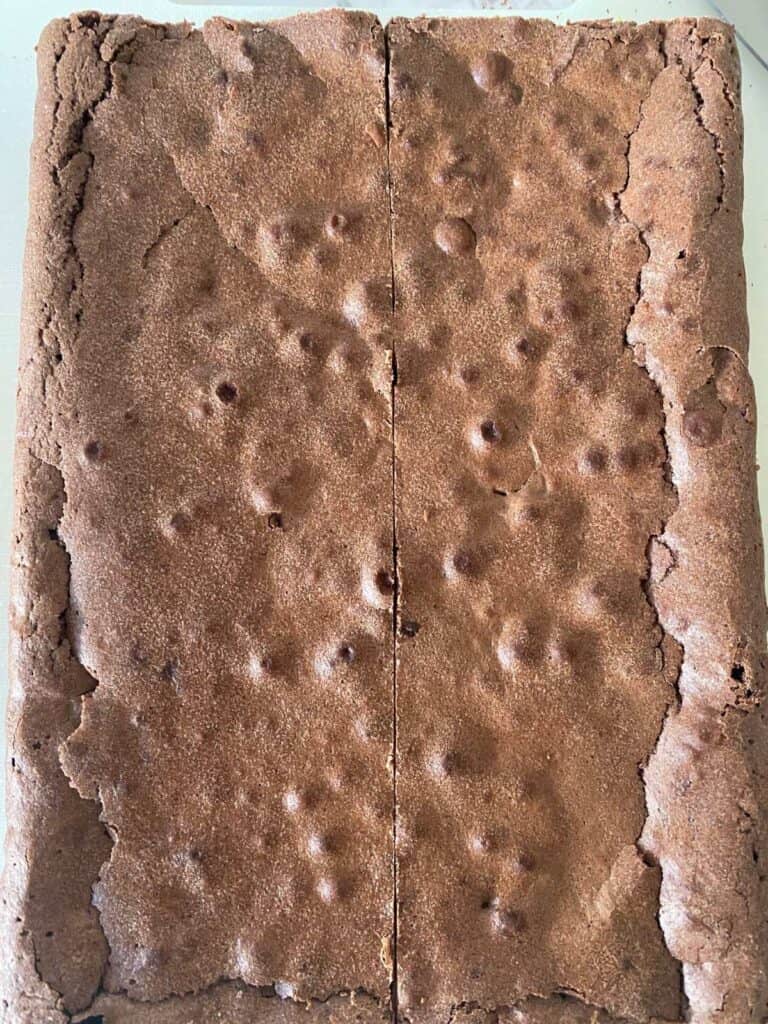
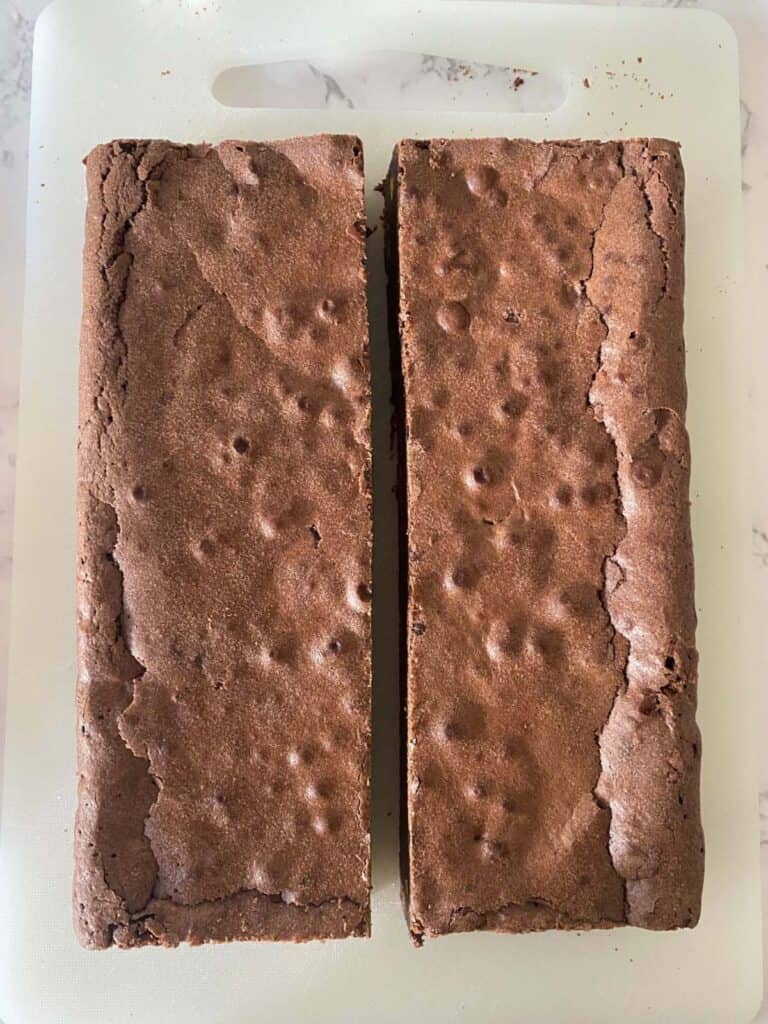
Now turn the brownie from ‘landscape’ to ‘portrait’. Using a ruler, find the centre of the brownie and add a little mark at each end. Score a cutting line, check it’s even then cut all the way through.
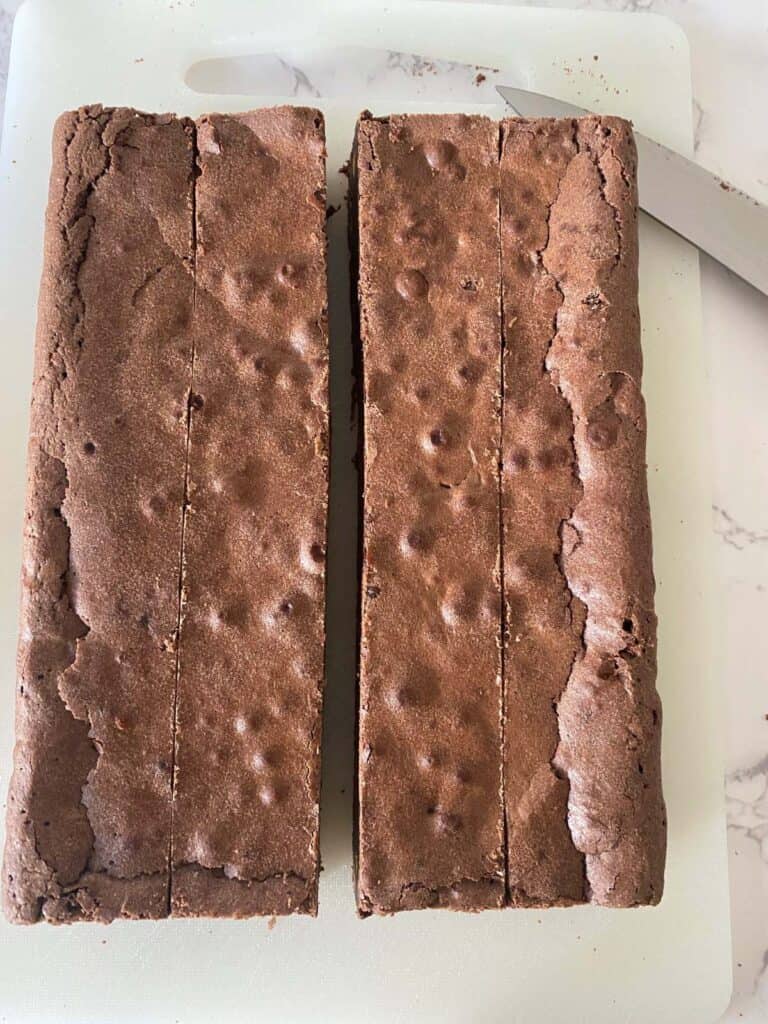
For the next steps, remember to re-dip and wipe your knife between every cut so your brownies have clean, sharp edges.

Find the centre of each half, measure, score and cut.

Cut each long piece into four even pieces, again by measuring, scoring and cutting.
You should now have 16 brownies of equal size. Place them on your plate.
Level the tops
Sometimes you will get a little bit of unevenness on the top of your brownies. If this happens you will need to level the tops so they are all the same height.
Place a brownie on its side and carefully slice off the uneven top. Bend down to check that it’s level.
Cover your brownies with plastic wrap and leave them on your bench while you make the buttercream.
Prep for icing and garnishing
Cut the 18 pistachios in half.
Line a large tray with baking paper (you will need this for your completed brownies).
Fit the piping bag
I recommend any of the following large tips:
123 (curved petal, which is what I’ve used) or a 124 or 125 petal tip.
Place your piping tip in a large disposable piping bag, snip off the end and pull the tip through.
Tip: I find putting the piping bag in a tall glass and turning over the top third of the bag makes it a lot easier to fill.
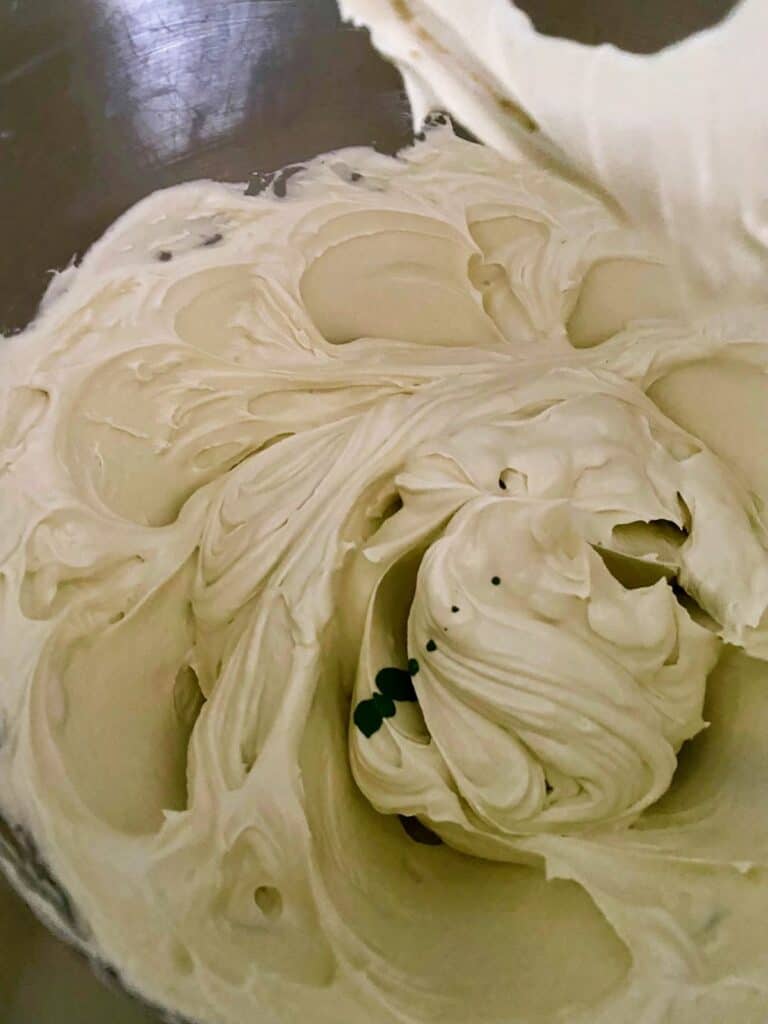
Make the buttercream
Make a small batch (3 egg white) amount of Swiss meringue buttercream by following my recipe. Don’t forget to use the 2 egg whites you saved from making the brownies.
Once you’ve made the buttercream return back here IMMEDIATELY for colouring and flavouring. Don’t wait too long or you’ll get air bubbles.
Add the pistachio cream
Turn the stand mixer onto the lowest setting (level 1 on a KitchenAid). Add the two tablespoons of pistachio cream to your buttercream together with a pinch of salt.
Mix until fully incorporated. Leave the motor running (still on level 1) while you add the colour.
Add the colour
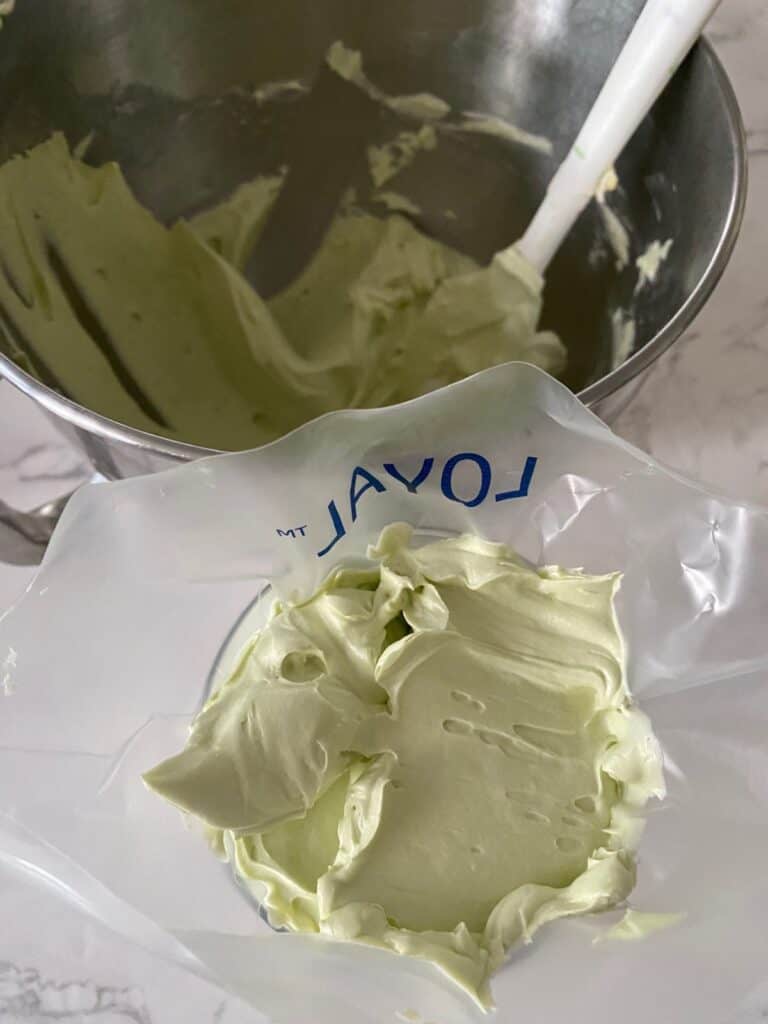
Start with 2 or 3 drops, mix until fully incorporated then add one drop at a time until you achieve a pale green ‘pistachio’ shade.
Tip: Take this slowly, it’s easy to add but impossible to take away if you go too far.
Fill the piping bag
Turn off the stand mixer and fill the piping bag 2/3 full. Pull up the cuff and twist then squeeze until a small amount buttercream comes out.
Have a practice with piping the buttercream (see instructions below) on a clean plate before you begin.
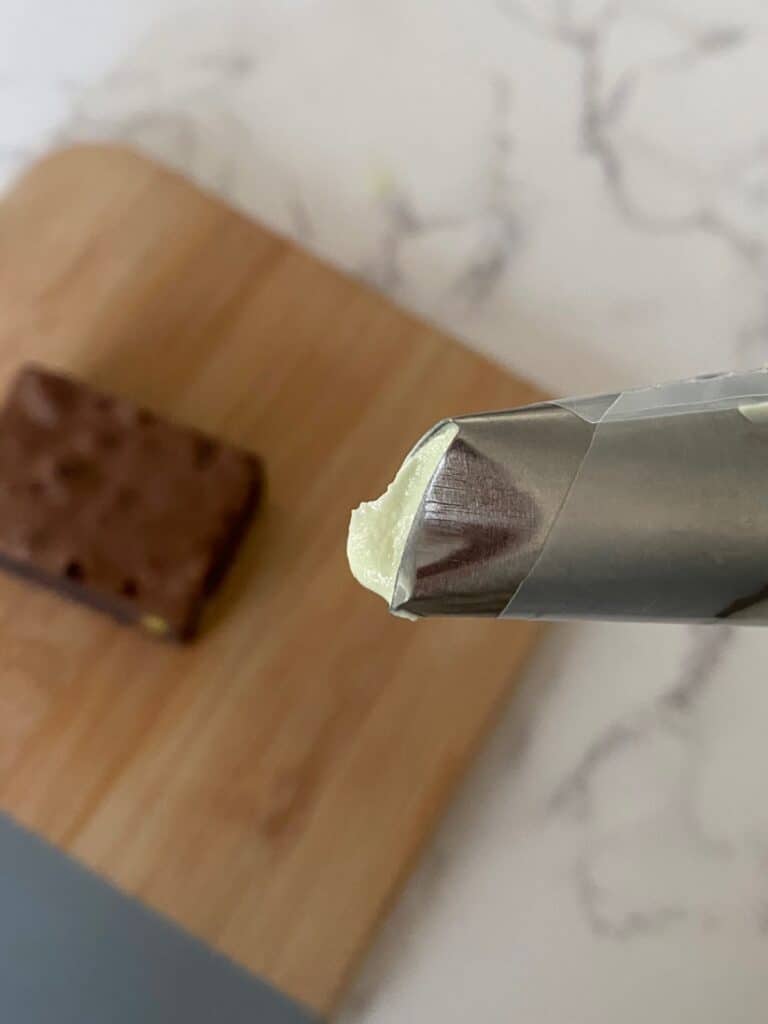
Decorate your brownies
Turn the bag in your hands so that the teardrop end of the piping tip is closest to your bench. (see photo above).
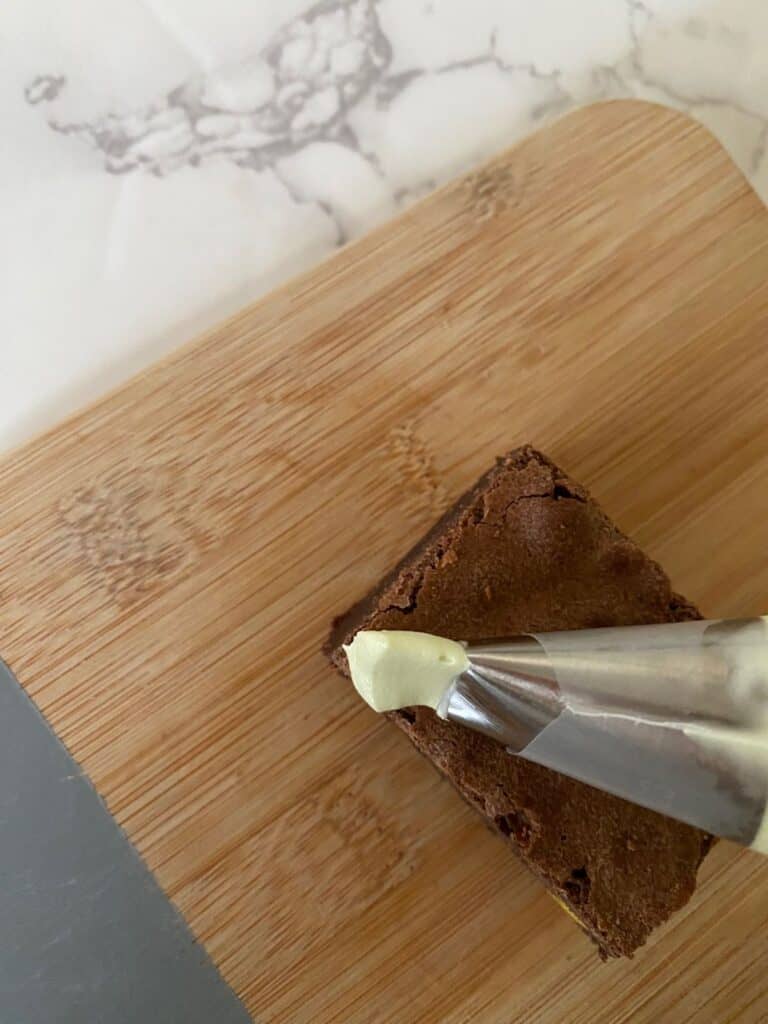
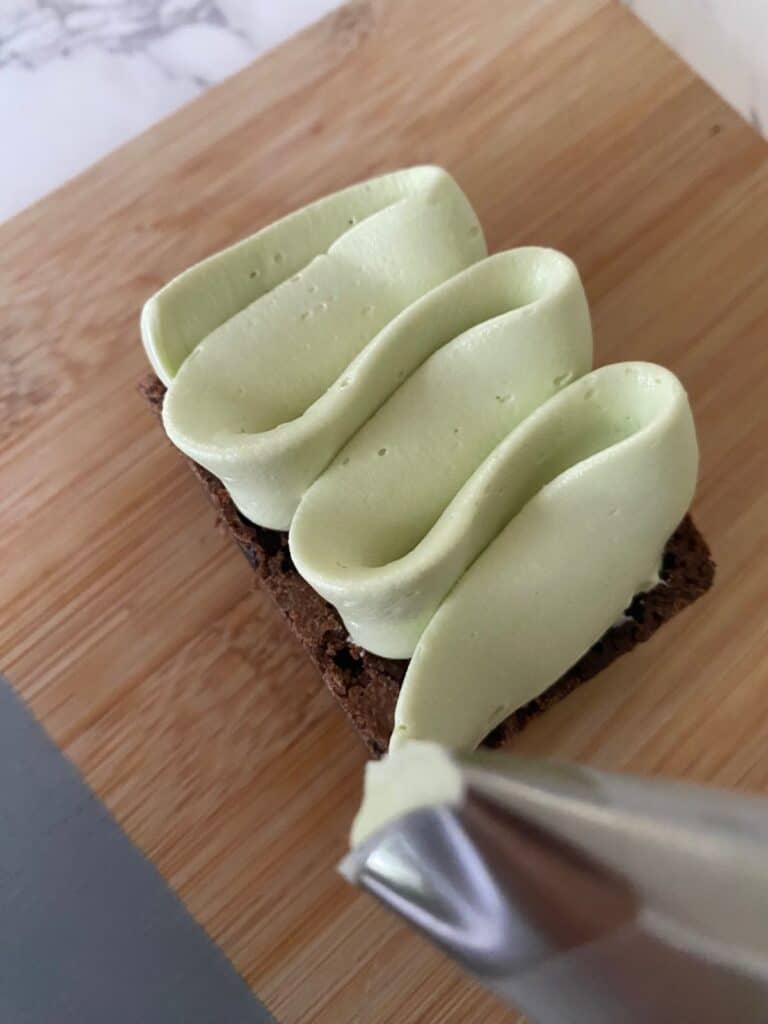
Hold the bag at a 30 degree angle, so not directly side on but at a slightly elevated angle (see pic) just above the brownie. Start piping along the left edge furthest away from you. Pipe slowly with gentle pressure or you will get a ruffle instead of ribbon effect.
When you get to the right edge ‘turn the corner’ and pipe back along the previous row of piping without stopping. Continue until you get to the other end of the brownie, ease off your pressure and leave a little tail.
Place the brownie on your lined tray.
Pipe the rest of the brownies.
Pipe the pistachio cream
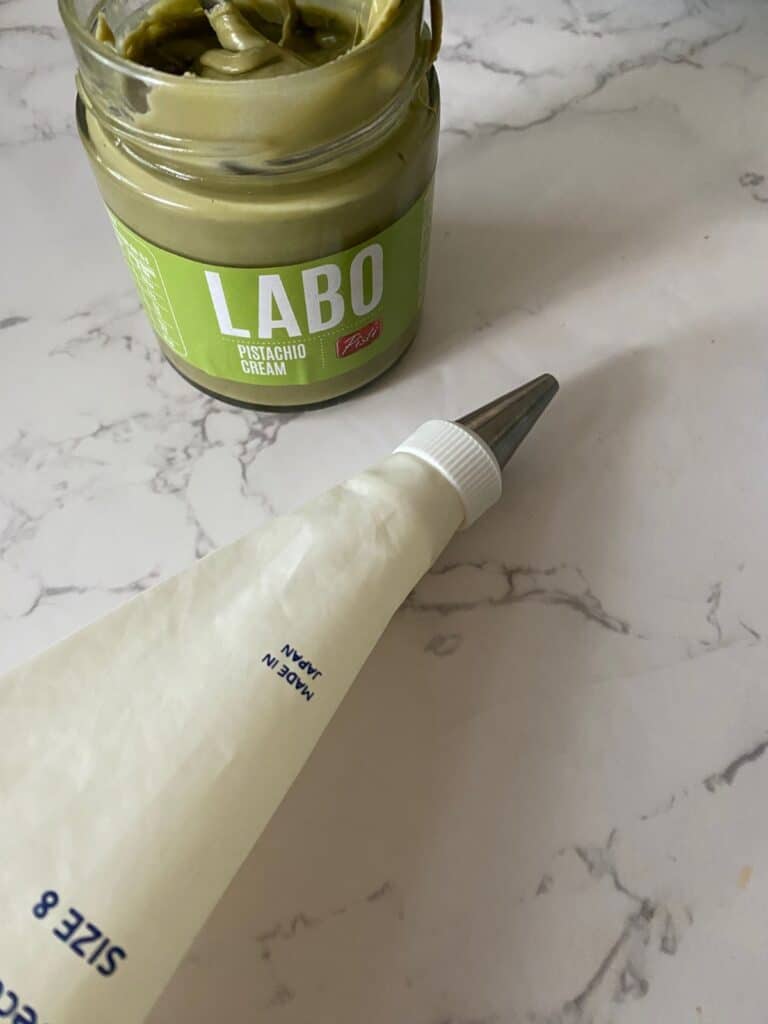
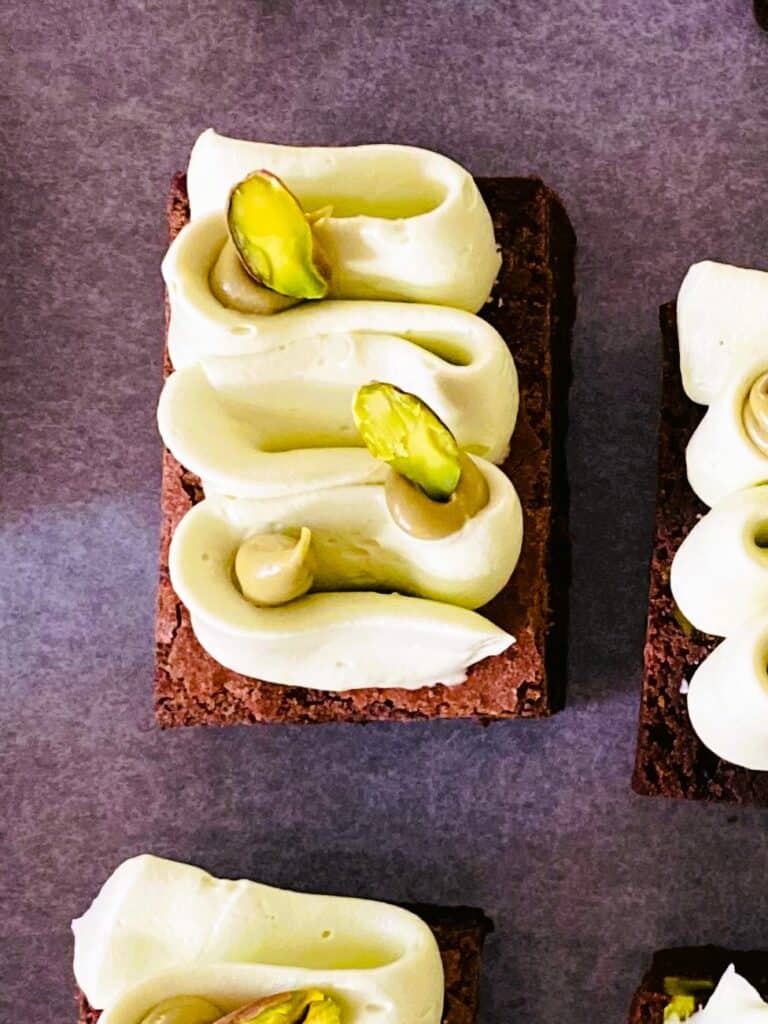
Fit the small piping bag with a plain tip #8 or you can use a small zip lock bag and snip a little bit off the corner. Add two tablespoons of pistachio cream to the bag.
The pistachio cream is not the easiest thing to pipe as it’s really gooey, so don’t stress about getting perfect blobs. You can choose to show the ones that work and hide the ones that don’t under your pistachios or edible flowers!
Add the pistachios
Arrange three pistachio halves on each brownie.
Store
You can choose to store your brownies at this stage. Place them a sealable container lined with baking paper and store in the fridge for up to 24 hours.
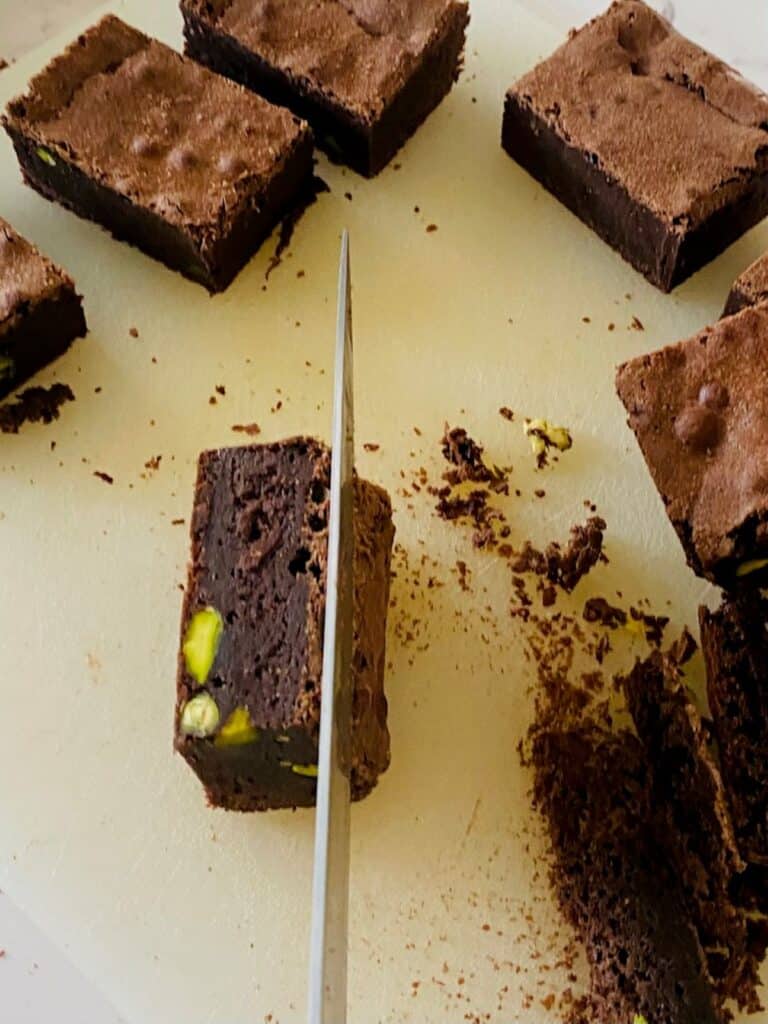
How to serve the Pistachio Brownies with Pistachio Buttercream
Remove the brownies from the fridge (but leave them in the container) at least 2 hours before serving to allow both the buttercream and the brownies to come to room temperature.
For bite-sized brownies: Cut in half while the brownies and the buttercream are firm. Use a hot knife and wipe between cuts.
Add the edible flowers
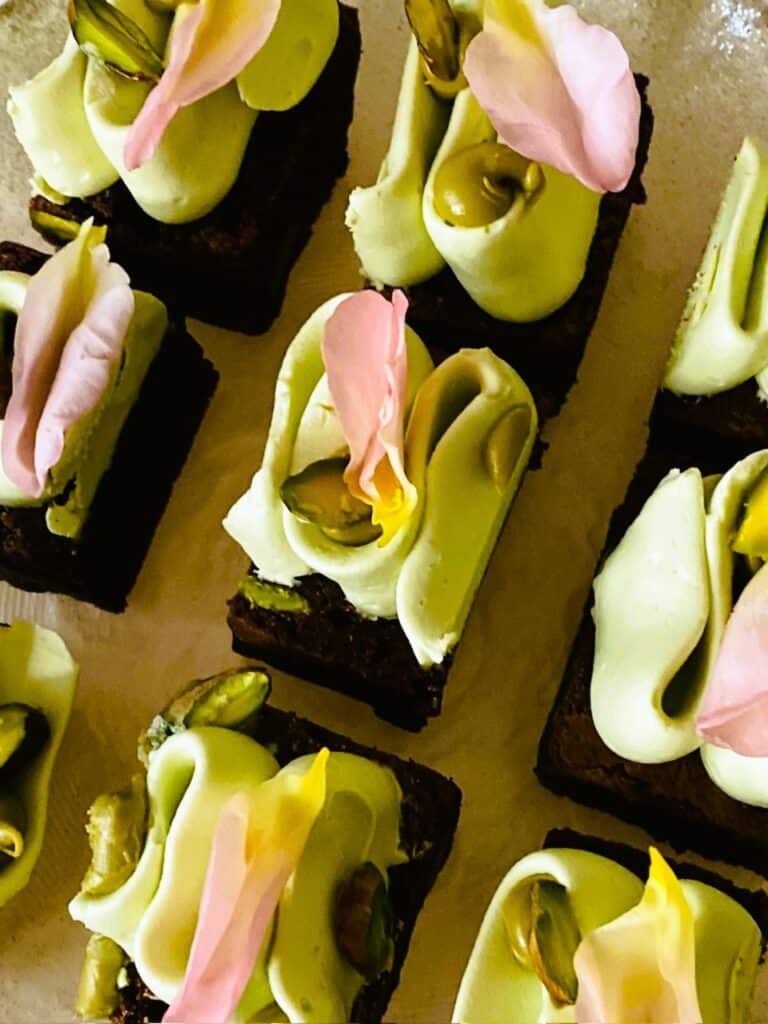
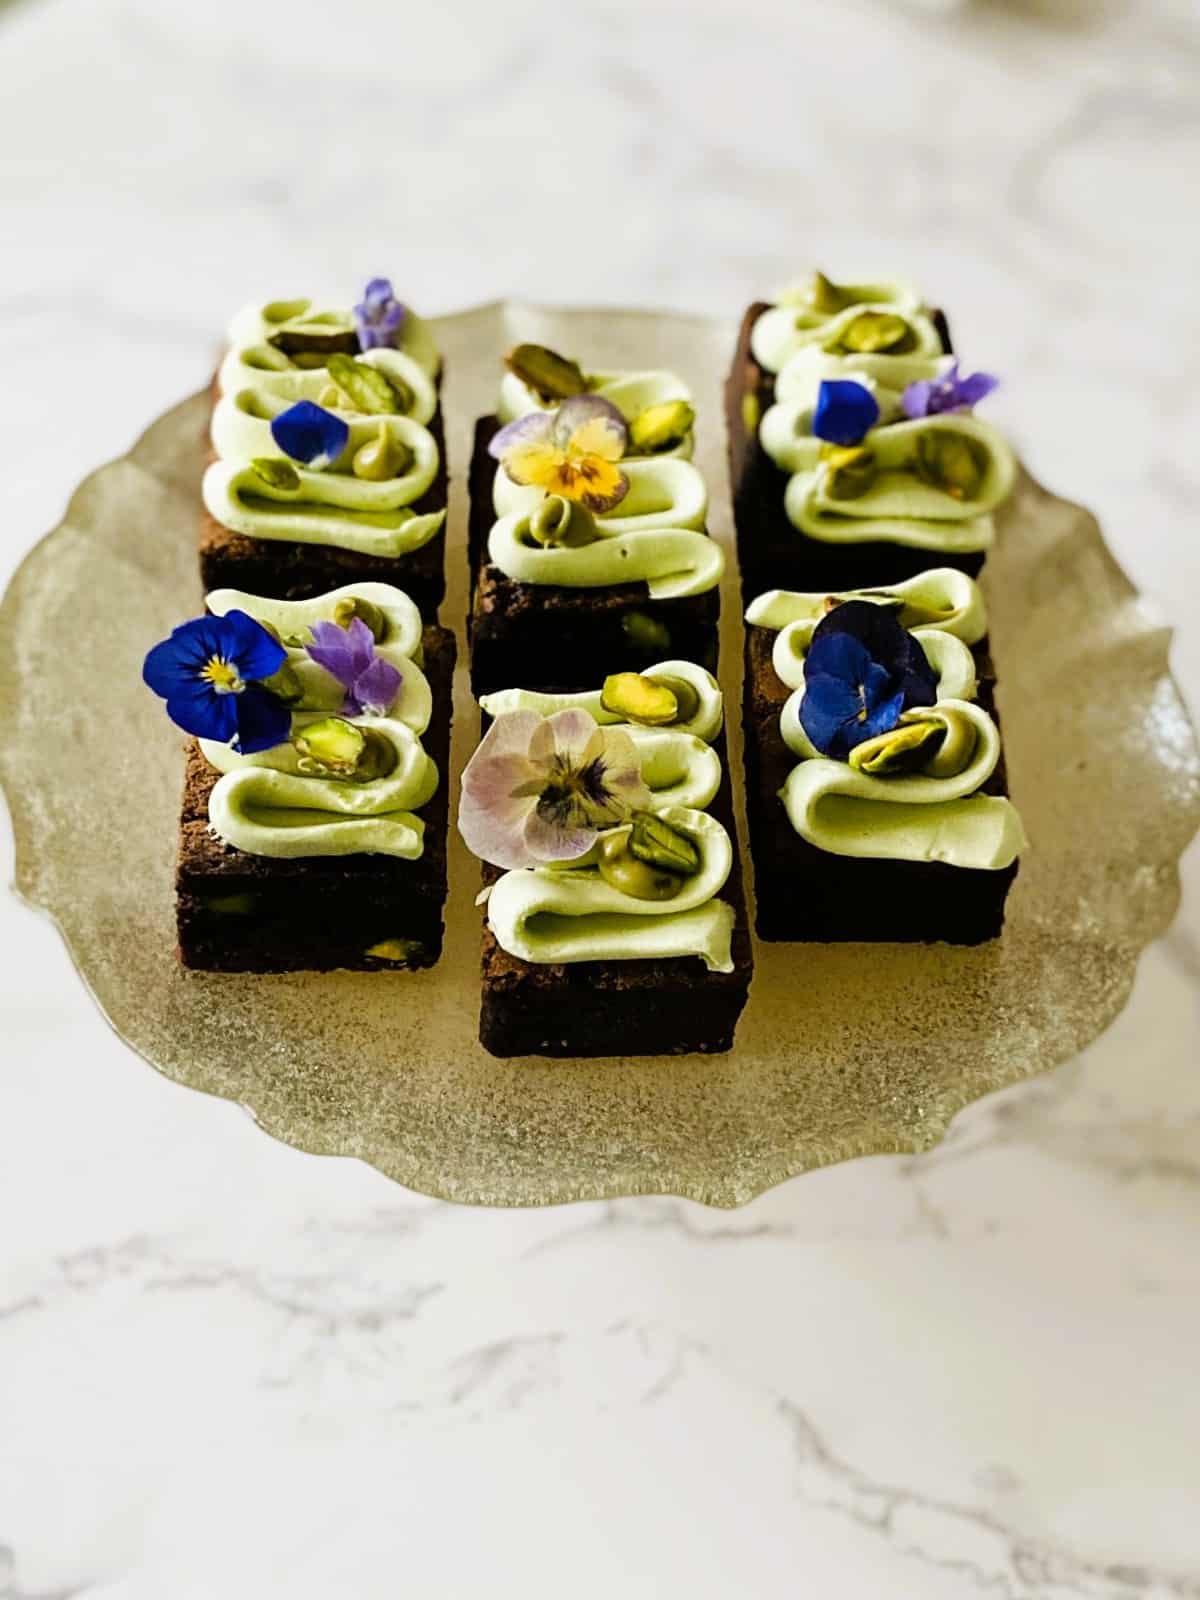
Just before serving, add your edible flowers.
FAQs about Pistachio brownies with Pistchio Buttercream
Can I freeze the brownies? You can, but I would do it at the uncut stage. Simply make the brownie, allow it to cool completely then remove it from the pan. Carefully place it in a sealed ziplock bag followed by a layer of foil. It should keep for up to one month. To defrost, place it in the fridge overnight (still in its foil wrapping) then leave it on your bench for 30 minutes before unwrapping and cutting as per the instructions.
Can I use a different buttercream? Yes, you can make American Buttercream with butter and icing sugar and a dash of milk. It will be a bit sweeter but still delicious.
Pistachio brownies with pistachio buttercream
16
servings30
minutes30
minutes20
Equipment
 Piping tips #8 and #123 (or #124 or #125)
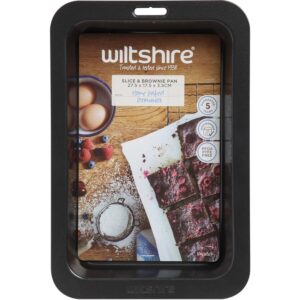 Wiltshire Easy Bake slice and brownie pan 27.5 x 17.5 x 3.5cm (11” x 7” x 1 ½”)
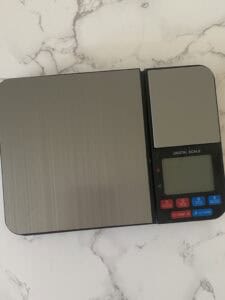 Digital scales
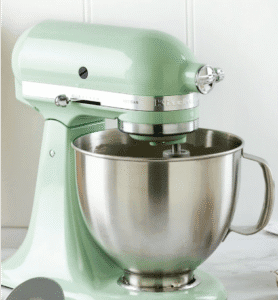 Stand mixer with bowl and whisk attachment
Other equipment for the Pistachio Brownies
Note: See Swiss Meringue Buttercream recipe for specific equipment
Baking paper
Disposable Piping bag and small piping bag (or plastic bag)
Two small bowls
Jug
Saucepan
Frying pan
Spatula
Spoons
Knife for cutting the brownies
Dinner plate or tray
Keep the screen of your device on
Ingredients
- Brownies
60 g 2 1/8 oz Pistachios plus an extra 24 pistachios for garnish
2 2 whole eggs
2 2 egg yolks (save the whites for the buttercream)
200 g 7 oz unsalted butter
60 ml 2 6/7 oz coffee (either a shot or instant with hot water)
190 g 6 5/7 oz block of dark chocolate or chocolate melts
60 g 2 1/8 oz cocoa
300 g 10 4/7 oz caster sugar
150 g 5 2/7 oz plain flour
Pinch Pinch fine table salt
- Pistachio Buttercream
Swiss meringue buttercream – small quantity (3 egg white)
2 tablespoons 2 tbsp Pistachio cream (store-bought)
Oil based food colouring – Lime colour
- Garnishes
48 48 Pistachio halves (3 per brownie)
2 tablespoons 2 tbsp Pistachio cream (extra)
Edible flowers or petals
Directions (See post above for photos – they’ll help alot)
- Grease a rectangular brownie/slice tin measuring 27.5 x 17.5 x 3.5cm (11” x 7” x 1 ½”) with a little butter.
- Line with a piece baking paper: The easiest way to do this is to cut off a piece of paper a little bigger than the brownie tin, screw it up into a ball, smooth it out, cut a slit into each corner, then place it in your tin. Rub the bottom and each edge so it sticks to the pan.
- Break up the chocolate (if using a block) and cube the butter.
- Make a cup of coffee (with a pod, espresso machine, instant or French press) and measure out 60ml.
- Fit your stand mixer with the whisk attachment.
- Preheat the oven to 160 C fan / 320 F fan.
- Toast the pistachios in a frying pan over low heat, shake the pan at regular intervals so they don’t burn. This should take about 5 minutes. Set aside to cool.
- Sift the flour and the salt together into a bowl. Set aside for now.
- Crack the two whole eggs into a jug.
- Separate the yolks from the whites of the other two eggs – yolks in one small bowl, whites in the other (don’t throw them out).
- Add the yolks to the jug and mix with a fork until the eggs are frothy.
- Cover the egg white bowl with plastic wrap and place it in the fridge until you are ready to make the Swiss meringue buttercream.
- Put the butter and the coffee in a small saucepan over a low heat. Stir until the butter has melted. Add the chocolate pieces and stir continuously (important) until the chocolate has completely melted and incorporated into the butter mixture.
- Remove from the cooktop and pour the mixture into stand mixer bowl. Use a spatula to get it all out.
- Add the sugar and the cocoa to the chocolate mixture then whisk on medium speed (KitchenAid level 4 or equivalent) for 2 minutes.
- Stop the mixer/beaters and scrape down the sides of your bowl with the spatula.
- Pour in the eggs and whisk on low speed for 1 minute.
- Remove the bowl from the stand mixer and place it on your bench.
- Fold the toasted pistachios through the chocolate mixture with a spatula.
- Now add half the flour and fold it through until combined. Add the remaining half and gently fold through again until no signs of flour remain.
- Pour the brownie mixture into the lined tin, use the spatula to get every last bit out of the bowl.
- Gently shake the pan from side to side, up and down to distribute the mixture evenly.
- Place the tin on the centre shelf in the oven and bake for 30 minutes. Test with a skewer, it should leave behind traces of mixture when ready (see photo in post as a guide.)
- Cool in the pan then cover with foil and refrigerate overnight (or at least 3 hours). This will make it easier to cut.
- THE NEXT DAY
- Remove the brownie pan from the fridge. Discard the foil, then tip the brownie out onto a cutting board (give it a little tap if you need to).
- Remove the baking paper. Carefully turn it right side up.
- Fill a heatproof jug with hot water (I use a coffee plunger) and add your sharpest knife. Place a roll of paper towel as well as a ruler close by.
- Place a large plate on your bench.
- Square off the ends if your pan has rounded edges like mine. If yours are square then skip this step.
- Remove the knife from the hot water and wipe it clean with the paper towel.
- Cut off the rounded short end of the brownie so you have a sharp edge (see photo in blog post). Re-dip and dry your knife, then repeat with the other side.
- Clean your knife again for the next step.
- Now turn the brownie from ‘landscape’ to ‘portrait’. Using a ruler, find the centre of the brownie and add a little mark at each end. Score a cutting line, check it’s even then cut all the way through.
- For the next steps, remember to re-dip and wipe your knife between every cut so your brownies have clean, sharp edges.
- Find the centre of each half, measure, score and cut.
- Cut each long piece into four even pieces, again by measuring, scoring and cutting.
- You should now have 16 brownies of equal size. Place them on your plate.
- To make bite-sized brownies see To Serve below for instructions.
- Sometimes you will get a little bit of unevenness on the top of your brownies. If this happens you will need to level the tops so they are all the same height.
- Place a brownie on its side and carefully slice off the uneven top. Bend down to check that it’s level.
- Cover your brownies with plastic wrap and leave them on your bench while you make the buttercream and prep the garnishes.
- Cut the pistachios in half.
- Line a large tray with baking paper (you will need this for your completed brownies).
- Fit the piping bag – I recommend any of the following large tips: 123 (curved petal, which is what I’ve used) or a 124 or 125 petal tip.
- Place your piping tip in a large disposable piping bag, snip off the end and pull the tip through.
- Tip: I find putting the piping bag in a tall glass and turning over the top third of the bag makes it a lot easier to fill.
- Make a small batch (3 egg white) amount of Swiss meringue buttercream by following my recipe. Don’t forget to use the 2 egg whites you saved from making the brownies.
- Once you’ve made the buttercream return back here IMMEDIATELY for colouring and flavouring. Don’t wait too long or you’ll get air bubbles.
- Turn the stand mixer onto the lowest setting (level 1 on a KitchenAid). Add the 2 tablespoons of pistachio cream to the buttercream together with a pinch of salt.
- Mix until fully incorporated. Leave the motor running (still on level 1) while you add the colour.
- Start with 2 or 3 drops, wait until fully incorporated then add more one drop at a time until you achieve a pale green ‘pistachio’ shade.
- Tip: Take this slowly, it’s easier to add but impossible to take away if you go too far.
- Turn off the stand mixer and fill the piping bag 2/3 full. Pull up the cuff and twist then squeeze until a small amount buttercream comes out.
- Have a practice with piping the buttercream (see instructions below) on a clean plate before you begin.
- Turn the bag in your hands so that the teardrop end of the piping tip is closest to your bench. (see photo in post).
- Hold the bag at a 30 degree angle, so not directly side on but at a slightly elevated angle just above the brownie. Start piping along the left edge furthest away from you. Pipe slowly with gentle pressure or you will get a ruffle instead of ribbon effect.
- When you get to the right edge ‘turn the corner’ and pipe back along the previous row of piping without stopping. Continue until you get to the other end of the brownie, ease off your pressure and leave a little tail.
- Place the brownie on your lined tray.
- Repeat piping the rest of the brownies.
- Fit a small piping bag with a plain tip #8 or you can use a small zip lock bag and snip a little bit off the corner. Add 2 more tablespoons of pistachio cream to the bag.
- The pistachio cream is not the easiest thing to pipe as it’s really gooey, so don’t stress about getting perfect blobs. You can choose to show the ones that work and hide the ones that don’t under your pistachios or edible flowers!
- Arrange 3 pistachio halves on each brownie.
- Store -You can choose to store your brownies at this stage. Place them a sealable container lined with baking paper and store in the fridge for up to 24 hours.
- To Serve – Remove the brownies from the fridge at least 2 hours before serving to allow both the buttercream and the brownies come to room temperature.
- For bite-sized brownies: Cut in half while the brownies and the buttercream are firm. Use a hot knife and wipe between cuts.
- Just before serving, add your edible flowers.
Delicious, not too rich.
Thank you! I’m glad you liked their flavour and found them not too rich.