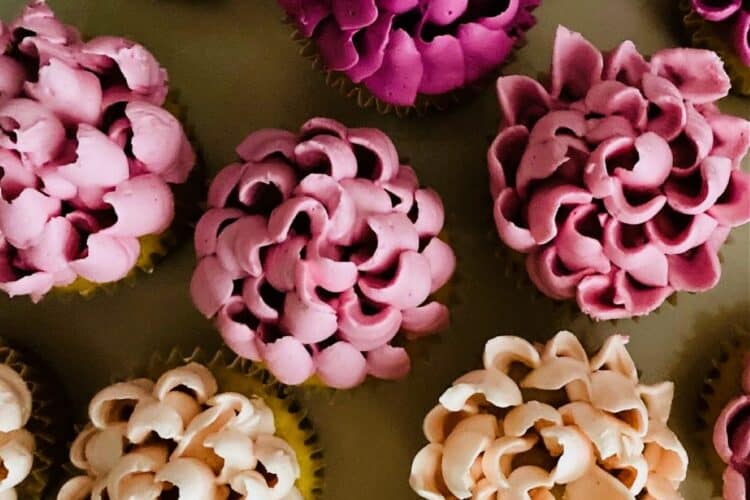
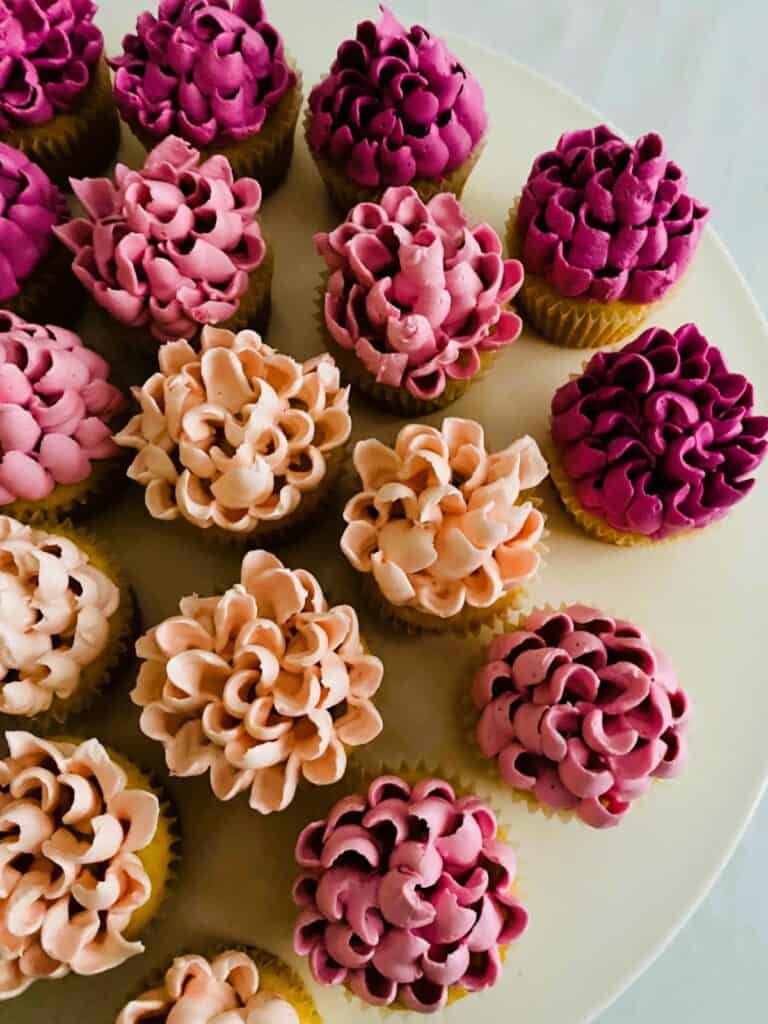
Mini flower cupcakes featuring fluffy, moist vanilla cake with a hidden strawberry jam filling. Piped in three complementary shades of Swiss meringue buttercream they resemble gorgeous chrysanthemums or dahlias.
These edible blooms are as eye-catching as they are delicious. Perfect for afternoon tea, garden parties, or spring celebrations, they’re just the right size to disappear in two elegant bites.
Easy Flower Magic in Miniature
These mini flower cupcakes prove that pretty doesn’t have to mean complicated. “But they look hard!” I hear you say. Well, despite their show-stopping appearance, they’re surprisingly simple to decorate.
All you need is a Curved Petal Chrysanthemum piping tip, a smooth batch of my Swiss meringue buttercream, one colour, and some disposable piping bags. Between you and me, you’re just making little squirts of buttercream all over the top of a small cupcake. You see, the piping tip makes all the magic (but I won’t tell if you don’t). You can purchase the piping tube from my Amazon Shop or find one at your local baking store. Note: As an Amazon Affiliate I receive a small commission on purchases.
Why You’ll Love These Mini Flower Cupcakes
- Perfectly imperfect – Whether your petals are open, closed, layered, ruffled, or a mix (like mine), they all look beautiful.
- Make-ahead friendly – Bake the vanilla cupcakes in advance, then decorate when you’re ready. The finished cupcakes also keep for up to 2 days in the fridge.
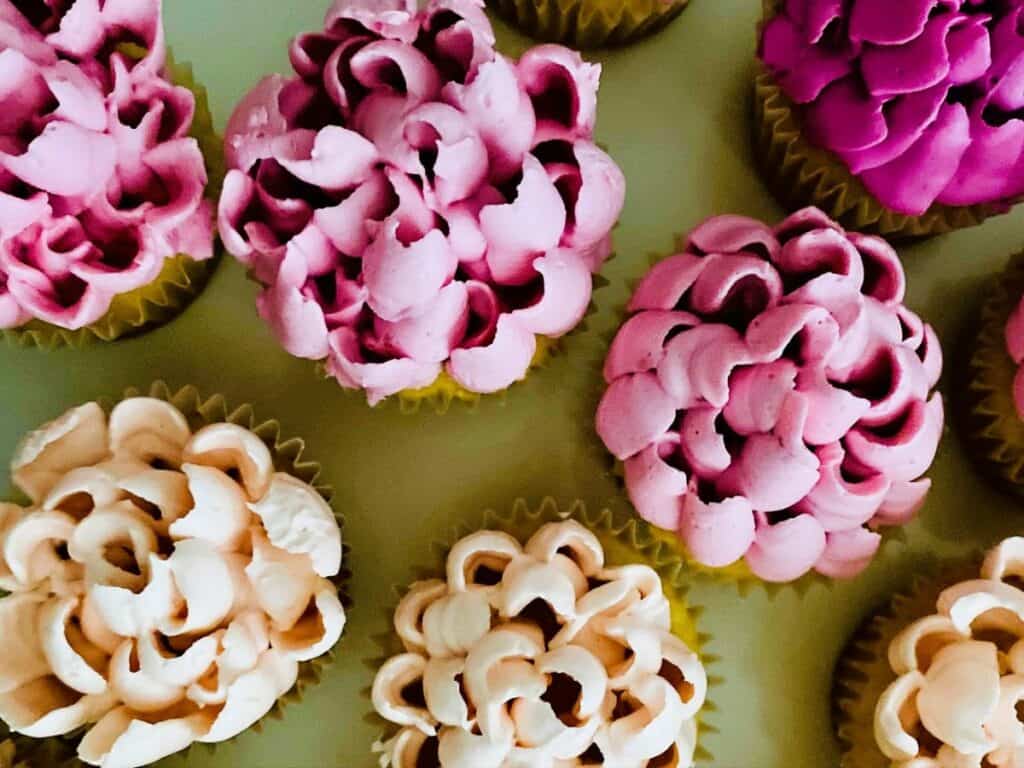
- One colour, endless shades – A single oil-based food colour is all you need to create a beautiful ombré palette.
- Mini size, maximum charm – Ideal for an afternoon tea stand, these two-bite beauties complement other treats without taking up too much space.
So go ahead—whip up a batch of mini cupcakes, grab your piping bag, and make some edible flower magic.
Good to know
- You can make the mini cupcakes ahead of time and freeze until the day before decorating.
- My step-by-step Swiss meringue buttercream recipe covers everything you need to know to make a delicious batch of this easy to pipe and not too sweet icing.
- You don’t have to fill the cupcakes with strawberry jam – it’s completely optional, simply bake the cupcakes, make the buttercream while they cool, then ice. Or, fill with a different flavour instead (lemon curd anyone?).
Bake like a pro – weigh your ingredients!
I use weight measurements not cup measurements in all my recipes as cup sizes are not universal – a cup in the US for example is different to a cup in Australia. This ensures accuracy and a far better result, especially if you are baking which relies on scientific principles. Yes it’s a bit nerdy, but ingredients are expensive and there’s nothing worse than following a recipe to the letter only to have it fail on you.
Pro tip: Always keep a set of spare batteries for your scales. You don’t want your scales dying halfway through a recipe!
Other recipes to try
Lemon Tartlets with Pistachio Meringues
Mini Vanilla Cupcakes Ingredients
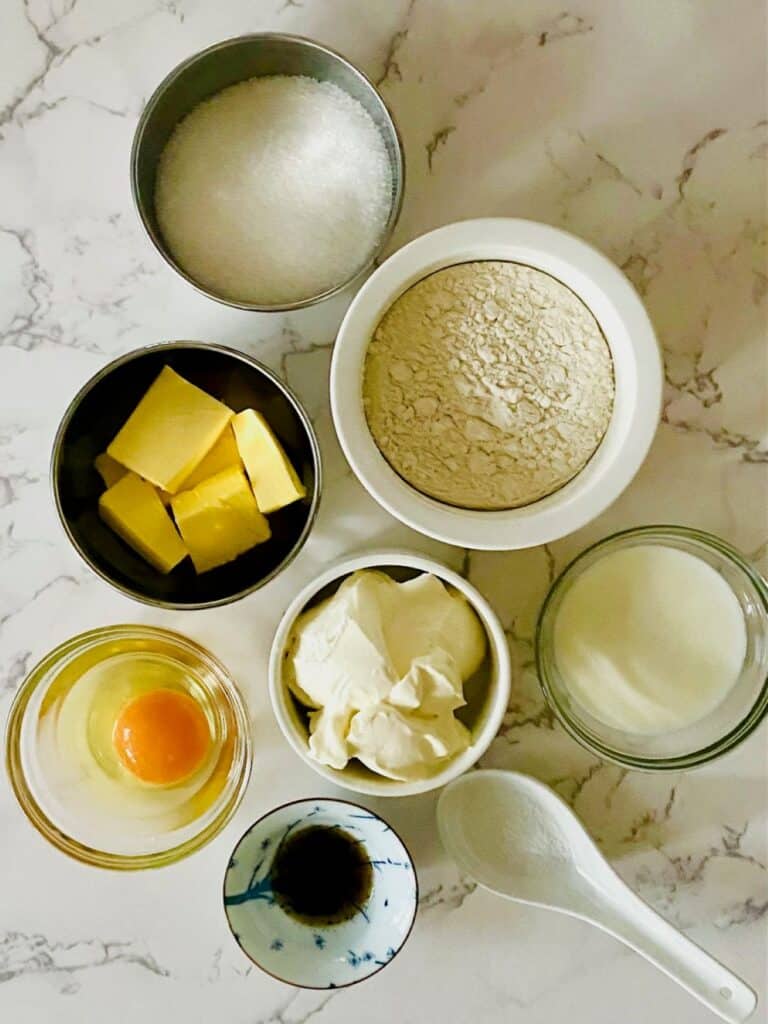
Ingredients
Sugar – Use standard white granulated sugar.
Self raising flour – This is all-purpose flour with baking powder already added to it in the right proportions. Make sure yours is fresh as it will affect the rise of your cupcakes. I always write the date of opening on mine and buy a new packet if its been open longer than 6 months.
Sour cream – Use fresh, full-fat sour cream as it will give your cakes a wonderfully moist texture. The acid in the sour cream will also react with the baking powder in the flour, resulting in a good rise and fluffy texture.
Vanilla bean extract – Use extract not essence as it won’t give you the true vanilla flavour you are looking for in the mini cupcakes.
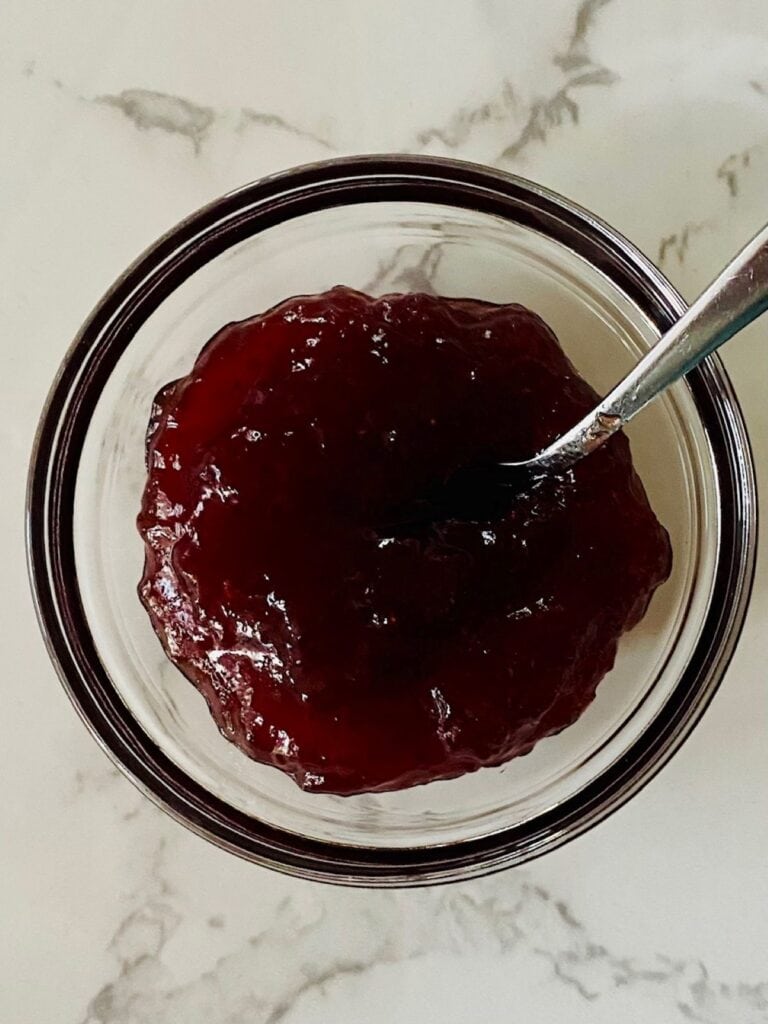
Strawberry jam (optional) – Use a good quality strawberry jam. I love this one from Beerenberg as the strawberries are grown about 30 minutes from where I live. You can also substitute with another flavour or even lemon curd if you prefer.
You will also need
Unsalted butter, a pinch of fine table salt, full fat milk, and an egg.
Mini cupcake cases with a base diameter measurement of 38mm / 1.5 inch.
A small batch (3 egg whites) of my Swiss Meringue Buttercream – see separate post for ingredients and instructions.
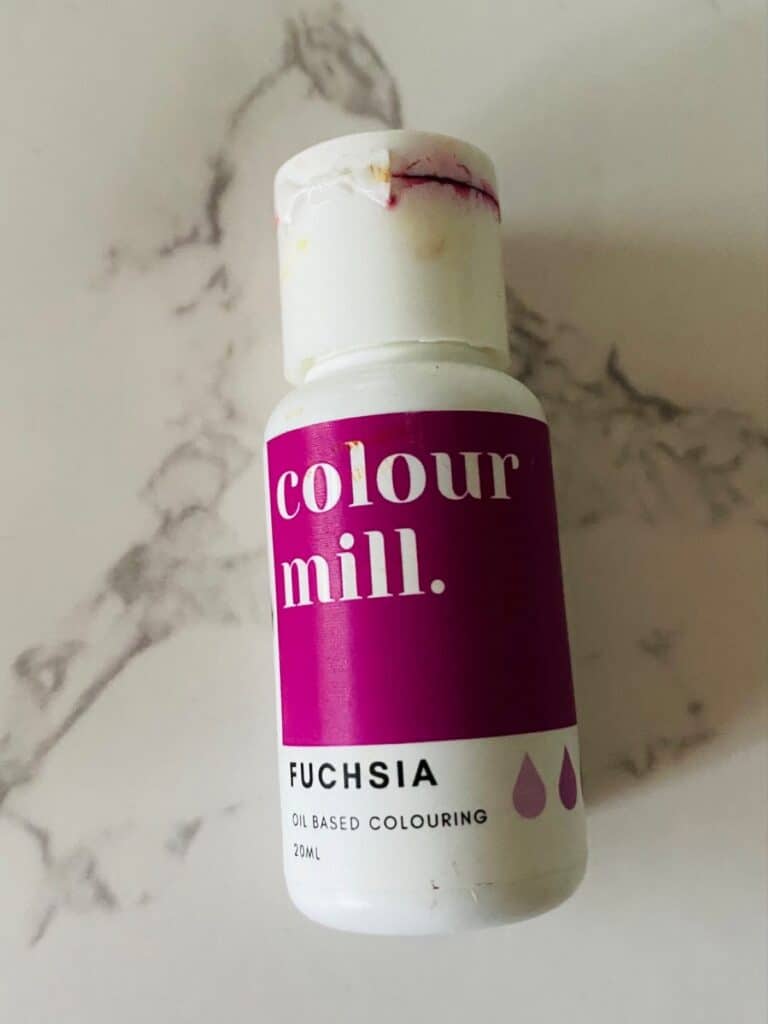
Oil-based food colouring – I’ve used Colour Mill in Fuschia for this recipe, however feel free to colour your flowers any shade you like.
How to make my Mini Flower Cupcakes
Preheat the oven to 160 C (fan) / 325 F (fan). Line a mini muffin tin with 24 mini cupcake cases and set aside.
Measure out the sugar, self-raising flour and salt into the bowl of a stand mixer.
Soften the butter in a microwave safe bowl (20 to 30 seconds on high at 900W) and it place next to the stand mixer together with a spoon.
Measure out the sour cream and milk in a microwave safe jug. Stir to break up the sour cream, then microwave on high for 30 seconds 900w. Stir thoroughly to distribute the heat then add the egg and vanilla extract and stir again thoroughly. Put the jug next to your stand mixer with a spatula.
Place the bowl with the dry ingredients on a stand mixer fitted with a paddle attachment and mix on low speed for 30 seconds.
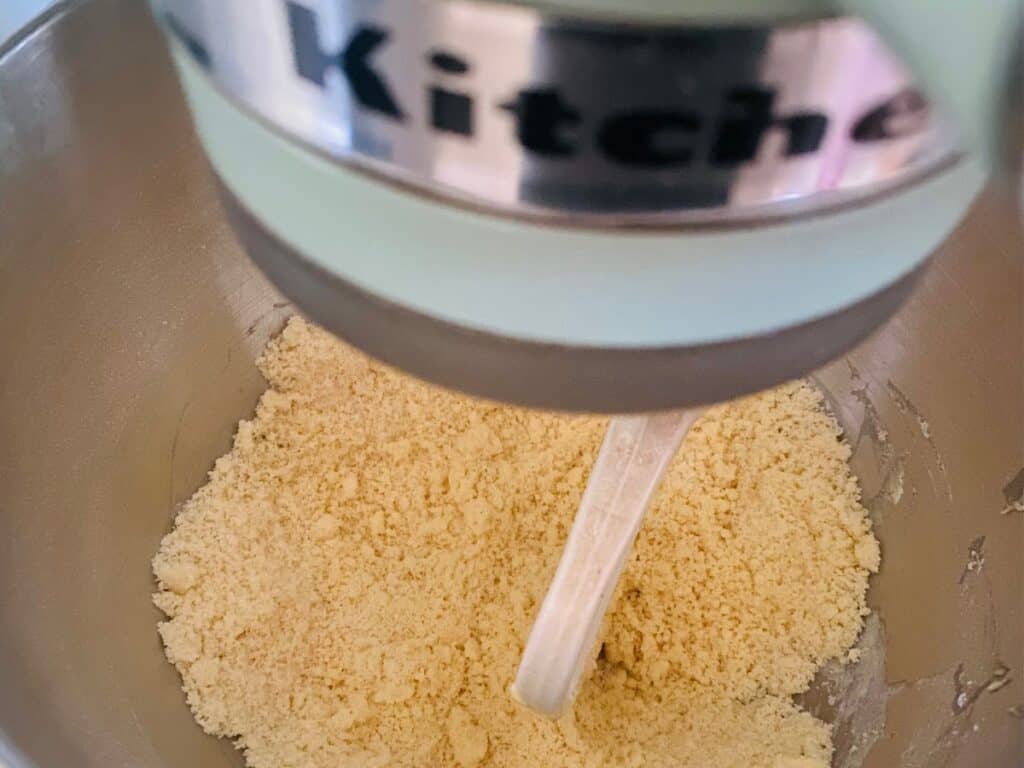
Add the butter and mix on low until the mixture resembles a breadcrumb-like texture.
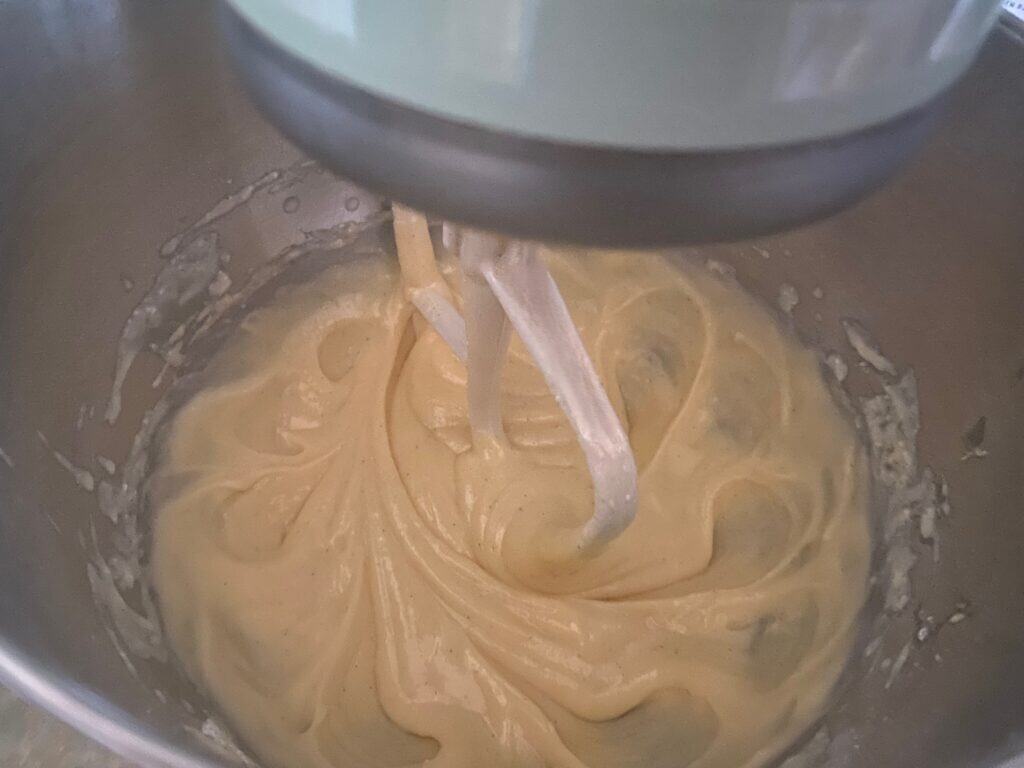
Scrape the sides of the bowl. Re-start the mixer on low then slowly add the sour cream mixture, use the spatula to get as much out of the jug as you can. Increase the speed to medium and beat for 30 seconds until light and fluffy. Do not overmix or else the batter will have a dense texture when baked. Scrape the sides again if necessary and give a quick mix to incorporate.
Fill the cupcake cases
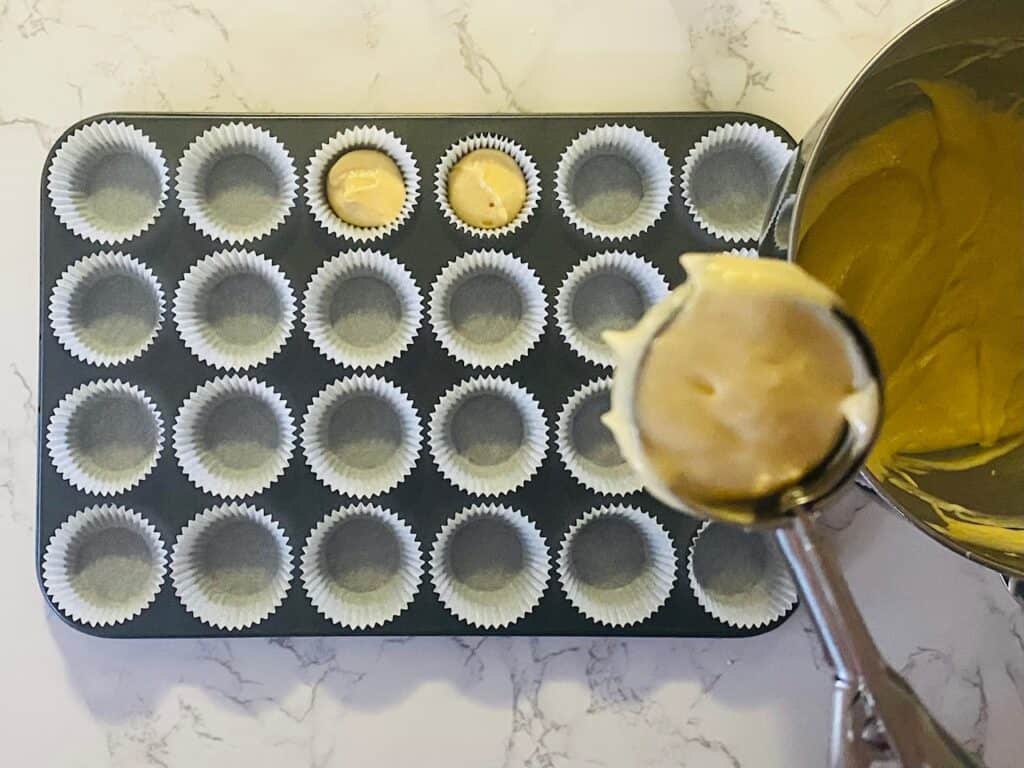
Fill a small ice cream scoop ¾ full and divide the batter equally between the mini cupcake wrappers. If you don’t have a scoop or your wrappers are a different size then fill each wrapper to just under half full (see image). They will rise A LOT in the oven.
Tip: Once filled, check that all the cases are sitting evenly in the muffin tin, adjust if you need to.
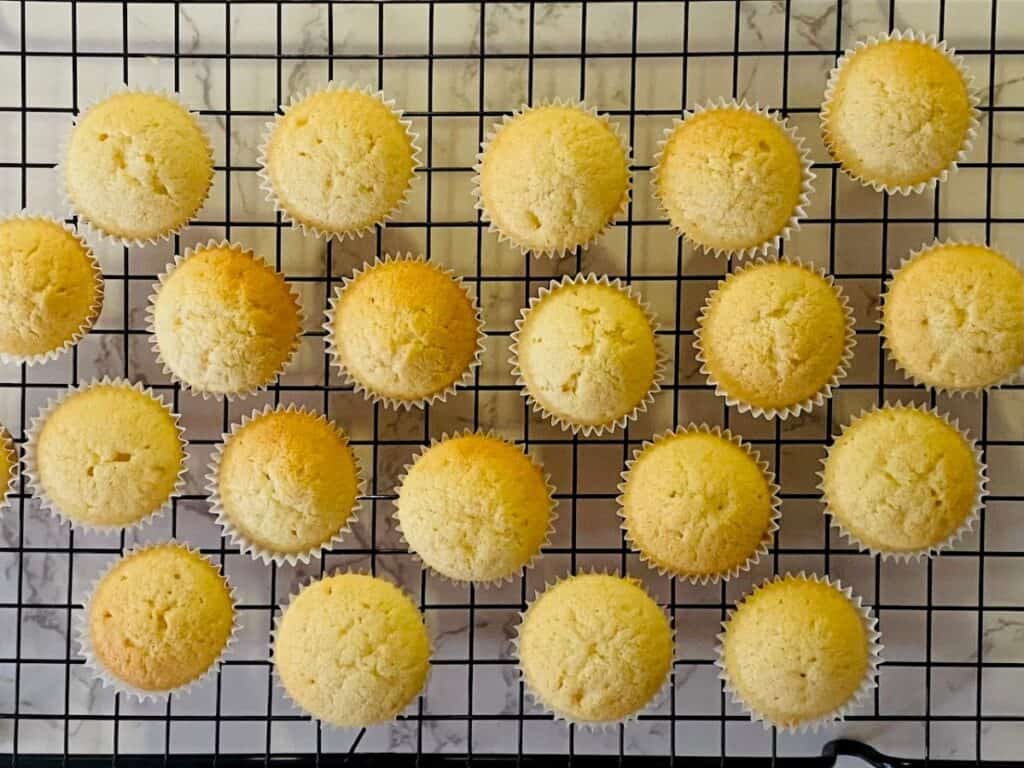
Place the mini cupcakes in the preheated oven and cook for 15 minutes then remove from the oven. Take them out of the muffin tin and cool on a rack as soon as possible without burning your fingers. Note: They will puff right up while cooking then settle nice and flat once cooled.
When cooled completely, place the cupcakes in a container with a lid and refrigerate for a minimum of 30 minutes. This will make it easier to fill them with the jam.
Fill with strawberry jam (optional)
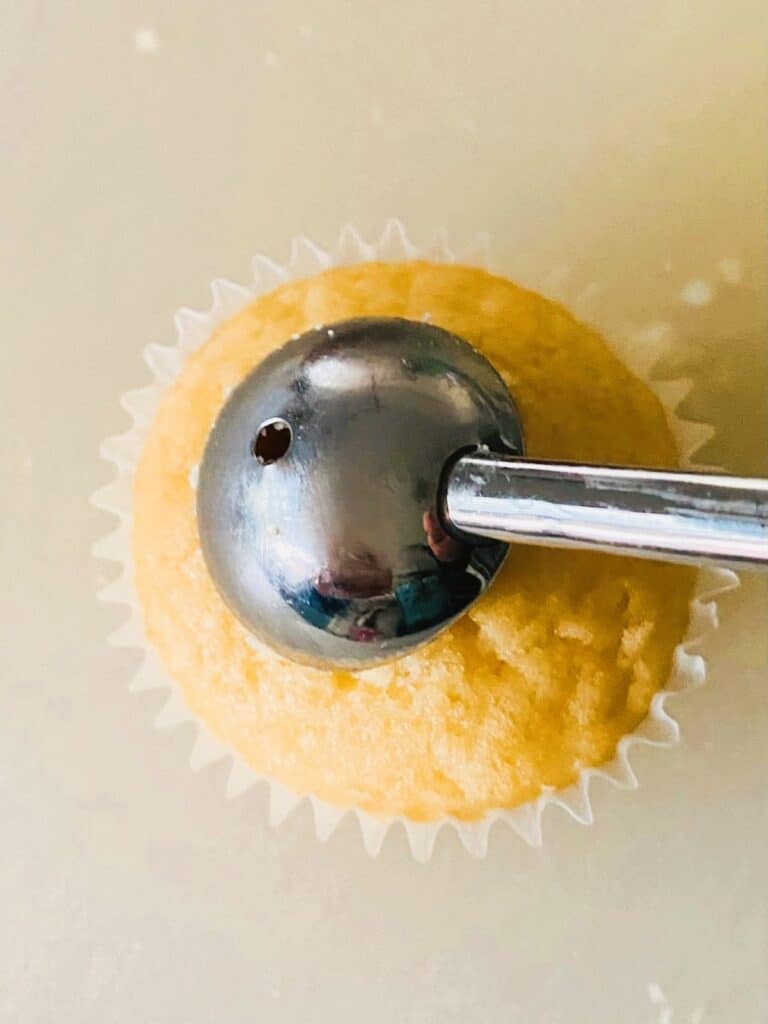
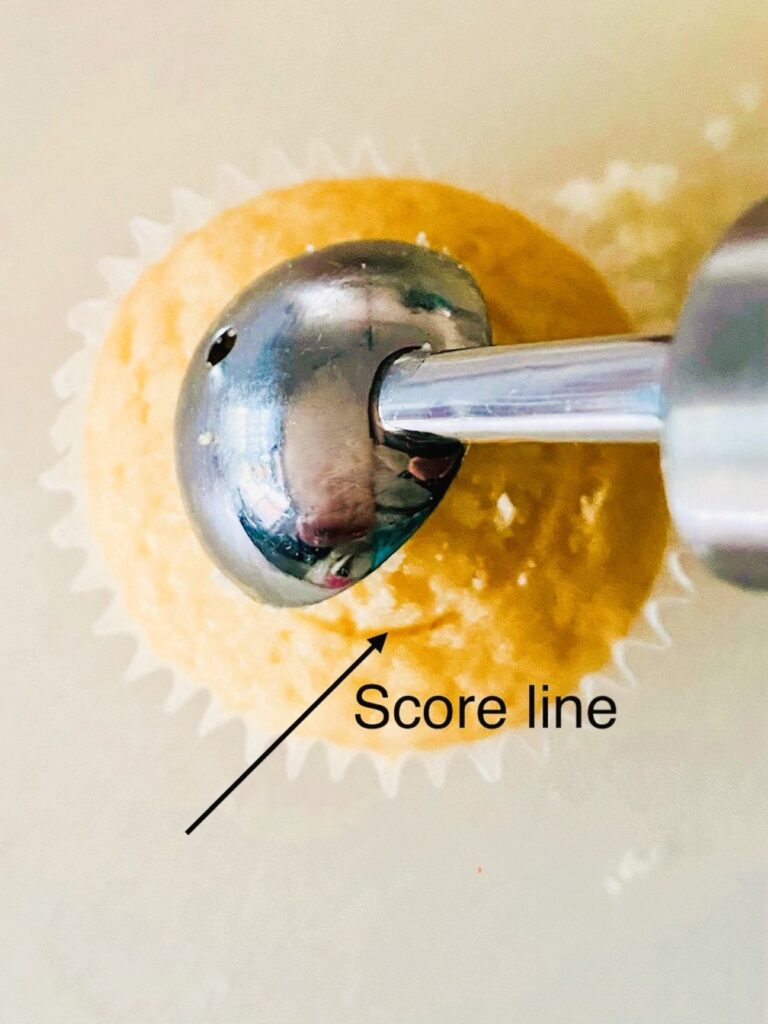
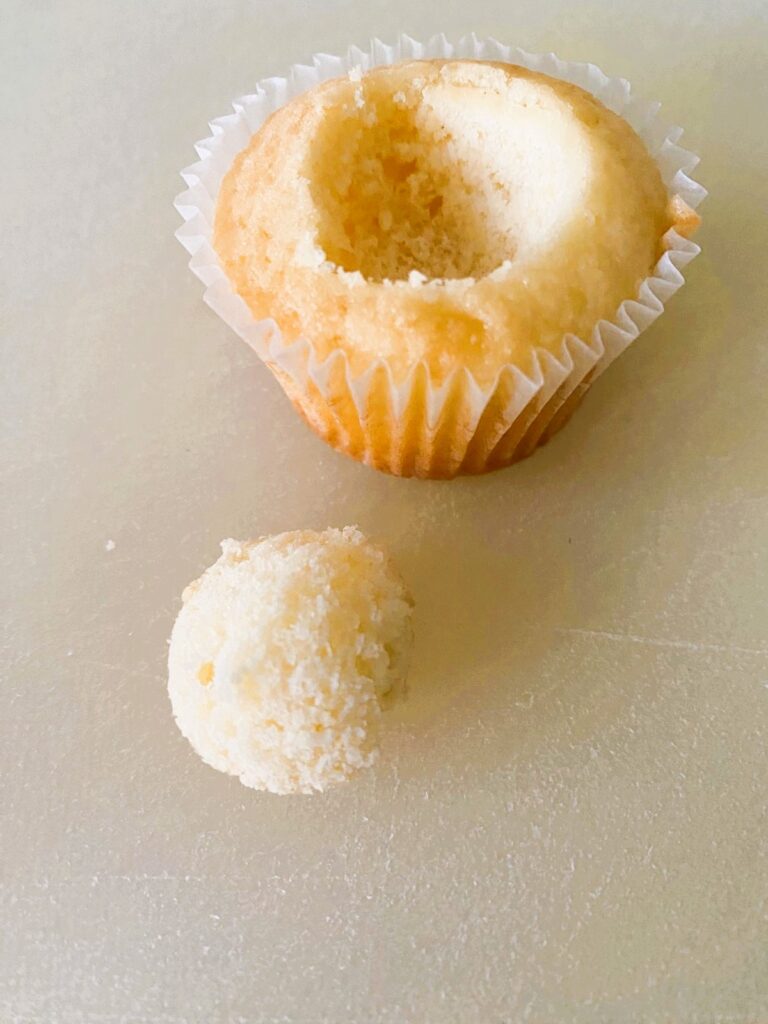
Take a melon ball tool and insert it into the top of the cake on one side to create a score line (step 1), then turn the cake and press it into the other side (step 2). Now twist the ball tool and remove the piece of cake (step 3). Keep it close by as you will need it in the next step.
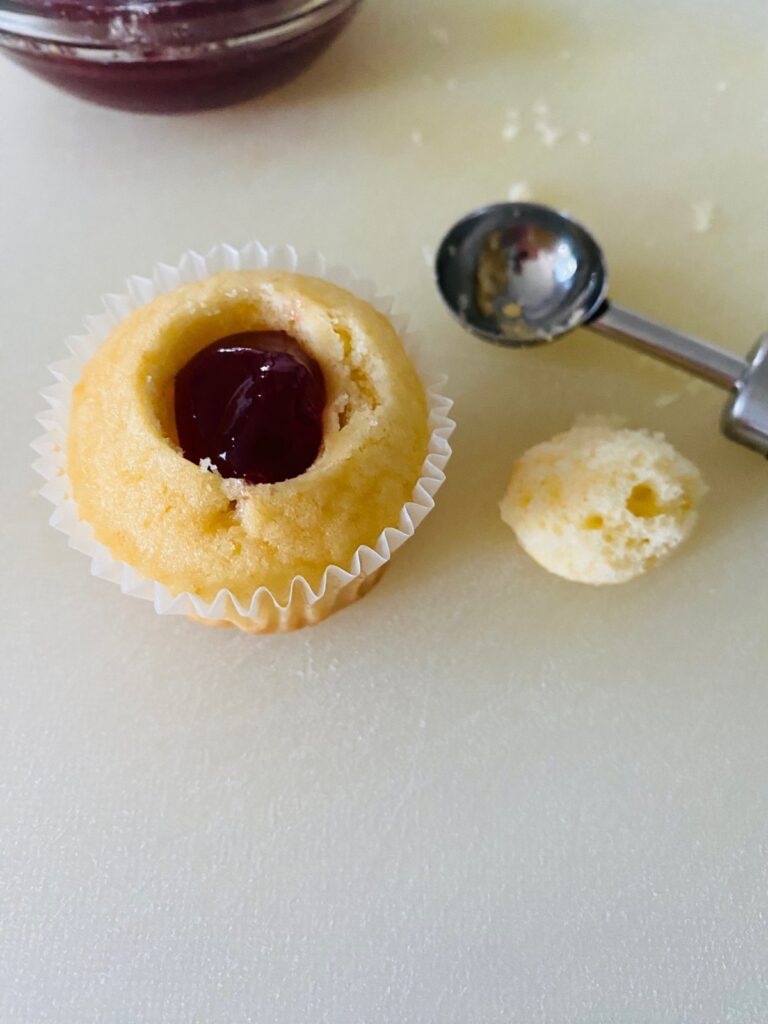
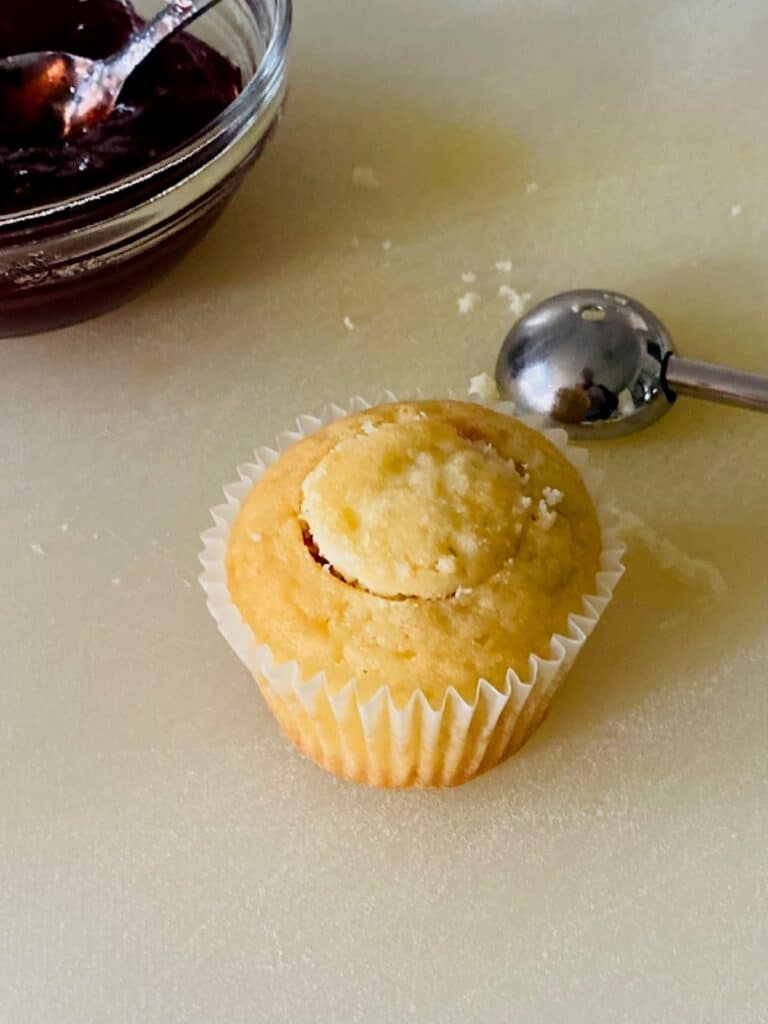
Using a teaspoon, fill the hole with a little strawberry jam then replace with the piece of cake.
Once all the cupcakes have been filled, put them back into the container and place the lid on so they don’t dry out. Leave on your bench while you make the Swiss meringue buttercream.
Make the Swiss Meringue Buttercream
You will need to make the small quantity (3 egg whites) of my detailed Swiss Meringue Buttercream recipe then return here for the colouring instructions.
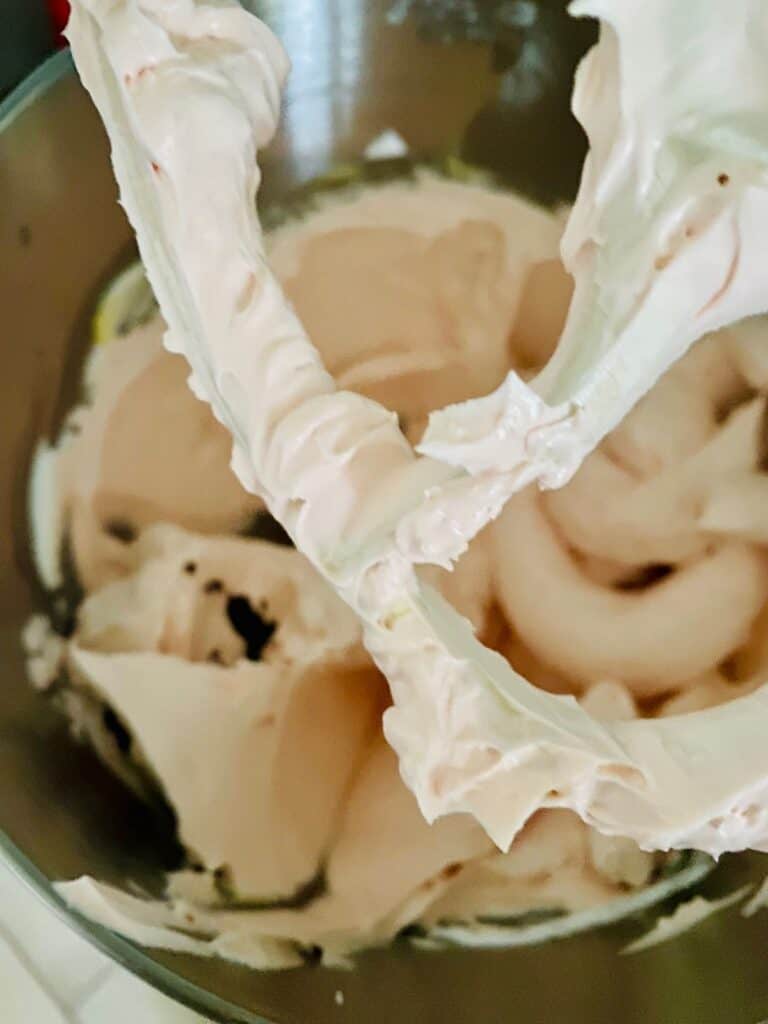
Colour the buttercream
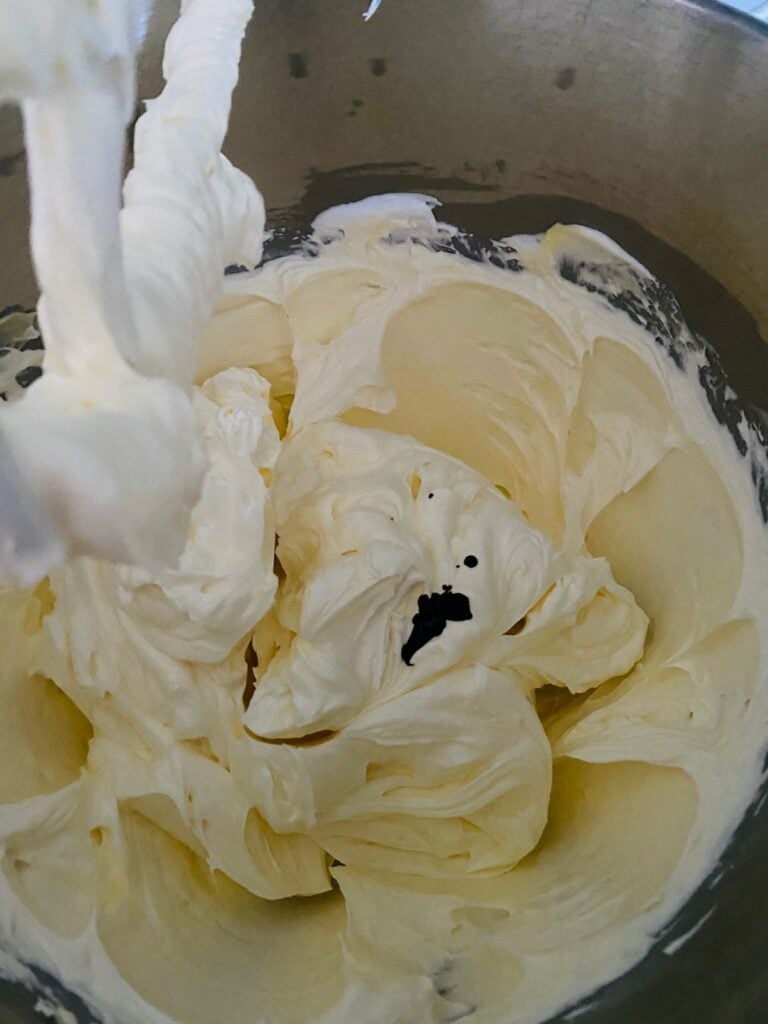
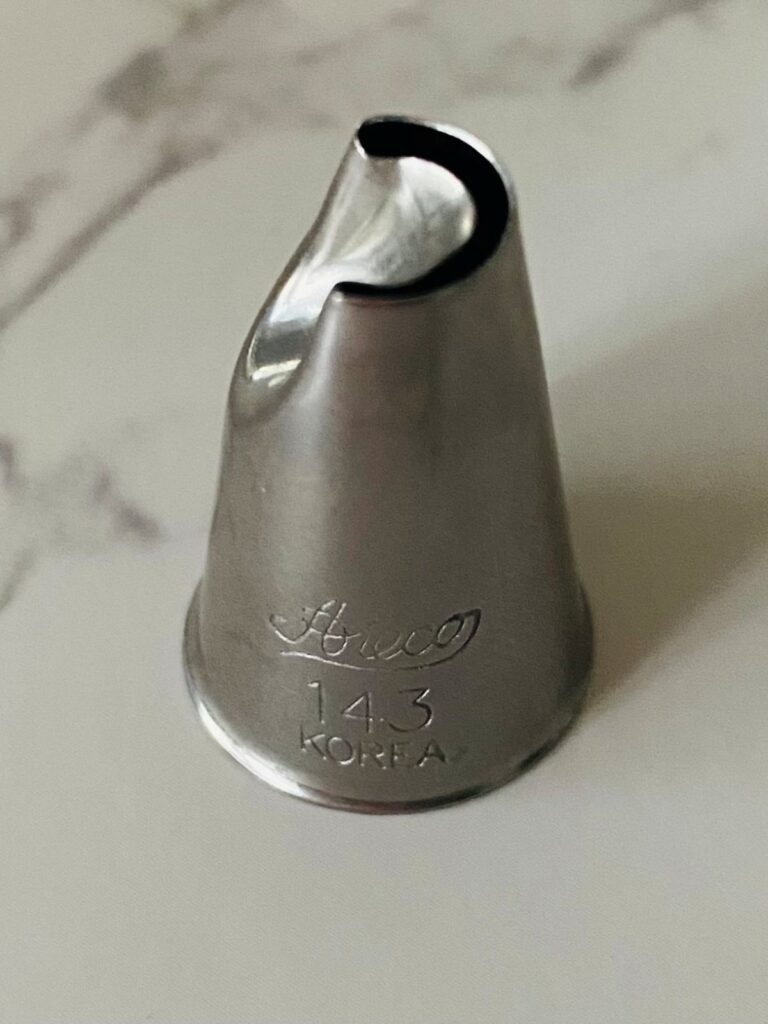
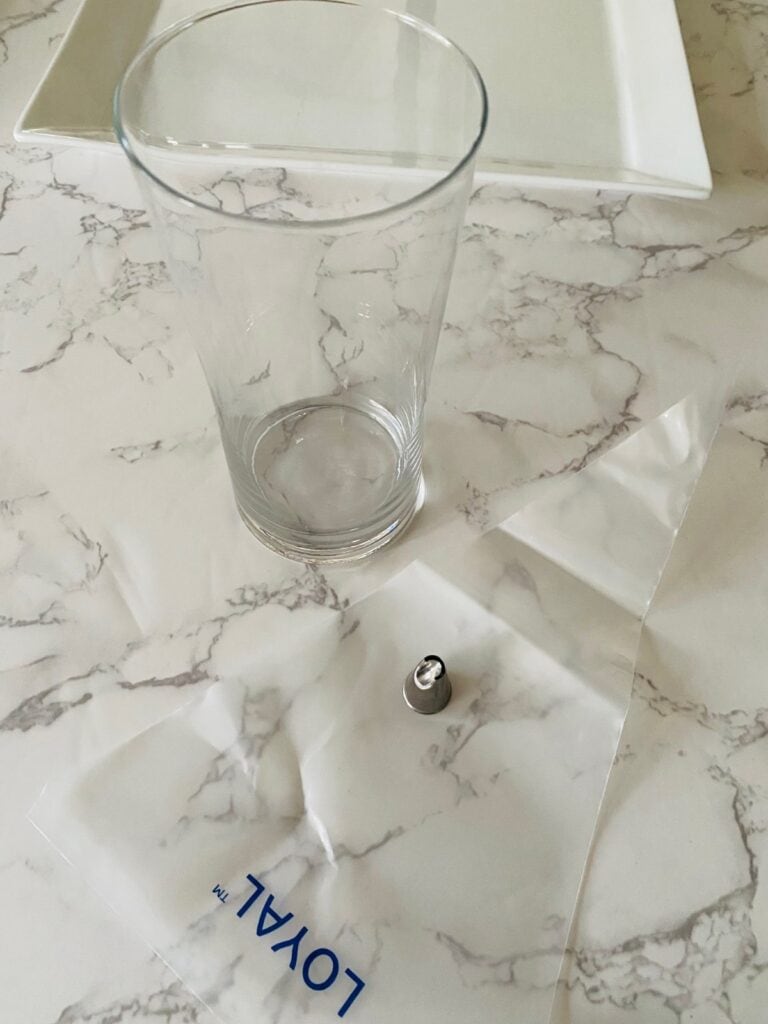
Lightest shade first: Start by adding 2 drops of colouring to the whole batch of buttercream. Mix on the lowest setting until all the colour has been incorporated. Meanwhile, fit a medium disposable piping bag with an Ateco 143 or PME 55 Chrysanthemum piping tip, place it in a tall glass, turn about 1/3 of it over to make a cuff.
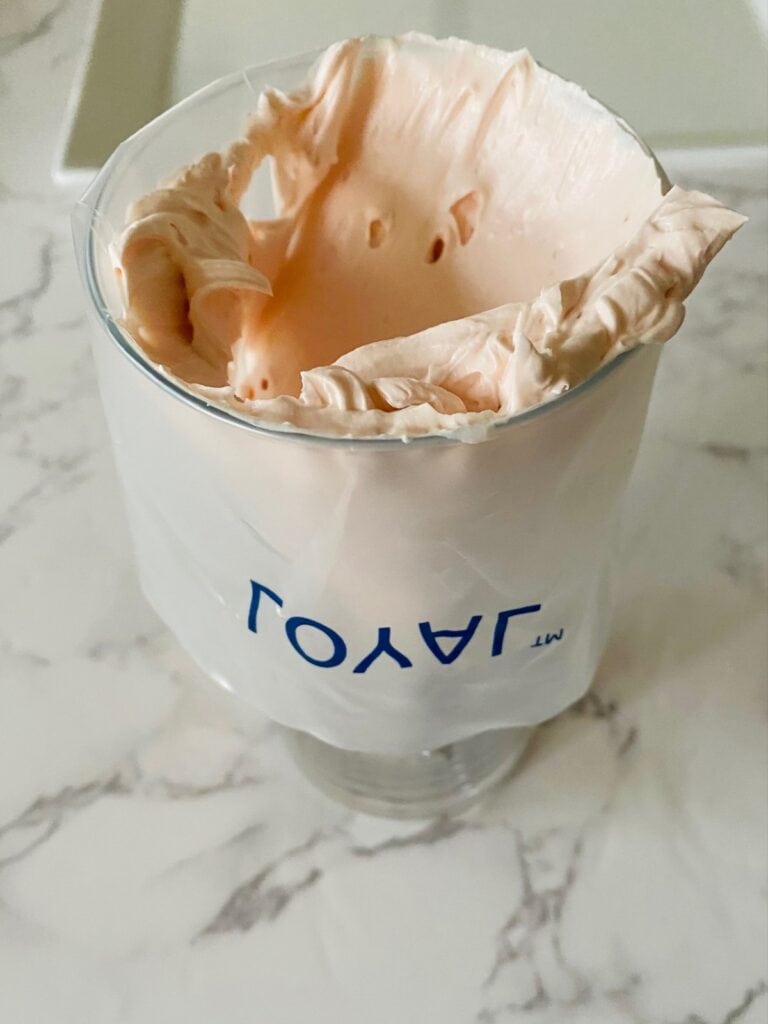
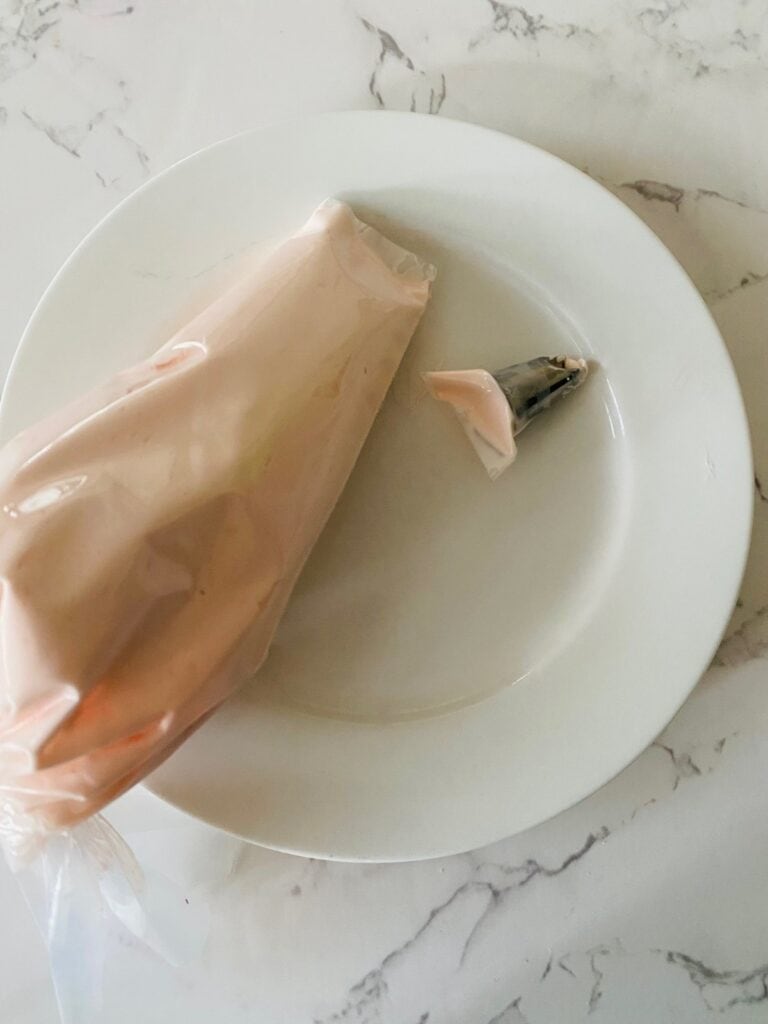
When you are happy with the colour of the buttercream, take a spatula and fill the piping bag about 2/3 full.
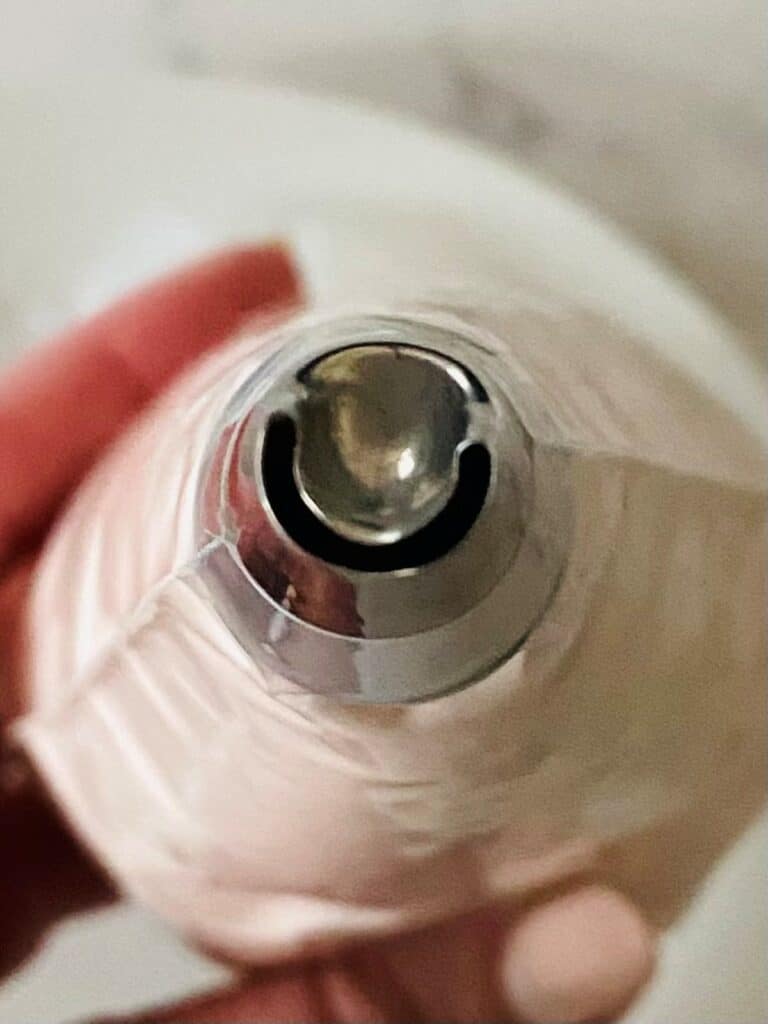
Remove the piping bag from the glass, pull up the cuff and twist. Manipulate the bag in your hand so that the tip looks like it is smiling at you not frowning (see pic) This will give you petals that resemble a chrysanthemum. Squeeze until a little bit comes out cleanly from the tip, then rest it on a small plate.
Good to know: If this is your first time using this tip, make a few pratice pipes on a saucer to work out your preferred angles, height and to get a feel for holding the bag. Scroll down for Petal Shapes.
Piping the cupcakes
Have a quick look at my tips for piping different Petal Shapes below before you start.
Remove 8 cupcakes from the container and place them on a large plate.
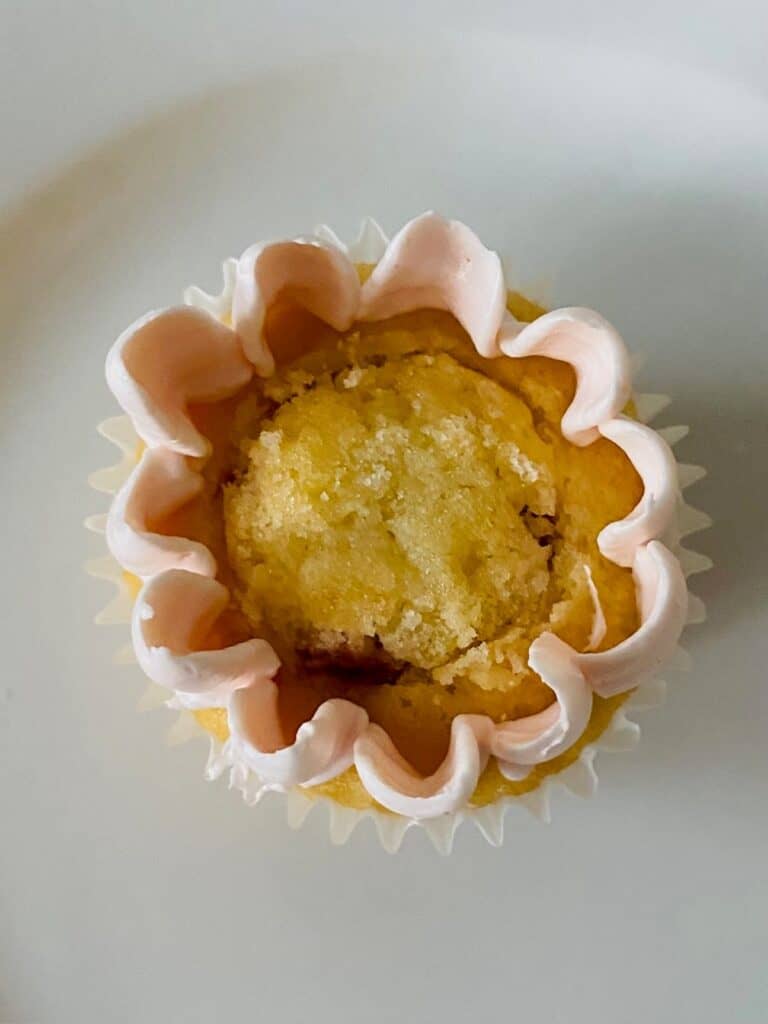
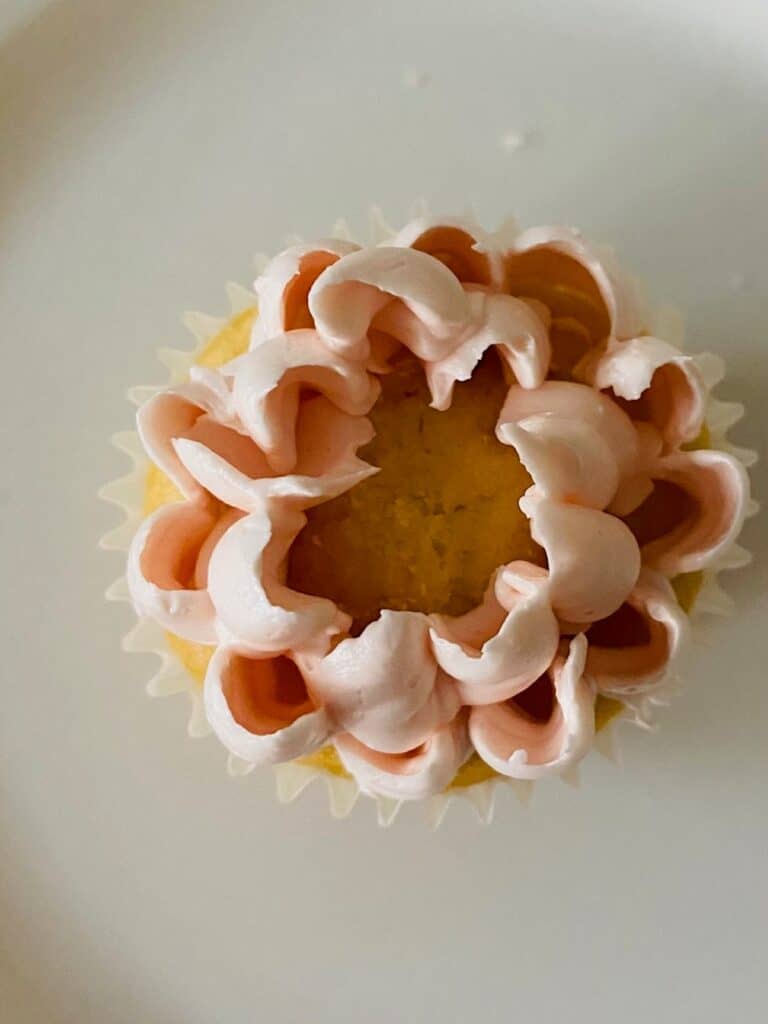
First row: Take a cupcake in one hand, your piping bag in the other, then start to pipe the outside petals by placing the tip just above the surface of the cupcake, squeeze out a small amount of buttercream, turn the cupcake, then repeat. Try to keep the petals the same height with each squeeze. Working from the outside to the inside ensures you get a consistent outline on every cupcake.
Second row: Tilt the cupcake towards you then add another row of petals around the same height, just inside the outside row.
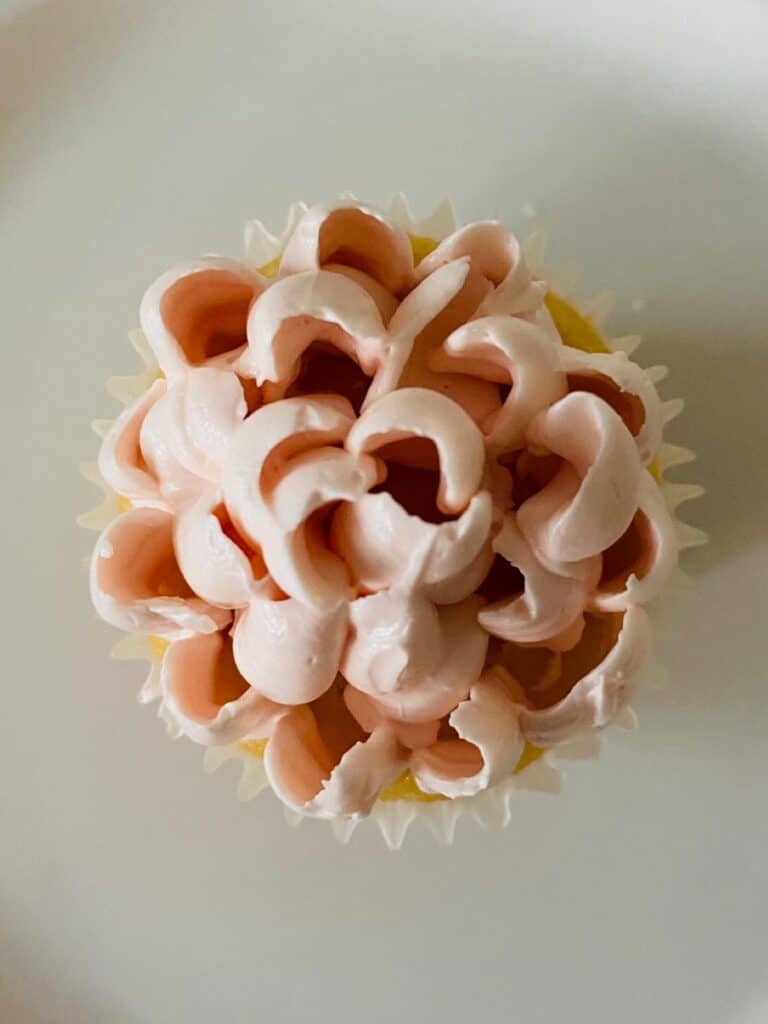
Continue piping and turning until you get to the centre. Take a look at your cupcake and insert your piping tip into any gaps where you can see the top of the cupcake.
Tip: Repostion any wayward petals with the end of your piping tip. Simply give them a little tap!
Petal shapes
Straight petals: Hold the bag directly above the cupcake.
Open petals: Hold the bag on a slight angle towards you.
Closed petals: Pipe a straight petal then use the end of the piping tip to gently push it inwards.
Layered petals: Turn the bag so the “smiling” tip is slightly side on (about a quarter turn to the left), pipe a petal, then pipe the next one so it overlaps slightly.
Colour the next batch of buttercream
When you have finished piping your first 8 cupcakes, snip off the end of your piping bag and squirt the remaining buttercream back into your mixing bowl.
Deepen the colour
Add another 2 drops of the same colour and again mix on the lowest speed until incorporated. If the difference between the first and second colours is not obvious, then add one more drop.
Meanwhile, remove the piping tip from the snipped end of the piping bag, wash it in hot water, then dry with paper towel. Set up a new disposable piping bag and tip using the same method above.
Repeat the steps for filling and piping the new colour on the next 8 cupcakes.
Colour the last batch of buttercream
Repeat the steps for removing the tip and colouring the buttercream as detailed above, adding another 2 drops of colour to the remaining buttercream – this will be your strongest shade.
Repeat the steps for filling and piping the new colour on the last 8 cupcakes.
You have now made 24 beautiful mini cupcakes in ombre hues.
Serve or store
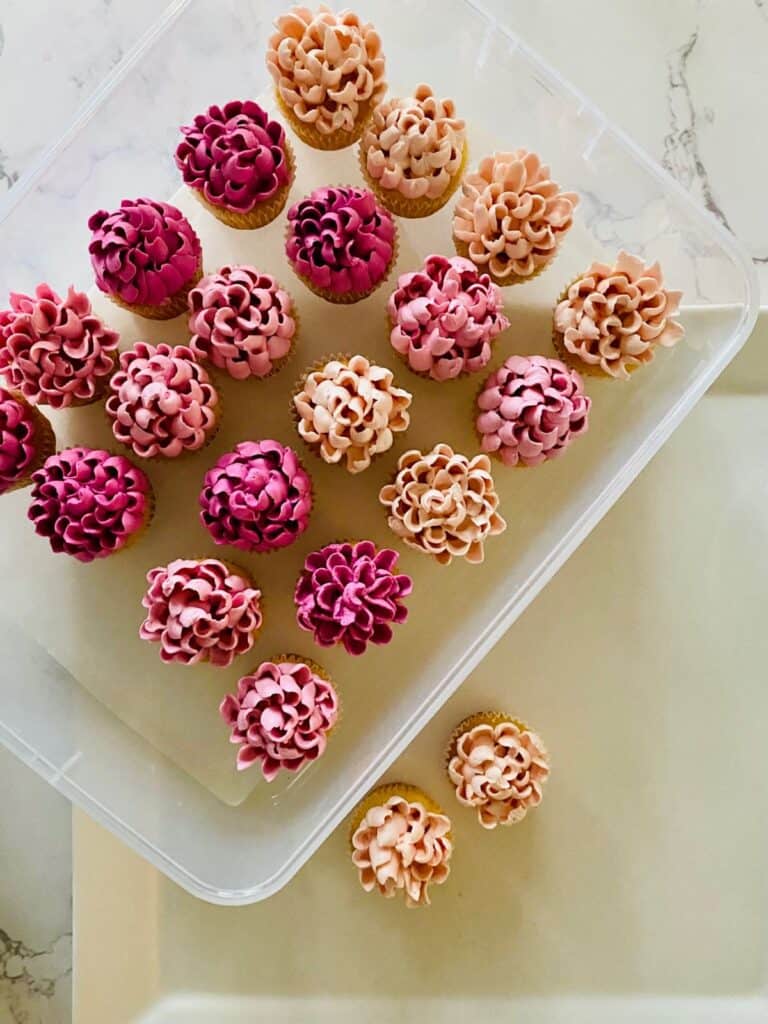
Serve your cupcakes on a tiered stand, platter or cake stand – try grouping them by shade for maximum impact.
Or place your cupcakes in a large container with a lid and store them for up to 2 days in the refrigerator. Remove from the fridge and place on your chosen stand or platter 30 minutes before serving.
FAQs for Mini Flower Cupcakes
Can I freeze my cupcakes?– Un-iced yes. With the piping, no. Bake the vanilla cupcakes, allow to cool completely then place in a container with a lid. Freeze for up to one month. Defrost in the container in the fridge overnight, then place on your bench for 30 minutes before removing the centre for the strawberry filling.
My buttercream is too firm and my hand hurts – If you are finding it hard to pipe the petals and your hand is getting sore then your buttecream may have gotten too cold. It should be silky smooth and effortless to pipe. However if it is a cold day, the buttercream may firm up making it difficult to get nice clean petals and piping very hard work.
If this is the case, put the heating on to remove the chill in the air then squirt the buttercream in the piping bag back into the bowl. Remove 1 tablespoon of buttercream and place it in a small microwave safe bowl. Heat on high for 10 seconds – it will melt which is perfect, then add it back into the stand mixer bowl containing the buttercream.
Now mix on the lowest speed for 2-3 minutes, the melted buttercream will warm up the buttercream in the mixer bowl and return it to a silky smooth and easy to pipe consistency.
Make up a fresh piping bag with a clean tip and fill as per the instructions.

Mini Flower Cupcakes
Equipment
 Chrysanthemum piping tip Visit my amazon shop
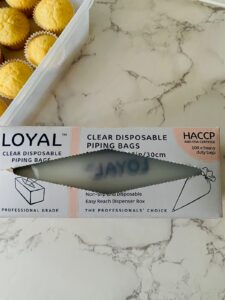 Medium disposable piping bags
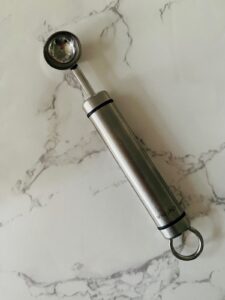 Melon ball tool
24
servings1
hour15
minutes20
minutesEquipment list
Stand mixer with bowl, plus paddle and whisk attachments
Digital scale
24 mini cupcake cases with a base diameter measurement of 38mm / 1.5 inches
24 hole mini muffin tin
Large storage container with lid
Large & medium mixing bowls
Microwave safe jug
Small ice cream scoop
Small & large plate
Spatula
Keep the screen of your device on
Ingredients
- Vanilla Cupcakes
90 g 3 1/6 oz sugar
130 g 4 3/5 oz self-raising flour
60 g 2 1/8 oz unsalted butter
Pinch Pinch fine table salt
110 g 3 7/8 oz sour cream
2 tbsp 2 tbsp full fat milk
1 1 egg
1 tsp 1 tsp vanilla extract
Strawberry jam/preserves (optional)
Small Small quantity Swiss Meringue Buttercream (see link in post for recipe)
Directions
- Vanilla Cupcakes
- You will need mini cupcake cases with a base diameter measurement of 38mm / 1.5 inch.
- Preheat the oven to 160 C (fan) / 325 F (fan). Line a mini muffin tin with 24 mini cupcake cases and set aside.
- Measure out the sugar, self-raising flour and salt into the bowl of a stand mixer.
- Soften the butter in a microwave safe bowl (20 to 30 seconds on high at 900W) and place it next to the stand mixer together with a spoon.
- Measure out the sour cream and milk in a microwave safe jug. Stir to break up the sour cream, then microwave on high for 30 seconds 900w. Stir thoroughly to distribute the heat then add the egg and vanilla extract and stir again thoroughly. Put the jug next to your stand mixer with a spatula.
- Place the bowl with the dry ingredients on a stand mixer fitted with a paddle attachment and mix on low speed for 30 seconds.
- Add the butter and mix on low until the mixture resembles a breadcrumb-like texture.
- Scrape the sides of the bowl. Re-start the mixer on low then slowly add the sour cream mixture, use the spatula to get as much out of the jug as you can. Increase the speed to medium and beat for 30 seconds until light and fluffy. Do not overmix or else the batter will have a dense texture when baked. Scrape the sides again if necessary and give a quick mix to incorporate.
- Fill a small ice cream scoop ¾ full and divide the batter equally between the mini cupcake wrappers. If you don’t have a scoop or your wrappers are a different size then fill each wrapper to just under half full (see image). They will rise A LOT in the oven.
- Tip: Once full, check that all the cases are sitting evenly in the muffin tin, adjust if you need to.
- Place the mini cupcakes in the preheated oven and cook for 15 minutes then remove from the oven. Take them out of the muffin tin and cool on a rack as soon as possible without burning your fingers. Note: They will puff right up while cooking then settle nice and flat once cooled.
- When cooled completely, place the cupcakes in a container with a lid and refrigerate for a minimum of 30 minutes. This will make it easier to fill them with the jam.
- Fill with strawberry jam (optional)
- Take a melon ball tool and carefully remove a small amount of cake from the centre top section of the cupcake and place it next to the cupcake. I find the easiest way to do this is to press the tool into the top of the cake on one side, then turn the cake and press it into the other side and then remove (see photos in the post above).
- Using a teaspoon, fill the hole with a little strawberry jam then replace with the piece of cake. Try not to overfill.
- Once all the cupcakes have been filled, put them back into the container and place the lid on so they don’t dry out. Leave on your bench while you make the Swiss meringue buttercream.
- Make the Swiss Meringue Buttercream
- You will need to make the small quantity (3 egg whites) of my Swiss Meringue Buttercream recipe then return here for the colouring instructions.
- Colour the buttercream
- Lightest shade first: Start by adding 2 drops of colouring to the whole batch of the buttercream. Mix on the lowest setting until all the colour has been incorporated.
- Meanwhile, fit a medium disposable piping bag with a Chrysanthemum piping tip, place it in a tall glass, turn about 1/3 of it over to make a cuff.
- Fill the piping bag
- When you are happy with the colour of the buttercream, take a spatula and fill the piping bag with some of the buttercream. Remove the piping bag from the glass, pull up the cuff and twist. Manipulate the bag in your hand so that the tip looks like it is smiling at you not frowning (see pic in post). This will give you petals that resemble a chrysanthemum. Squeeze until a little bit comes out cleanly from the tip, then rest it on a small plate.
- Piping the cupcakes
- Place 8 cupcakes on a large plate.
- Tip: You will need to hold the cupcake in your hand and turn it as you pipe the petals.
- Take a cupcake in one hand, your piping bag in the other, then start to pipe the outside petals by placing the tip just above the surface of the cupcake, squeeze out a small amount of buttercream, turn the cupcake, then repeat. Try to keep the petals the same height with each squeeze. This will ensure you get a good, consistent outline on every cupcake. See post above for step by step photos and petal shape options.
- Continue piping and turning until you get the to centre. Take a look at your cupcake and insert your piping tip into any gaps where you can see the top of cupcake. Move or tap wayward petals in place with the end of your piping tip.
- Colour the next batch of buttercream
- When you have finished piping your first 8 cupcakes, snip off the end of your piping bag and squirt the remaining buttercream back into your mixing bowl. Add another 2 drops of the same colour and again mix on the lowest speed until incorporated. If the difference between the first and second colours is not obvious, then add one more drop.
- Meanwhile, remove the piping tip from the snipped end, wash it in hot water, then dry with paper towel. Set up a new disposable piping bag and tip using the same method above.
- Repeat the steps for filling and piping the new colour on the next 8 cupcakes.
- Colour the last batch of buttercream
- Repeat the steps for removing the tip and colouring the buttercream as detailed above, adding another 2 drops of colour to the remaining buttercream – this will be your strongest shade.
- Repeat the steps for filling and piping the new colour on the last 8 cupcakes.
- You have now made 24 beautiful mini cupcakes in ombre hues.
- Serve or store
- Serve your cupcakes on a tiered stand, platter or cake stand – try grouping them by shade for maximum impact.
- Or place your cupcakes in a large container with a lid and store them for up to 2 days in the refrigerator. Remove from the fridge and place on your chosen stand or platter 30 minutes before serving.