This professional-style Swiss Meringue Buttercream is the smooth, stable frosting I rely on in my own cake decorating, with step-by-step photos, flavour variations, and storage guidance to ensure consistent success. Scaled for small, standard, or large batches, it’s a dependable foundation for beautifully finished cakes and cupcakes.
Your ultimate guide to silky, smooth, never-fail Swiss Meringue Buttercream
Shiny. Smooth. Glossy. Not too sweet. Absolutely dreamy to work with. That’s Swiss Meringue Buttercream — and I’m here to help you master it.
In this post I cover
- How to make Swiss meringue buttercream step-by-step
- Colouring – yellow tones and tricky colours
- Flavouring ideas
- Storing, freezing & reviving
- FAQs including troubleshooting
Whether you’re covering a celebration cake, piping delicate vintage swirls, or decorating cupcakes, Swiss Meringue Buttercream is a decorator’s dream… once you know what you’re doing. The problem? Most recipes leave out crucial details and assume you know more than you do. I’ve been there — my first attempt was a soupy mess and left me totally discouraged.
But not anymore.
In this post, I’ll walk you through everything you need to know about Swiss Meringue Buttercream. No fluff, no confusion, just straight-up, proven advice from someone who’s made over 500 batches (and even taught her husband how to do it — and his specialty is ham and cheese toasties). I’ve also included some images of how I’ve used it on cakes and cupcakes.
Let me be your Swiss Meringue Buttercream guide! We’re climbing the Everest of buttercreams together — and you’re going to conquer it.
Why Choose Swiss Meringue Buttercream?
Swiss Meringue Buttercream is:
- Smooth, silky, and shiny – giving your cakes a professional finish with sharp edges
- Less sweet than traditional buttercream – perfect for adults and kids alike
- Stable enough for layering, stacking, piping, and crumb-coating
- Adaptable – flavour it, colour it, freeze it, resurrect it (yes, really)
Key components (get these right, every time)
- Egg whites & sugar – temperature 75 C / 167 F
- Meringue – stiffness
- Butter – colour & softness
- Mixer – speed
Good to know
If you think you can skip a step and it won’t matter, then think again. This buttercream in my opinion is an exact science (we’re talking air and fat molecules here) and best results come from following the steps exactly. Once you get the hang of it, it’s very easy to make – I promise!
Read through the recipe and watch the video before you start.
Bake like a Pro – weigh your ingredients!
I use weight measurements not cup measurements in all my recipes as cup sizes are not universal – a cup in the US for example is different to a cup in Australia. This ensures accuracy and a far better result, especially if you are baking which relies on scientific principles. Yes it’s a bit nerdy, but ingredients are expensive and there’s nothing worse than following a recipe to the letter only to have it fail on you. What a waste of time and money! Invest in a set of digital scales and you will set yourself up for success every single time. It’s what all professional cake creators and pastry chefs use so why not you?
Look for a set that goes up in 1g increments, includes weights for liquids like fl oz / ml and can toggle between metric / US if you need to.
Pro tip: Always keep a set of spare batteries for your scales. You don’t want your scales dying halfway through a recipe!
More Afternoon Tea recipes
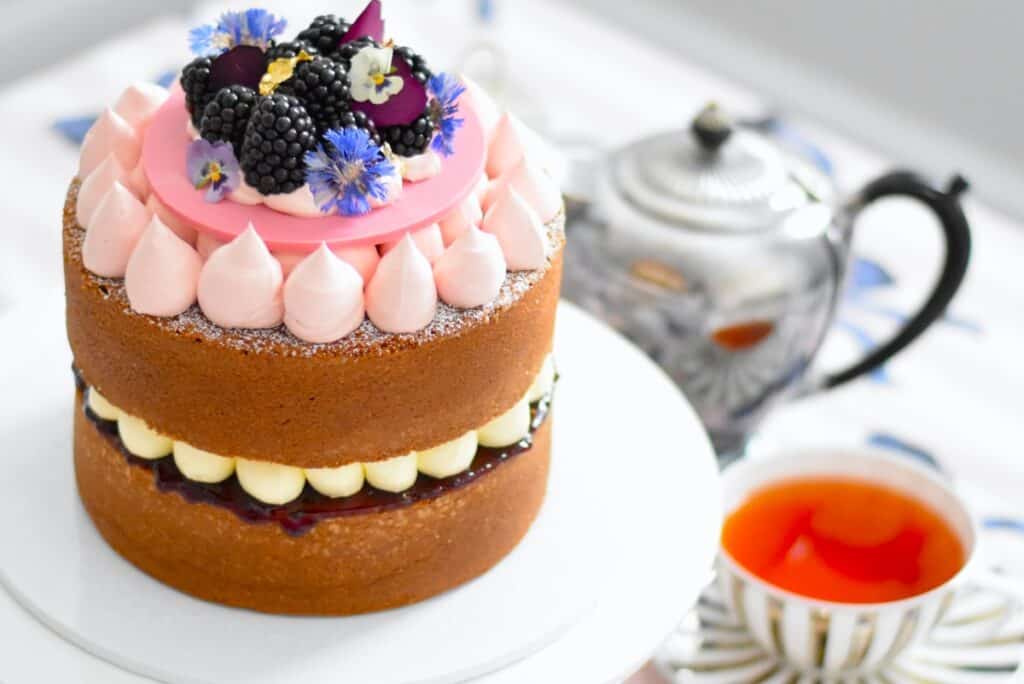
Lemon & Blackberry Sandwich Cake (it features Swiss Meringue Buttercream)
Chicken Wellington Sausage Rolls
Ingredients for my Swiss Meringue Buttercream
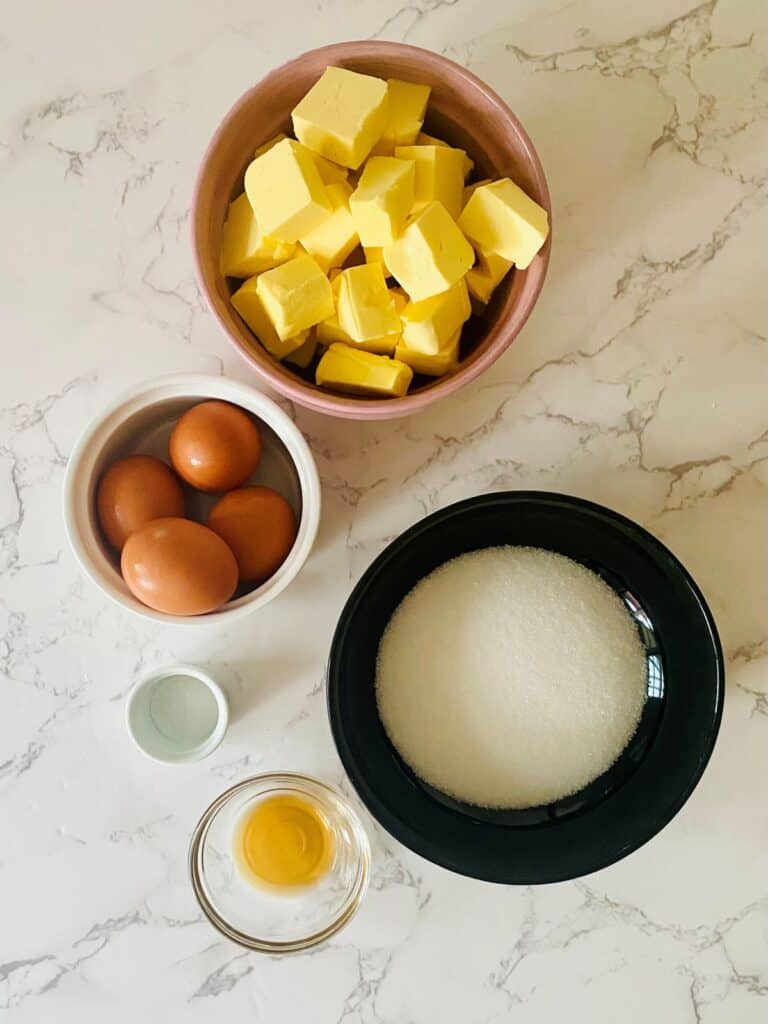
Sugar – White granulated sugar works best.
Eggs – You will need egg white from Large eggs (700g / 24 oz carton).
Unsalted butter – Use unsalted butter so that you can control the amount of salt. If you need an ivory colour icing for your cake then try to choose butter that is less yellow in colour. While it is not possible to make bright white Swiss Meringue Buttercream the lighter in colour the butter is at the start the better the result. However if you are colouring your buttercream then this won’t matter so much. See Colouring your buttercream below.
In Australia I recommend the butter from Aldi or Western Star – they’re both pale enough to give you the result you are looking for. The butter from Woolworths is bright yellow so avoid it if you need an ivory buttercream.
Please comment and share your recommendations for pale coloured butter recommendations in other countries. I’d love to hear your thoughts and share them with others.
Salt – Regular table salt
Vanilla – Pure vanilla extract not essence is used in this recipe. If you plan to flavour your buttercream then you can omit the vanilla.
PLUS White vinegar/lemon juice for cleaning some of your equipment.
How to make Swiss Meringue Buttercream step-by-step
You will need the following equipment
- Digital scale
- Digital instant-read thermometer
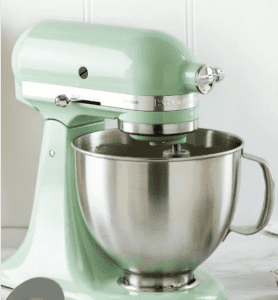
- Stand mixer with whisk and paddle
- Stand mixer bowl
- Timer
- Paper towel
- Silicone spatula
- Saucepan (smaller than your stand mixer bowl so that it can sit on top),
- Small bowl for egg white
- Small bowl for yolks/shells
- Microwave safe bowl to soften butter
Preparation
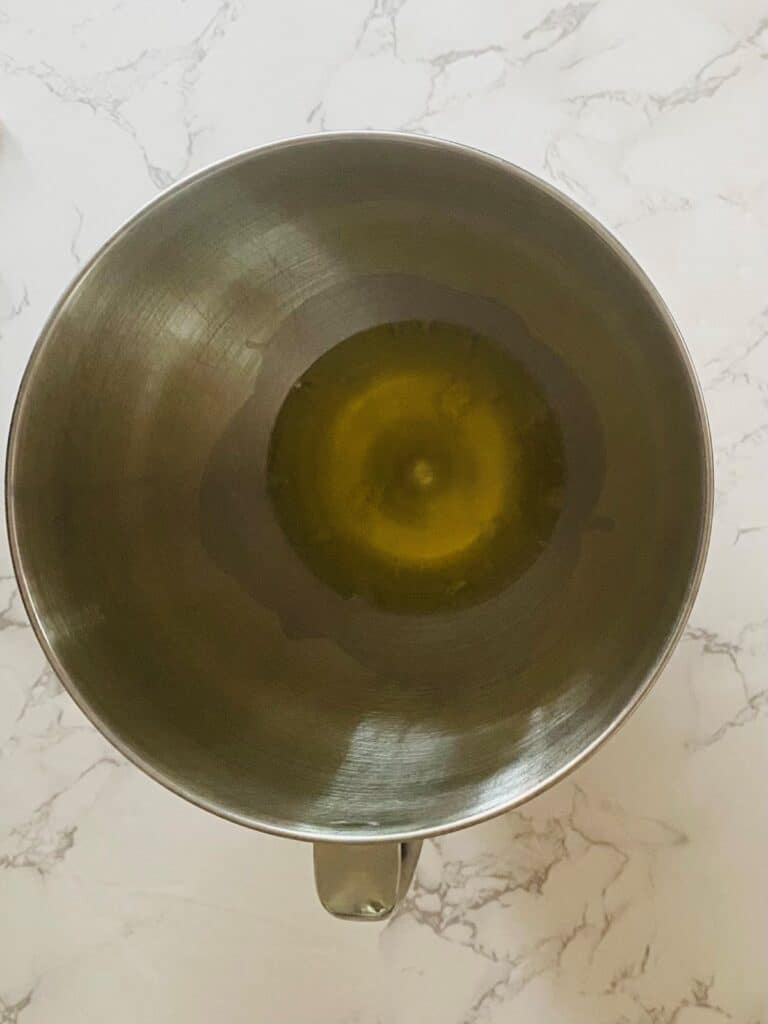
Oil or a greasy film on your equipment will kill your meringue. You can’t see it but it might be there. To ensure a successful meringue, Dip a piece of paper towel in some lemon juice or vinegar and thoroughly clean your thermometer, stand mixer bowl, whisk, the small bowl for separating the eggs and the spatula. Wipe off with a fresh piece of paper towel. Don’t use tea towel as it too may have oil on it.
Once clean, fit your mixer with the whisk attachment – I use a piece of paper towel to hold it so that I don’t get any grease on it that might affect my meringue.
The meringue mixture
Separate your eggs: Crack one egg into two small bowls — yolk in one, white in the other — then add the white only to your stand mixer bowl. Repeat the process with remaining eggs. Save your yolks or discard – they are not required for this recipe.
Once all the egg white has been added, zero your scale, then add the sugar. Take your spatula and give it a good mix then leave it in the bowl. Set the mixture aside while you prepare the butter.
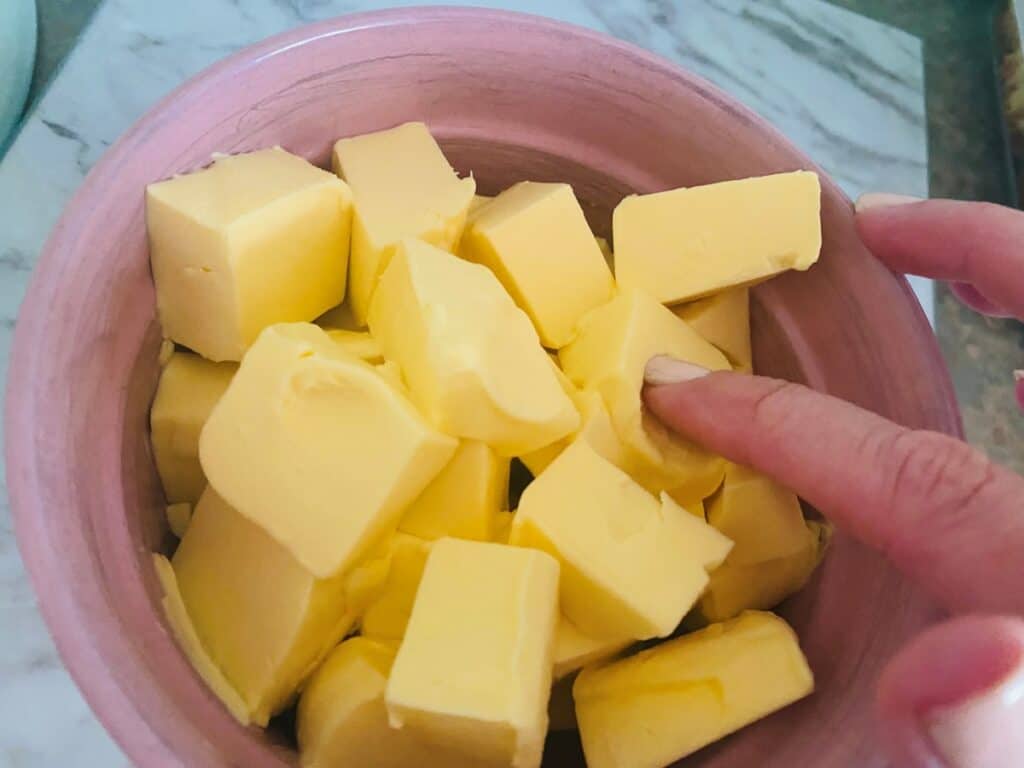
The butter
Remove your butter from the fridge (cold butter is important at this stage). Cut it into cubes. Place a microwave safe bowl on your scale, zero it, then add cubes of butter until you reach the required amount.
Put it in the microwave and heat on high: 20 seconds for the small recipe, 30 seconds for the standard recipe, 40 seconds for the large recipe (based on 900w – reduce the time by 5-10 seconds if 1100w). Remove from the microwave, stir, then press a clean finger into a few cubes of butter. You are looking for an indentation that stays without melting away (see pic). If you don’t have this yet then reheat in 10 second bursts until you do.
Store in the microwave: When you are happy with the butter, store it in the microwave with the door closed. This ensures that the kitchen temperature does not affect your butter.
Help! If you have gone too far with the butter, put it in the fridge for a few minutes to firm up until you get the indentation (as specified above), then store in the microwave as suggested above.
You need to know this: The consistency of the butter is the secret trick to getting your buttercream perfect every time.
Heat over a water bath
Fill a saucepan with 4 cm / 1.5 inches of hot tap water. Place it on a low heat on the front burner. Place your stand mixer bowl with the egg white/sugar mixture plus spatula on top, checking that the base does not come in contact with the water. If it does, then tip a little bit of the water out.
Tip: Don’t let the water boil, keep it on a low heat and allow to gently simmer.
Put a piece of damp paper towel on a clean plate and set your digital thermometer on top.
Stir the mixture (including the sides of the bowl) with the spatula every 20-30 seconds. This will ensure that the egg whites do not cook and the heat is evenly distributed. Don’t walk away and do something else. You will end up with little bits of solid egg white in your buttercream.
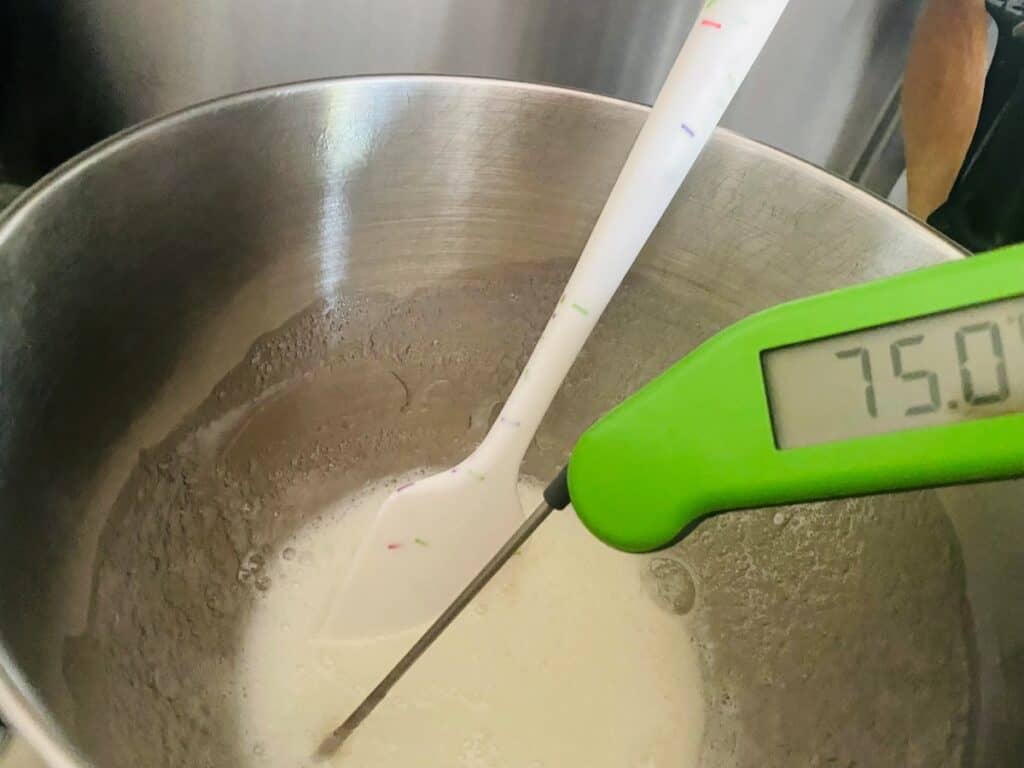
Temperature check
After about 5 minutes, insert your digital thermometer into the middle of the mixture (keep it off the bottom of the bowl) and take a temperature check.
Clean your thermometer with the damp paper towel. Continue to stir and check the temperature at regular intervals until the mixture reaches 75 C / 167 F.
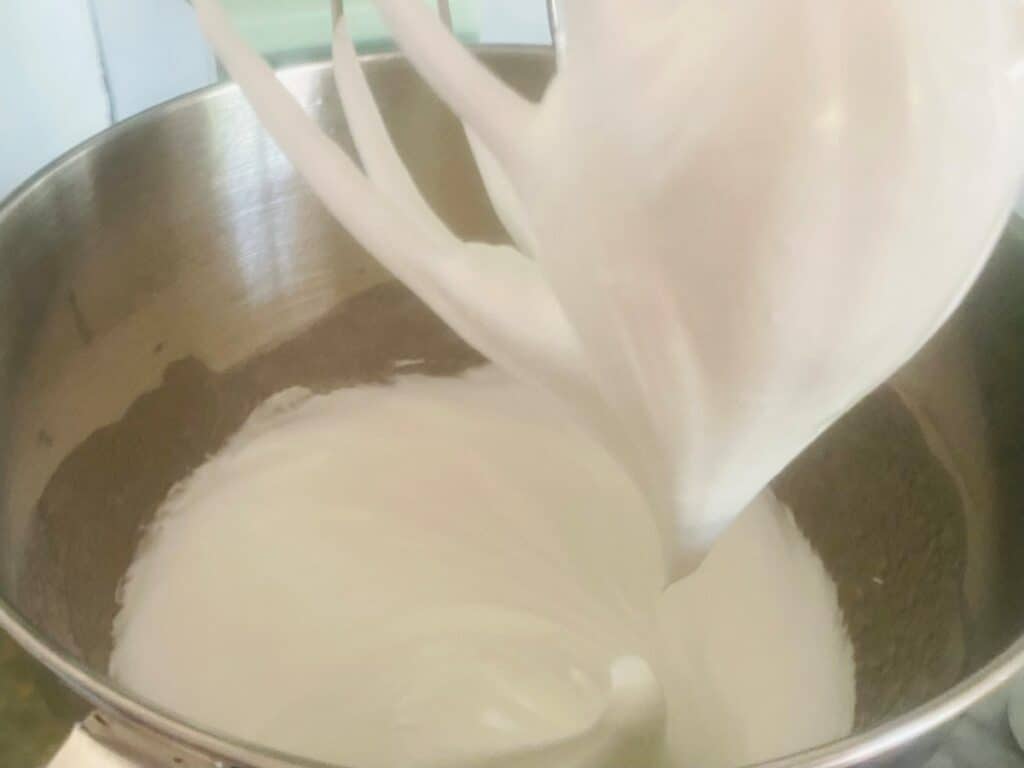
Whip the meringue
Once you reach the exact temperature, turn off your burner, pick up your mixer bowl, give the base a quick wipe with a tea towel (careful as it will be hot) and then put it on your stand mixer.
Lower the whisk attachment and turn the mixer on to medium speed (4 on a KitchenAid) for one minute (this builds the air bubbles) before turning up to medium high (6 on a KitchenAid) for 2 minutes. Turn off the mixer, lift the whisk attachment and check that the meringue on the whisk separates from the meringue in the bowl (like the pic above). If not, continue mixing and checking every 30 seconds until it does but don’t over do it. Over whipped meringue will be grainy and unusable.
Take a spatula and scrape down the sides, give it one quick whisk to incorporate (10 seconds), then remove the whisk (tap it on the side of the bowl to remove any meringue).
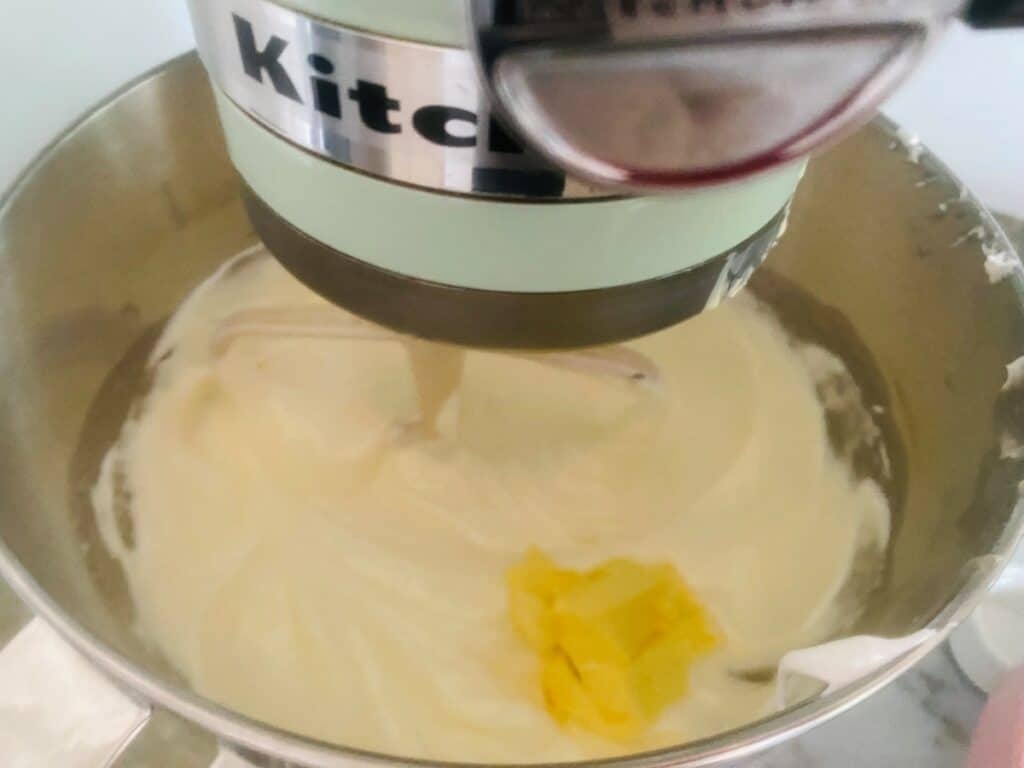
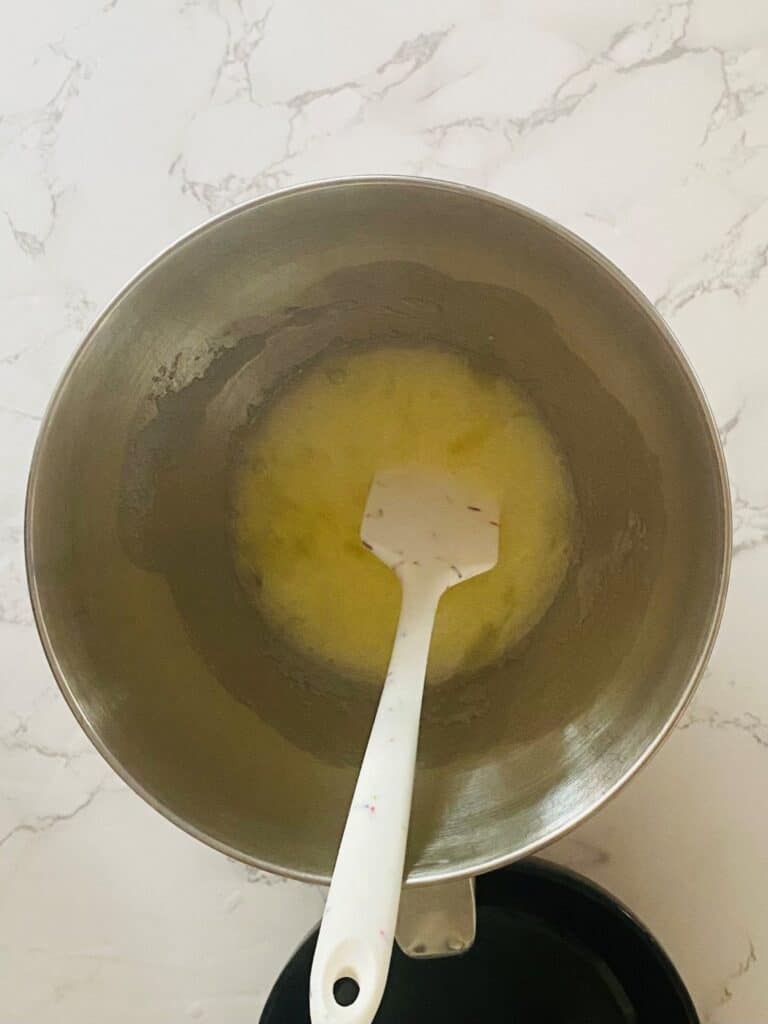
Add the butter
Attach the paddle attachment, lower it into the bowl and turn the mixer on to the lowest speed (1 on a KitchenAid).
Take the butter out of the microwave and set it next to the mixer then start to add butter pieces bit by bit with a tablespoon until you run out.
Add the vanilla and salt.
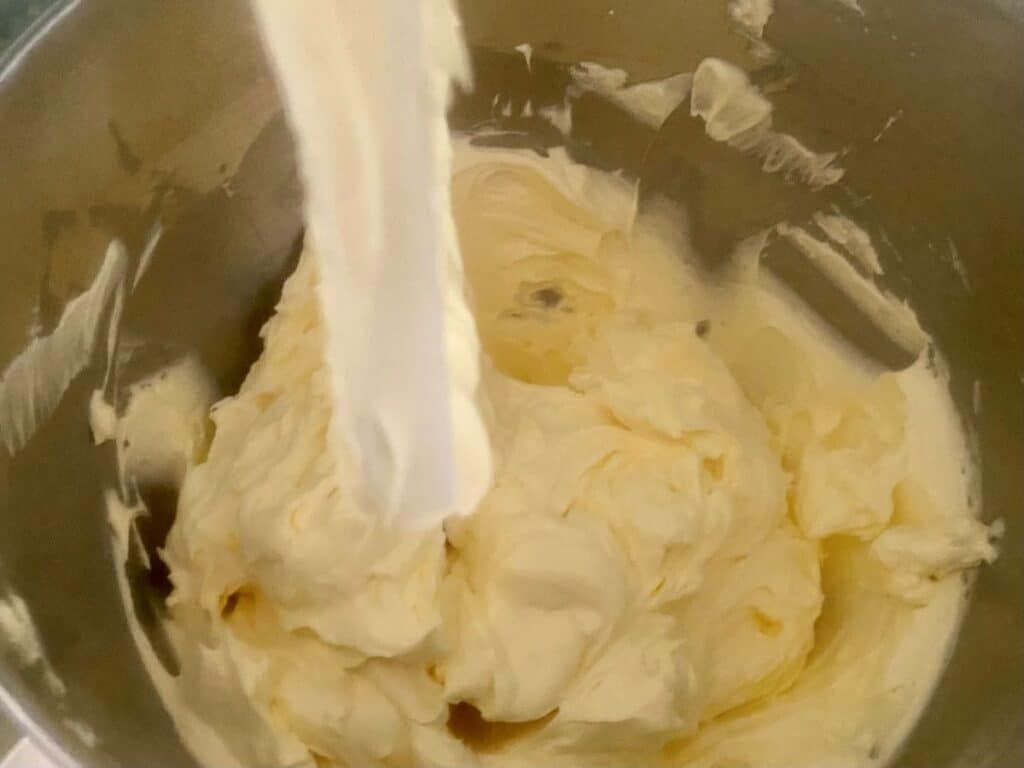
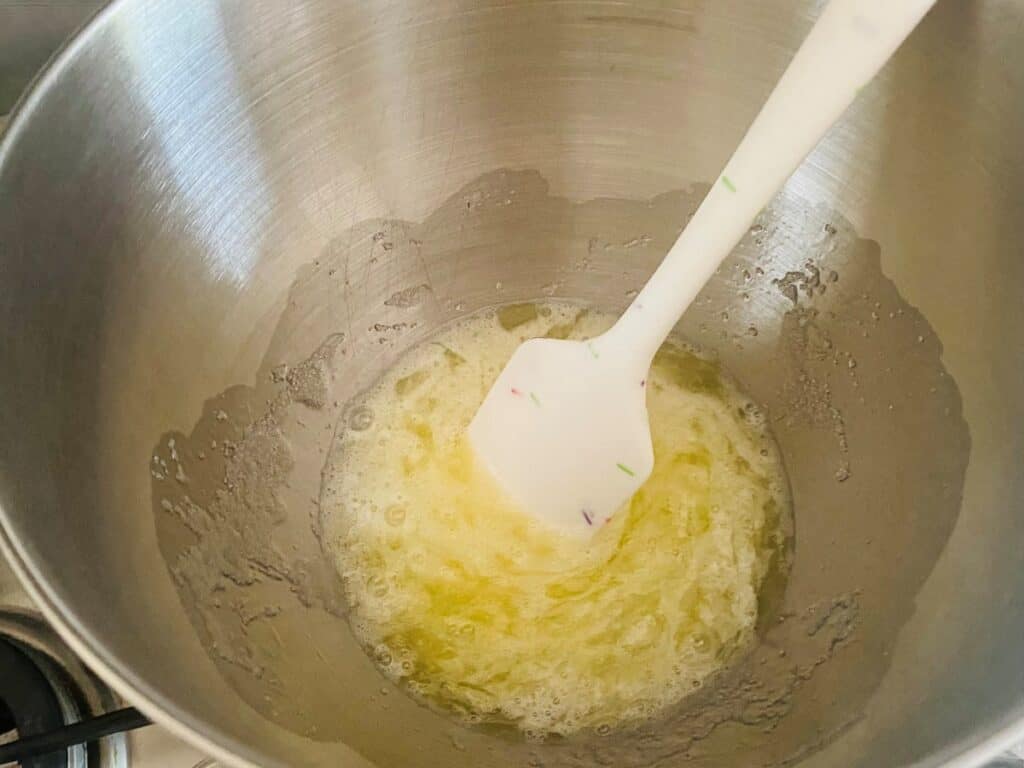
Keep mixing
Set a timer for 5 minutes and leave the mixer to work its magic.
You need to know this: DO NOT TURN THE SPEED UP! Stay on the lowest speed the whole time or you will get nasty air bubbles!!
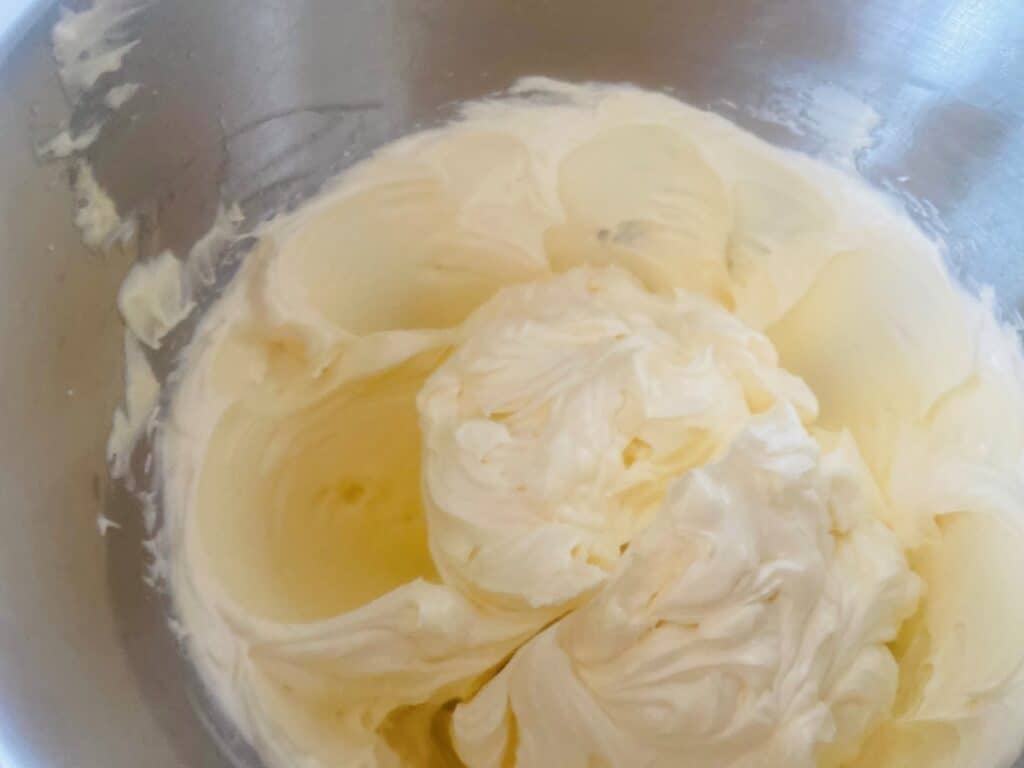
At the end of 5 minutes you should have a beautiful smooth, shiny buttercream that is ready for filling, piping or covering cakes.
You can now add additional flavouring and/or colours or use it as it is. Just don’t let it sit for too long or it will lose its silkiness and develop air bubbles. If this happens, simply re-whip on the very lowest speed for about 3 minutes.
Colouring & Flavouring
Colouring
The best way to colour your Swiss Meringue Buttercream is to use oil-based colours that have been developed to bind with the fat from the butter. Colour Mill is your best choice. Always add a little at a time, mixing on low between additions.
Remove the yellow tone
If you have used butter that is a pale colour rather than bright yellow, then you may not need this step (see Ingredients). However, if you find that your buttercream has too much of a yellow tinge to it, then a tiny bit of purple colouring can be helpful.
Start slowly as it’s easier to add rather than take away. Place a tiny amount on a toothpick, then dab it on to the paddle beater, then mix for few minutes on the lowest setting. Remove a little bit of buttercream and place it near your cake in good light and check the tone. Add a tiny bit more if required, but don’t go too far or you will end up with an ugly greyish buttercream instead of ivory.
Commercial whitener
There is a product sold at some baking supply stores called titanium dioxide that claims to whiten your Swiss Meringue Buttercream. I don’t recommend it. Apart from adding chemicals to your natural buttercream, it adds a horrible taste and makes the buttercream lose it’s ‘puffy’ texture. Stick with the aspect you can control which is the original colour of the butter.
Tricky colours
With the slightly yellow undertone (from the butter), your buttercream may not always reward you with the colour you were expecting. To counter this, follow my advice below.
Blue – add a little purple first then the blue colouring otherwise it will have a green tinge.
Red – colour it orange first then add the red colouring otherwise it will have a pink tinge.
Black – add dark blue first, then the black colouring otherwise it will have a grey tinge.
To deepen the colour, try to get as close to the shade you want then remove one tablespoon of Swiss Meringue Buttercream, put it in a microwave safe dish and microwave for 10 seconds. Add it back into the buttercream and mix on the lowest setting for 3-5 minutes. It will also deepen a little more overnight.

Flavouring Ideas
Swiss meringue buttercream flavours really well, particularly if you stick to natural flavours. Try these suggestions for cake fillings:
- Melted dark, milk or white chocolate: Melt 100g for my standard recipe, 150g for my large recipe – cool for 2 minutes (use a timer), stir, then add to the buttercream in a thin stream on low speed until incorporated. You are aiming to get the temperature of the chocolate a little warmer than the buttercream so it doesn’t set and leave lumps in your mixture. Conversely, very hot chocolate will melt the butter in your buttercream resulting in a soupy mixture.
- Freeze-dried fruit powders (raspberry, strawberry, etc.)
- Citrus zest, lemon curd or a fruit reduction (strain if it contains seeds)
- Salted caramel, pistachio butter or dulce de leche
Storing, Freezing & Reviving
For best results I recommend using your buttercream immediately, especially if you are covering a cake and looking for a super smooth finish.
However if it’s just not possible, or you need to make a few batches, then you can still get excellent results by following these simple steps:
Store in the fridge for up to 2 days: Place in a clean bowl, cover with plastic wrap and refrigerate overnight.
- How to revive: Remove from the fridge and leave it on the counter for 1 hour.
- When you are ready to pipe, fill, or cover your cake, place the Swiss Meringue Buttercream in a clean stand mixer bowl. Put 2 tablespoons of buttercream into a microwave safe dish and microwave on high for 10 seconds – it will become liquid.
- Add the melted mixture back into the mixer bowl and rewhip for 5 minutes on low until fluffy.
- To freeze: Store in an airtight container for up to 3 months.
- To defrost: Let it thaw overnight covered on your counter. Once fully defrosted, follow the instructions above for how to revive.

How to Use It Like a Pro
- Filling & covering cakes: Use a piping bag and offset spatula for filling and a stainless steel cake scraper for a smooth finish.
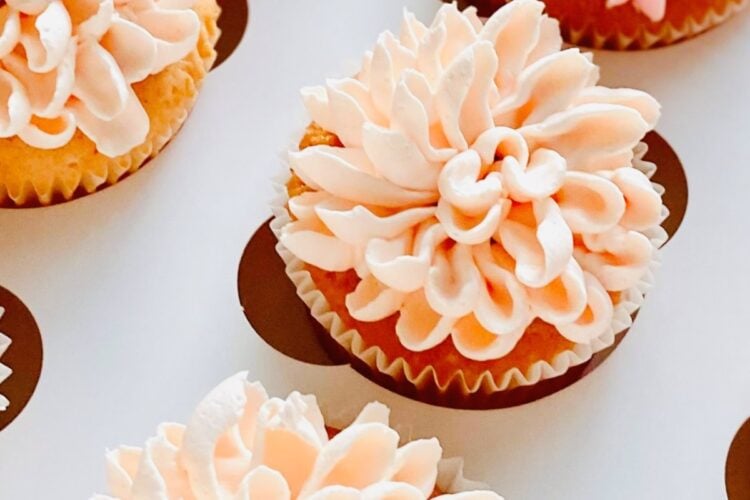
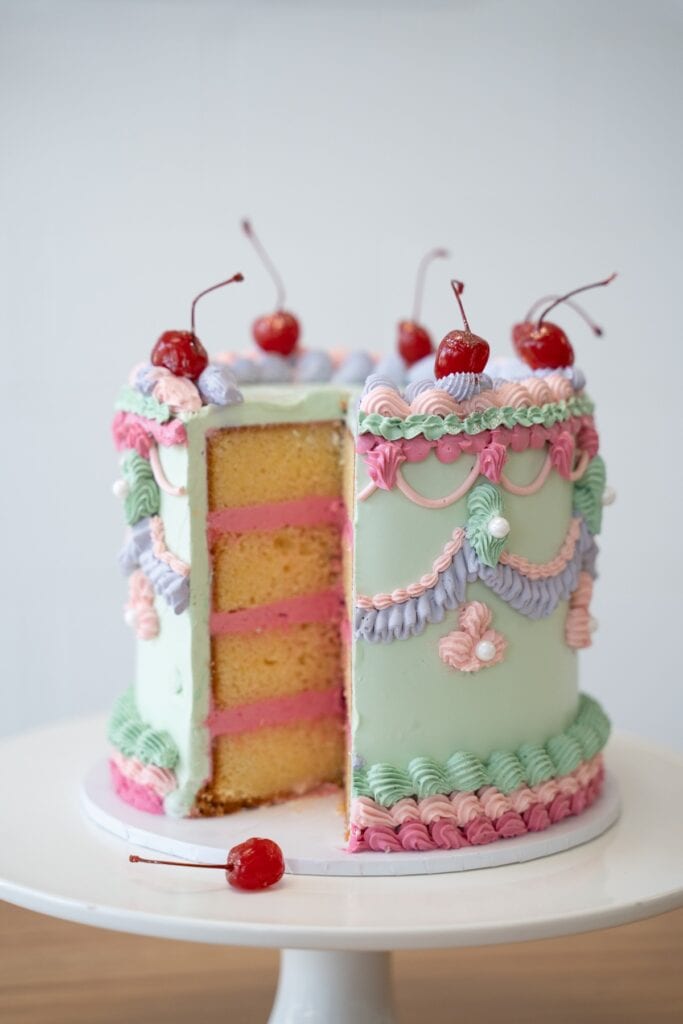
- Piping: Use a variety of tips for classic vintage swirls, borders and swags, or simply snip the end of a piping bag and pipe big clouds like I did for my Lemon & Blackberry Sandwich Cake
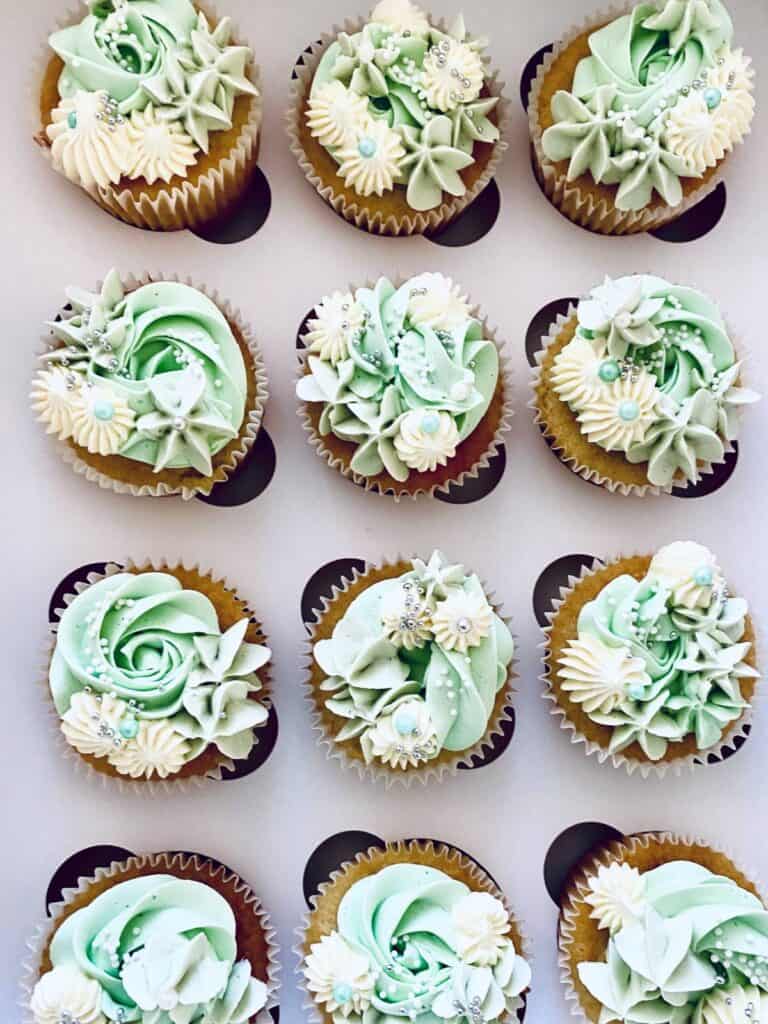
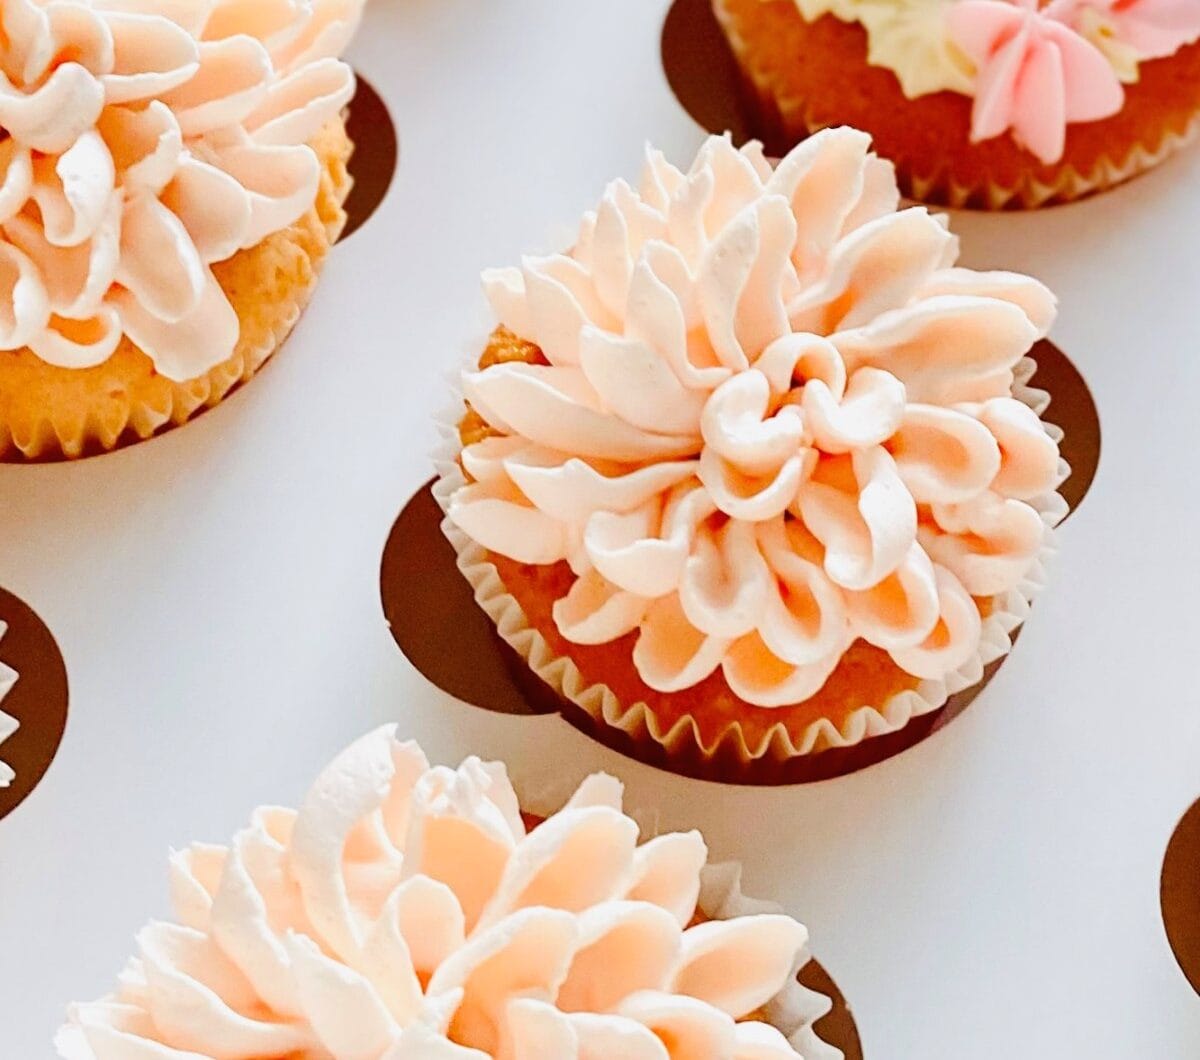
- Cupcakes: Load into a piping bag and swirl away — it holds its shape beautifully.
Swiss Meringue Buttercream FAQs
My buttercream is soupy: Your butter was either too warm or your kitchen is too hot. Here are some solutions:
- Add a cold cube of butter and mix on low until it has fully incorporated. This should cool the mixture down enough that it starts to bind together. If not, add a second small cube, mix again on low until the buttercream comes together.
- Put the air conditioning on – the cold air will get whipped into the buttercream and help cool the mixture.
- Be patient, it might take a little longer, but the buttercream will eventually come together as the mixture cools.
My buttercream is lumpy: Your butter was too hard and hasn’t fully incorporated into the meringue. Here is the solution:
- Microwave 2 tablespoons of mixture on high for 10 seconds in a small bowl. It will melt (that’s OK), then add it to the mixer bowl.
- Mix on low for 5 minutes then check that there are no small butter pieces still remaining in the buttercream. If yes, then take 1 tablespoon of mixture and microwave on high for 10 seconds. Add it to the mixer bowl. Mix again for 5 minutes on the lowest setting. This should fix the issue.
My buttercream has air bubbles: These are the worst! Especially if you are trying to get a smooth finish on the outside of your cake. Here’s what to do:
- Always whip your buttercream on the lowest setting. Air is not your friend with Swiss Meringue Buttercream (only at the meringue stage).
- Use your buttercream immediately, don’t let it sit around for too long or air bubbles will form. Re-whip on low speed for a couple of minutes whenever you need to.
- If you have to make your buttercream ahead of time, follow my instructions for reviving buttercream above.
What about hot weather?: Swiss Meringue Buttercream and hot weather don’t mix. If you are making a cake to go on display for a few hours in the middle of summer, then think about covering it in fondant instead. Or keep it in the fridge for as long as you can, then leave it to the last minute to display.
Re-think your cake if you have to transport it on a hot day in a hot car for more than 30 minutes. If you have no choice, then remove the cake from the fridge at the last minute, wrap your cake box in a towel to keep it insulated, and put the car’s air conditioning on high. Refrigerate immediately when you get to your destination.
Got more questions? Leave a comment and I will try to help x
Final Thoughts
Swiss Meringue Buttercream can feel intimidating at first — but once you understand it, it’s so much fun to use. With my recipe, detailed instructions, and a little bit of confidence, you’ll be making professional-level buttercream every time.
And remember: If my husband can do it, so can you. 😉
Swiss Meringue Buttercream
10
minutes10
minutes15
minutesEquipment
 Stand Mixer
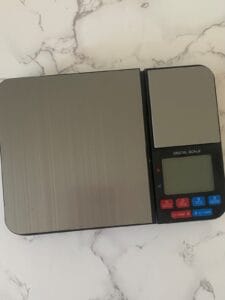 Digital Scales
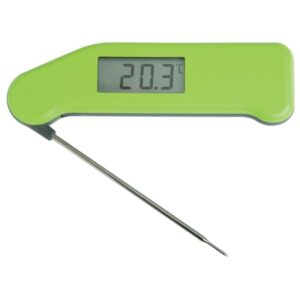 Digital instant read thermometer
Timer
Paper towel
Small plate
Silicone spatula
Saucepan (smaller than your stand mixer bowl so that it can sit on top),
Small bowl, bowl for yolks/shells
Microwave safe bowl to soften butter
Keep the screen of your device on
Ingredients
- Small Size
3 large 3 large eggs (whites only)
150 g 5 2/7 oz white sugar
340 g 12 oz unsalted butter
1/4 teaspoon 1/4 tsp vanilla extract
Pinch Pinch salt
- Standard Size
4 large 4 large eggs (whites only)
200 g 7 oz white sugar
450 g 15 7/8 oz unsalted butter
1/2 teaspoon 1/2 tsp vanilla extract
Pinch Pinch salt
- Large Size
6 large 6 large eggs (whites only)
300 g 10 4/7 oz white sugar
675 g 23 4/5 oz unsalted butter
1 teaspoon 1 tsp vanilla extract
Pinch Pinch salt
Directions
- READ FIRST
- My post (above) is the same as the method (below) but with very handy step-by-step photos as well as advice on colouring, storing, reviving and troubleshooting. I suggest you read it as well as watching the short video, particularly if you have never made Swiss meringue buttercream before.
- Preparation
- Oil or a greasy film on your equipment will kill your meringue. You can’t see it but it might be there. To ensure a successful meringue, Dip your paper towel in some lemon or vinegar and thoroughly clean your thermometer, stand mixer bowl, whisk, the small bowl for separating the eggs and the spatula. Dry off with a paper towel. Don’t use tea towel as it too may have oil on it.
- Once clean, fit your mixer with the whisk attachment – I use a piece of paper towel to do this so that I don’t get any grease on it that might affect my meringue.
- The Meringue Mixture
- Separate your eggs carefully. Crack one egg into two small bowls — yolk in one, white in the other — then add the white only to your stand mixer bowl. Repeat the process with remaining eggs. Save your yolks or discard – they are not required for this recipe.
- Once all the egg white has been added, place the mixer bowl on your scale, press zero, then add the sugar until you reach the amount required for your chosen recipe (small, standard or large).
- Take your spatula and give it a good mix then leave it in the bowl. Set the mixture aside while you prepare the butter.
- The Butter
- Remove your butter from the fridge (cold butter is important at this stage). Cut it into cubes. Place a microwave safe bowl on your scale, zero it, then add the cubes of butter until you reach the required amount.
- Put it in the microwave and heat on high: 20 seconds for the small recipe, 30 seconds for the standard recipe, 40 seconds for the large recipe (based on 900w – reduce the time by 5-10 seconds if 1100w). Remove from the microwave, stir, then press a clean finger into a few cubes of butter. You are looking for an indentation that stays without melting away (see pic in my post above). If you don’t have this yet then reheat in 10 second bursts until you do.
- Store in the microwave: Put the bowl of butter back in the microwave, close the door and leave it there until you need it. This ensures that the kitchen temperature whether hot or cold does not affect your butter.
- Help! If you have gone too far with the butter, put it in the fridge for a few minutes to firm up until you get the indentation (as specified above), then store in the microwave as suggested above.
- If your butter is too warm/melted or super soft then it will make the buttercream soupy and take a very long time to come together. Putting it in the fridge will eventually cool it down, however you will lose a lot of the air bubbles in the meringue and you won’t get the finish you are looking for.
- If the butter is too cold, it will cool the meringue down too quickly and prevent the rest of the butter from incorporating properly — leaving little yellow lumps throughout. If you notice a few colder cubes at the bottom of your bowl, put the butter in the microwave and cook on high for no more than10 seconds before adding.
- Make a water bath
- Fill a saucepan with 4 cm / 1.5 inches of hot tap water. Place it on a low heat on the front burner. Place your stand mixer bowl with the egg white/sugar mixture plus spatula on top, checking that it does not come in contact with the water. If it does, then tip a little bit of the water out.
- Tip: Don’t let the water boil, keep it on a low heat and allow to gently simmer.
- Put a piece of damp paper towel on a clean plate and set your digital thermometer on top.
- Stir the mixture with the spatula every 20-30 seconds. This will ensure that the egg whites do not cook on the side of the bowl and the heat is evenly distributed. Don’t walk away and do something else. You will end up with little bits of cooked egg white in your buttercream which look very ugly on the front of a cake.
- After about 5 minutes, insert your digital thermometer into the middle of the mixture (keep it off the bottom of the bowl) and take a temperature check.
- Clean your thermometer with the damp paper towel. Continue to stir and check the temperature at regular intervals until the mixture reaches 75 C / 167 F.
- Whip the meringue
- Turn off your burner, pick up your mixer bowl, give the base a quick wipe with a tea towel (careful as it will be hot) and then put it on your stand mixer.
- Lower the whisk attachment and turn the mixer on to medium speed (4 on a KitchenAid) for one minute (this builds the air bubbles) before turning up to medium high (6 on a KitchenAid) for 2 minutes. Turn off the mixer, lift the whisk attachment and check that the meringue on the whisk separates from the meringue in the bowl. If not, continue mixing and checking every 30 seconds until it does but don’t over do it. Over whipped meringue will be grainy and unusable.
- Take a spatula and scrape down the sides, give it one quick whisk to incorporate (10 seconds), then remove the whisk (tap it on the side of the bowl to remove any meringue).
- Attach the paddle attachment, lower it into the bowl and turn the mixer on to the lowest speed (1 on a KitchenAid).
- Add the butter
- Take the butter out of the microwave and set it next to the mixer then start to add butter pieces bit by bit with a tablespoon until you run out.
- Add the vanilla and salt
- Set a timer for 5 minutes and leave the mixer to work its magic.
- You need to know this: DO NOT TURN THE SPEED UP! Stay on the lowest speed the whole time or you will get nasty air bubbles which again, do not look good on the front of a cake!!
- Buttercream magic
- At the end of 5 minutes you should have a beautiful smooth, shiny buttercream that is ready for filling, piping or covering cakes.
- You can now add additional flavouring and/or colours or use it as it is. Just don’t let it sit for too long or it will lose its silkiness and develop air bubbles. If this happens, simply re-whip on the very lowest setting for about 3 minutes.
- See post for more on making ahead, flavouring, storage and troubleshooting (see the FAQs).