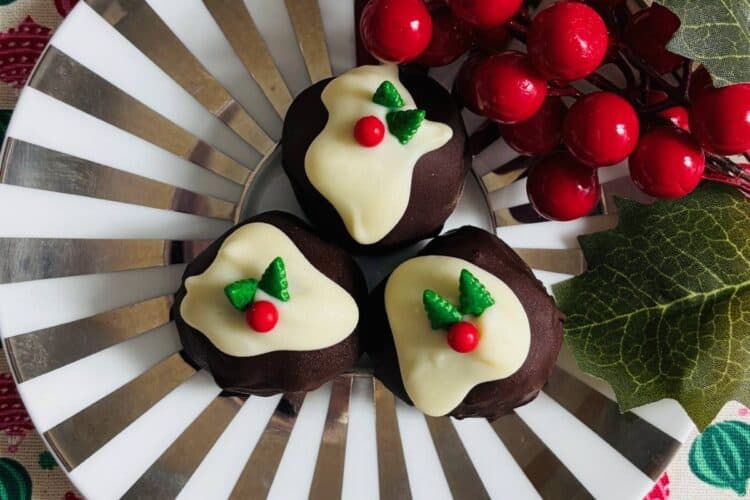
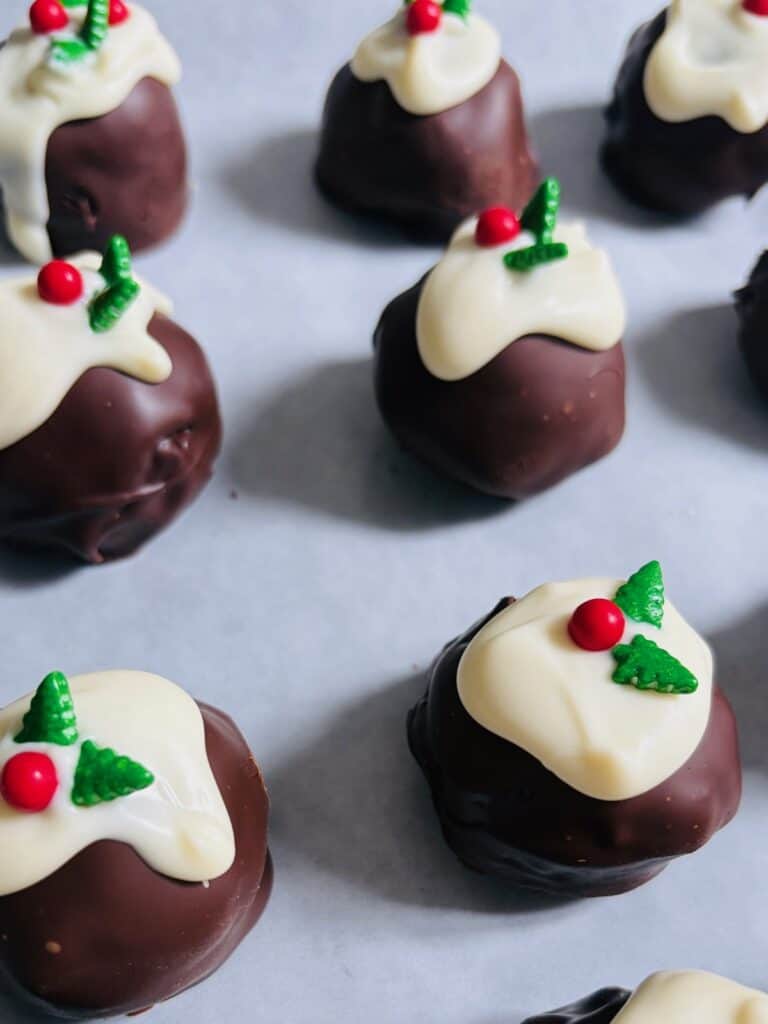
Indulgent little Christmas Pudding Truffles. They’re easy to make, perfect for gifting to friends and neighbours as well as serving with coffee on Christmas Day or of course a festive themed Afternoon Tea. Watch the promo video at the bottom of the recipe.

The perfect little Christmas treat
The first time I had these was when I was a single girl living in Brisbane and I was invited to an Urban Family Christmas party at my gorgeous (and also single at the time) friend Samantha’s apartment overlooking the Brisbane River. Her mum Mary had brought along a batch of these little Christmas pudding balls (as well as an incredible 7 layer dip) and I devoured them.
Anyway after questioning (cornering) Mary for a good 30 minutes on what was in these incredible little Christmas pudding truffles and how to make them I came away with the recipe and 18 years on my love affair has continued with these fun little Christmas treats.
Here’s why you’ll love them too
Super easy –use a storebought Christmas pudding mixed with a simple chocolate ganache
No bake – just mix, roll, dip and drizzle
Packed full of festive flavour – All the flavours of traditional Christmas pudding mixed with orange zest and chocolate ganache for the ultimate indulgence.
A great gift – The recipe makes 30 so you’ll have plenty to give away as Christmas treats for friends and family.
Make ahead magic
These are a great festive treat to make ahead. Simply store the truffles in a sealed container in the fridge for up to 2 weeks. You can also freeze the balls after the rolling stage then just defrost then dip in melted chocolate, drizzle with white chocolate and finish with a holly garnish.
Good to know
You will need a stand mixer with a paddle attachment for this recipe.
Resting the mixture makes the truffles easier to roll (and less messy)!
Digital scales are important for accuracy.
Use good quality dark chocolate for best results.
You can find similar holly sprinkles at your local bakery supply store. If you can’t find them then use glace red and green cherries instead. Simply snip off what you need with scissors or a small knife.

Other delicious Afternoon Tea recipes to make
Smoked Salmon Finger Sandwiches
How to make Little Christmas Pudding Truffles
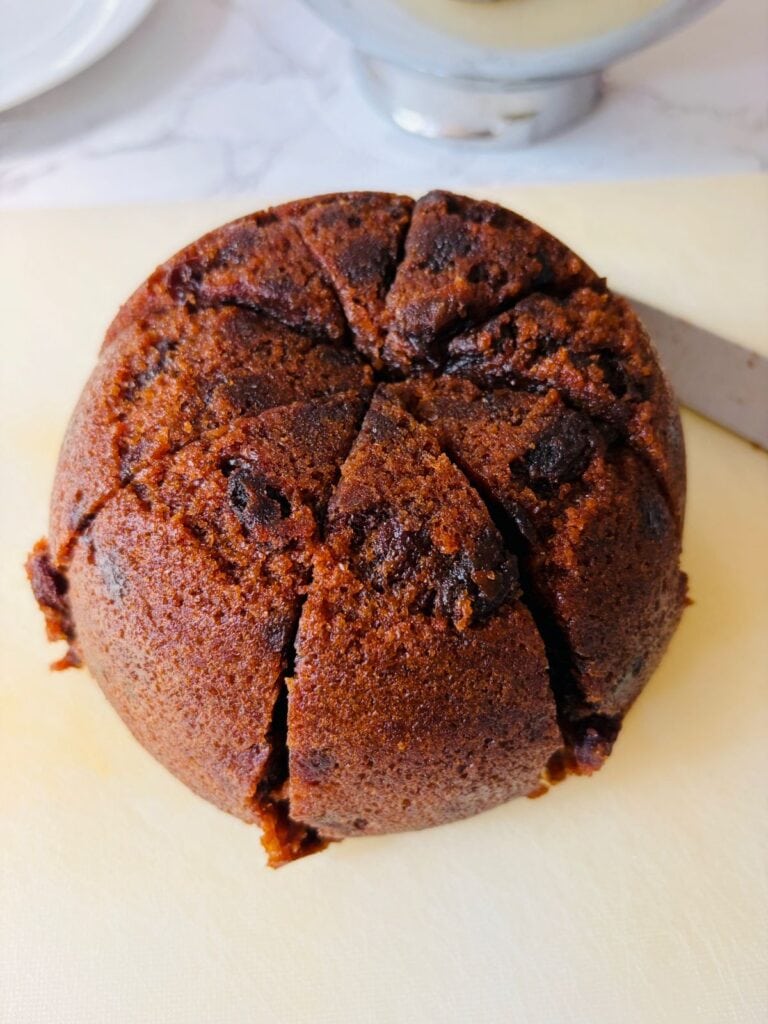

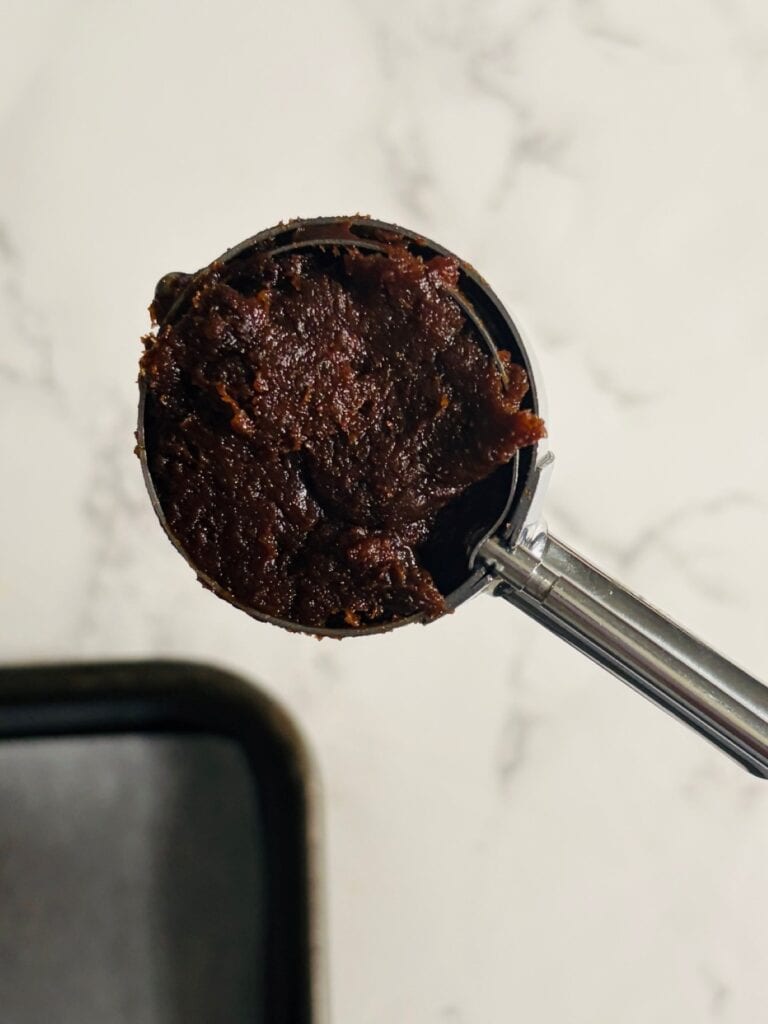
Remove the pudding from its container then cut it into medium sized pieces. Place it in the bowl of a stand mixer fitted with the paddle attachment.
Add the orange zest then set aside while you make the ganache.
Make the ganache
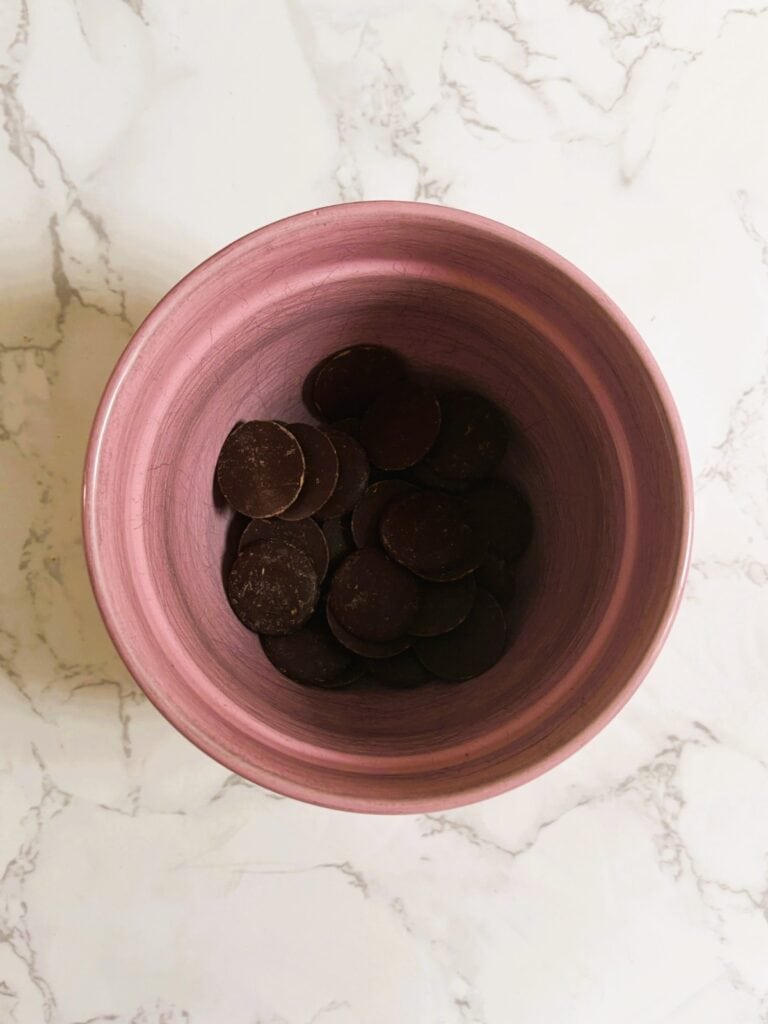
Wake up the chocolate: Measure 100g / 3.5 oz of the chocolate buttons into a microwave safe bowl and heat on HIGH (900w) for 30 seconds. Stir. Heat again for a further 20 seconds (HIGH), stir again, then leave in the microwave so the chocolate isn’t affected by the temperature in your kitchen. NOTE: The chocolate will not be melted at this stage but it will have ‘woken up’ so it will be a lot easier to incorporate when you add the hot cream.
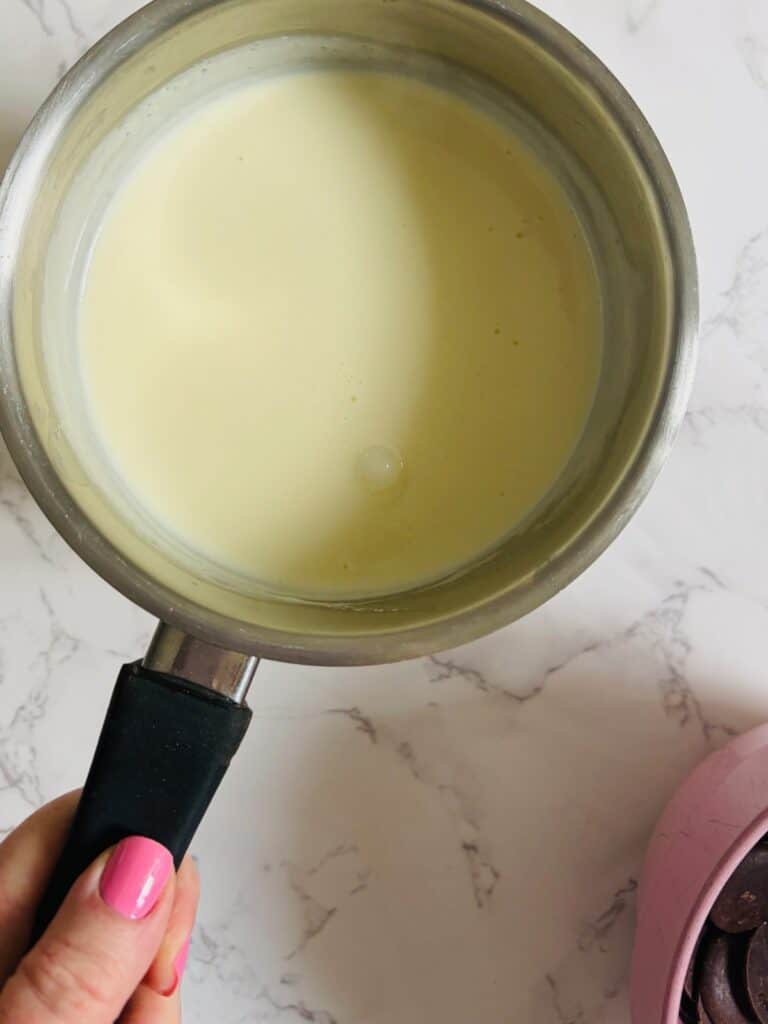
Heat the cream: Place the cream in a small saucepan. Heat over low heat stirring occasionally until the cream is very hot to touch.
Combine the chocolate and cream
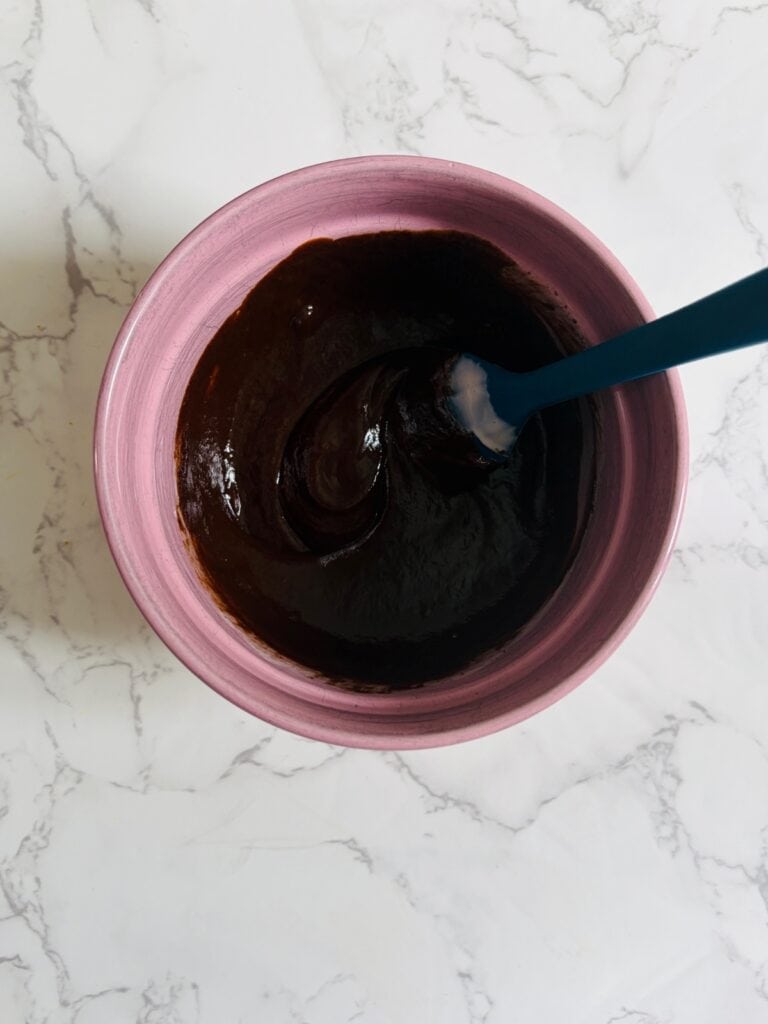
Remove the bowl with the chocolate from the microwave. Pour over the hot cream and let it sit for 30 seconds.
Now take a spatula or spoon and stir until the chocolate is completely melted and it has a smooth, glossy appearance.
TIP: If for some reason your chocolate is still not fully incorporated, place the bowl back in the microwave and heat for 20 seconds on HIGH (900w). Stir well then check again. Repeat the process with 10 second bursts (stirring in between each burst) until no chocolate remains.
Add the ganache
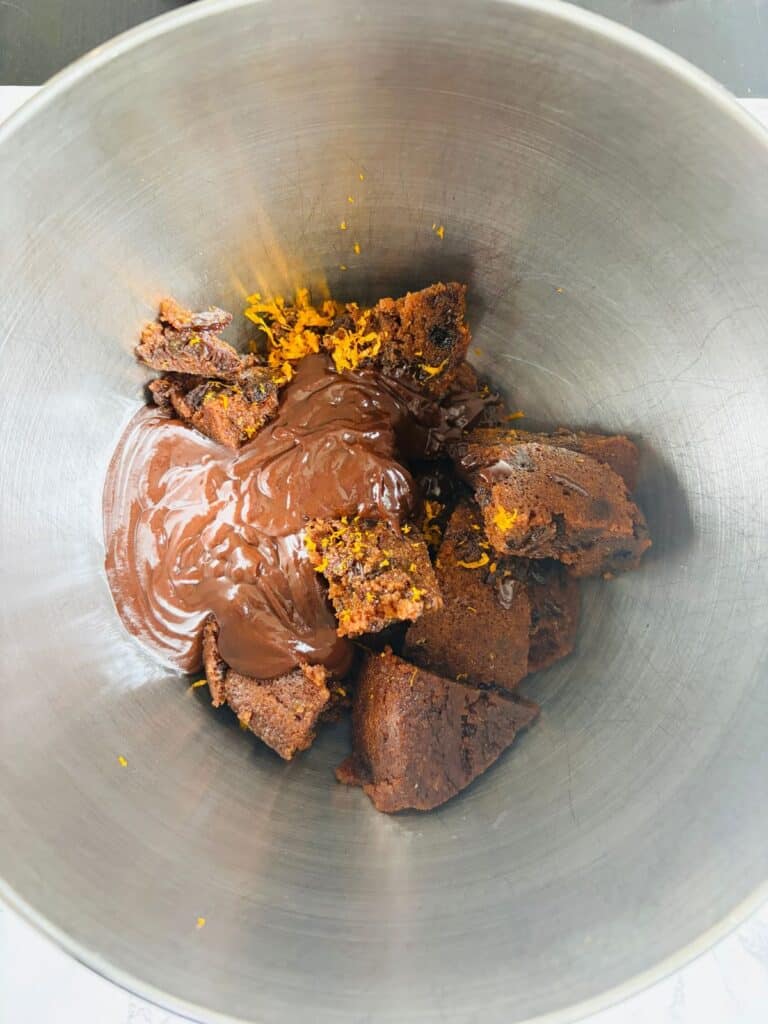
Pour the warm ganache over the pudding and orange zest.
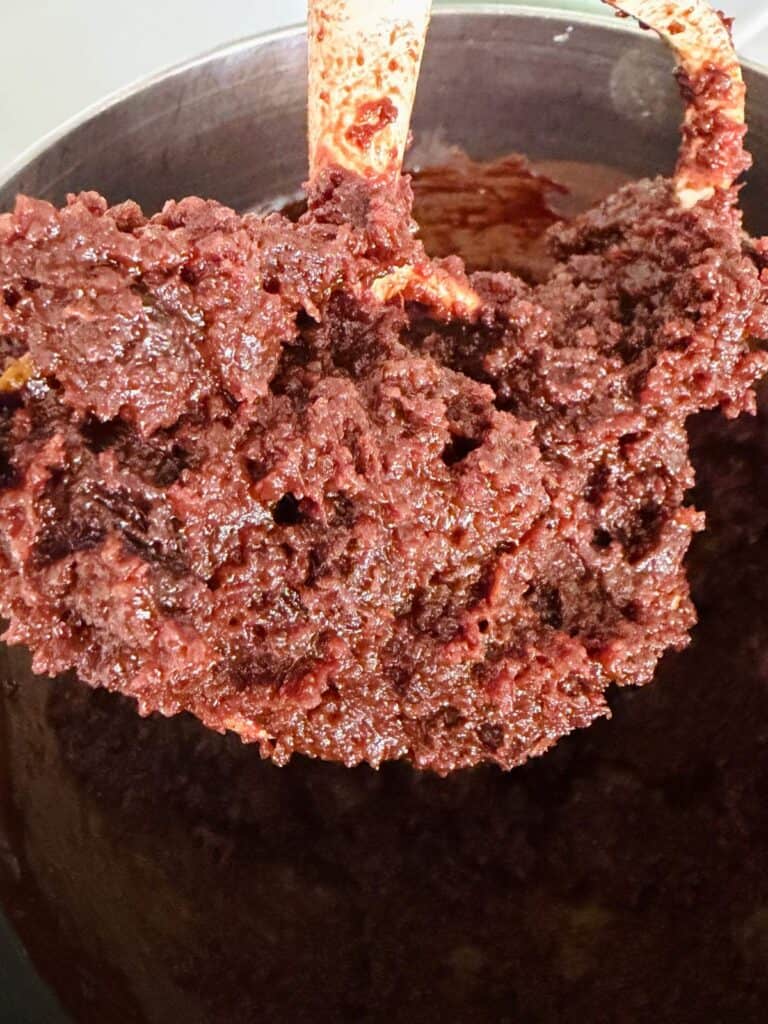
Mix on low speed for 20 to 30 seconds until well combined.
Scrape down the beater then remove the bowl from the stand mixer.
Rest the mixture
Cover the bowl with plastic wrap and place it in the fridge for 90 minutes to firm up (this will make rolling the truffles easier).
Roll the the little Christmas pudding truffles
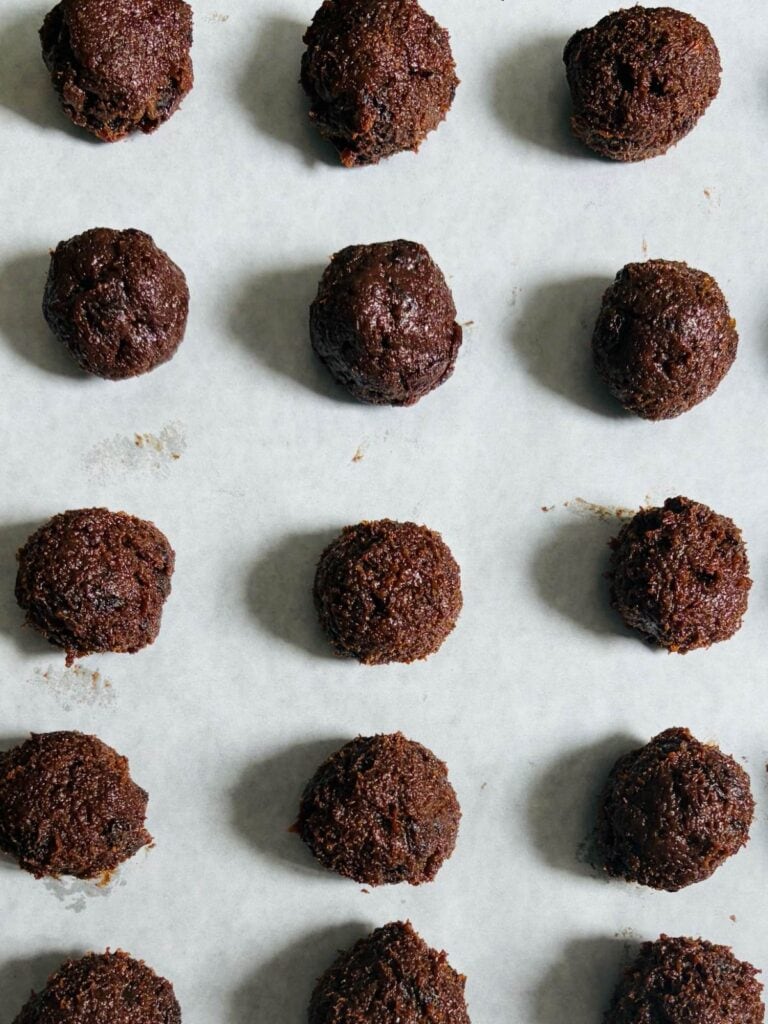
Line a large tray with baking paper.
Remove the bowl of mixture from the fridge. Take a small amount of mixture (use a small ice cream scoop or tablespoon for consistency) and roll it into a ball. Place on the tray. Repeat until all the mixture has been used. TIP: Washing your hands every 10 balls or so will make them easier to roll. Don’t worry if the truffles look a bit rough as you will be able to re-roll them once they’ve firmed up in the fridge (next step).
Firm up the truffles
Place the tray in the fridge (uncovered) for 30 minutes.
Melt the chocolate
Remove the tray from the fridge then give the truffles another quick roll to smooth out their edges. Put them on a plate then add a fresh sheet of baking paper to the tray and set aside.
Place the remaining chocolate buttons in a small microwave safe bowl deep enough to accommodate dipping the truffles. Microwave for 30 seconds on HIGH (900w) power, stir. Repeat again for 30 seconds, stir, then repeat again for 30 seconds until chocolate is completely melted. NOTE: Microwaves vary in power so always keep an eye on your chocolate so it doesn’t burn. You may need to reduce the time to be on the safe side – it will melt eventually!.
Dip the Little Christmas Pudding Truffles
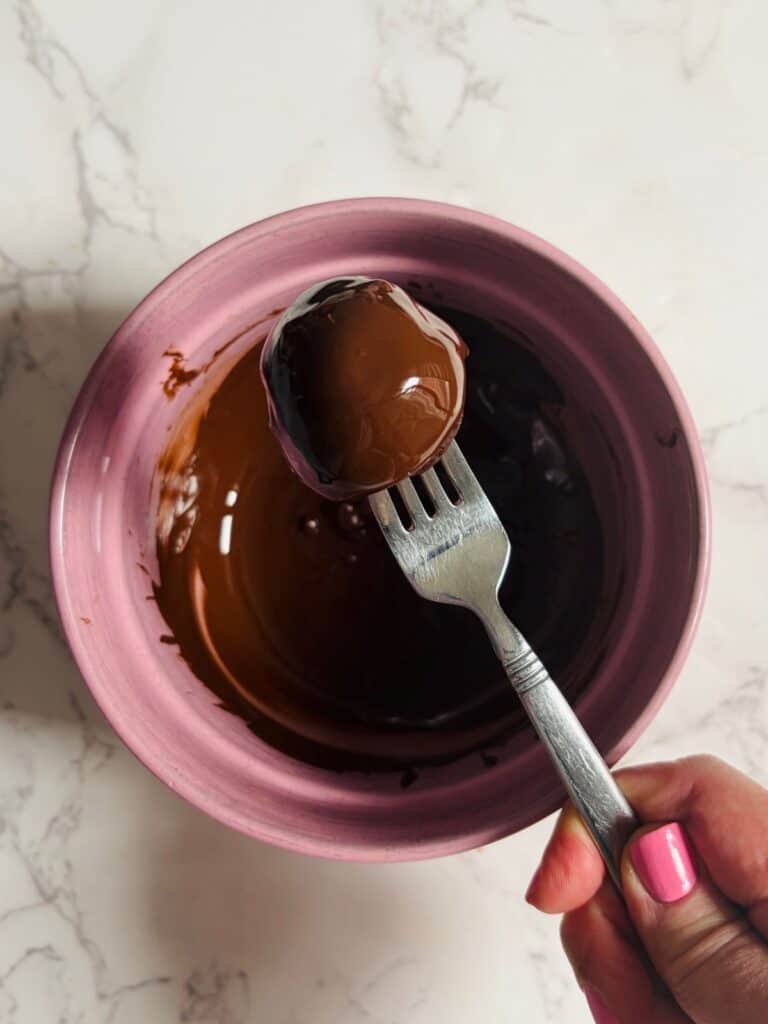
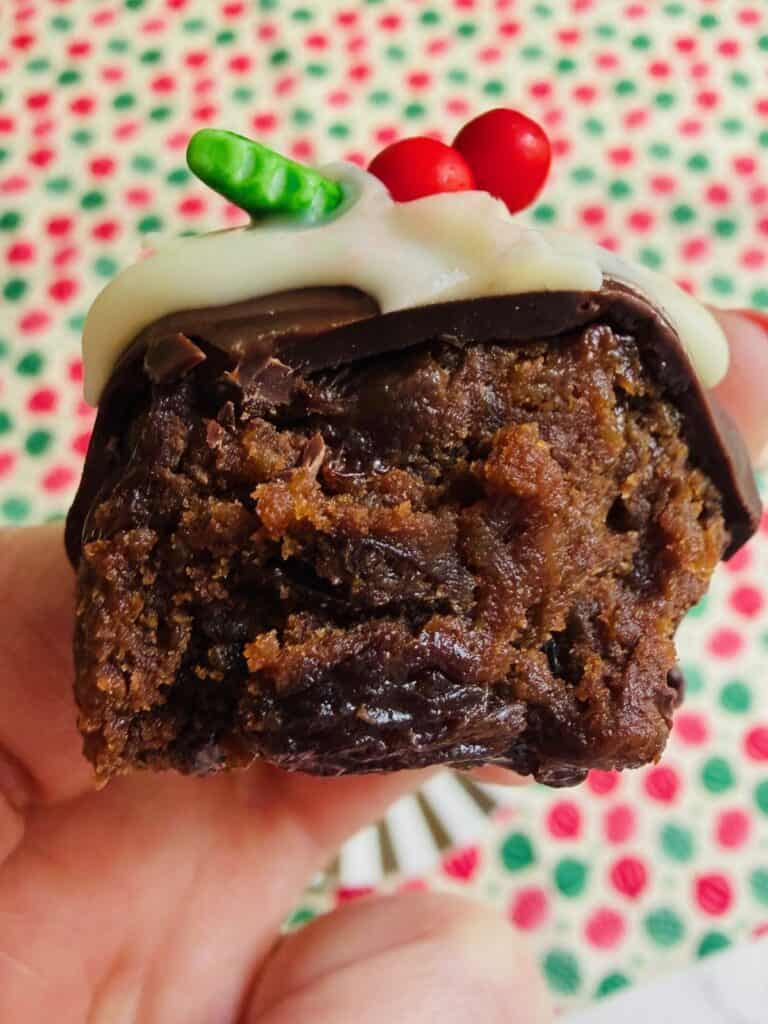
Insert a small fork or skewer into the top of the truffle then dip it into the melted chocolate. Allow it to run off the truffle then use your fingers to ease out the fork or skewer (the top will get covered in white chocolate so no need to worry about finger marks). Place the truffle on the tray. Repeat with remaining truffles. TIP: If the chocolate starts to thicken reheat it for 20 seconds in the microwave, stir before using.
Set
Place the tray back in the fridge for 15 minutes or until the chocolate is completely set.
Trim
Remove the tray from the fridge. Take a small knife and trim off any excess chocolate from the bottom on the truffles if required. Place them on a clean tray or plate.
Add the white chocolate
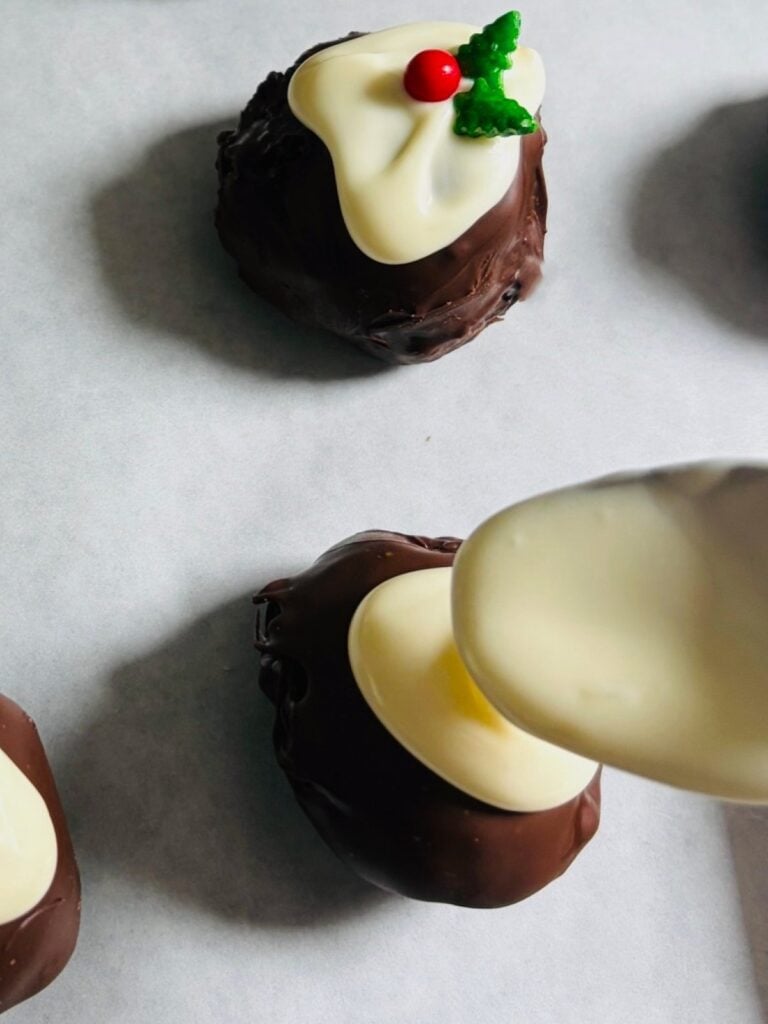
Measure the white chocolate into a small microwave safe bowl. Heat on HIGH (900w) in 30 second bursts, stirring between each burst until completely melted (just like you did for the dark chocolate).
Take a small teaspoon then drizzle a little over the top of four truffles; guiding it down the sides with the back of the spoon. Garnish with the holly sprinkle decorations.
Repeat the process with the remaining truffles working with only four at a time so the white chocolate doesn’t set before you have a chance to add the garnish.
Set (again)
Leave the truffles to set on your bench before placing then in an airtight container lined with baking paper.
Store the Little Christmas Pudding Truffles
Store the truffles in a sealed container in the fridge for up to two weeks.
Freeze
You can freeze the Little Christmas Pudding truffles after the first rolling stage in a sealed container for up to 1 month. Defrost overnight on your bench before continuing from the ‘melt the chocolate’ step above.

Little Christmas Pudding Truffles
30
servings30
minutes0
minutes135
minutesEquipment
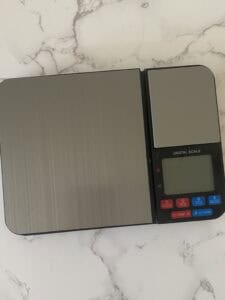 Digital scales
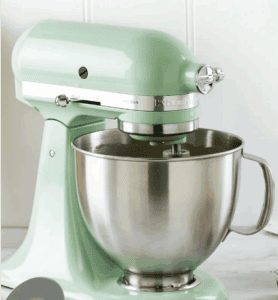 Stand mixer with paddle attachment
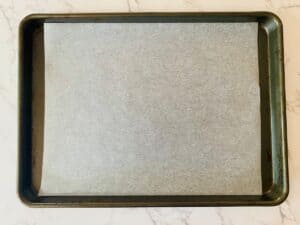 Tray lined with baking paper
Other equipment
Microwave safe bowl
Small ice cream scoop (4cm diameter) or tablespoon
Small saucepan
Airtight container (for storing)
Keep the screen of your device on
Ingredients
700 g 1 1/2 lb Christmas pudding
450 g 1 lb dark chocolate buttons
100 ml 3 3/8 fl oz cream
1 1 orange, zested
120 g 4 1/4 oz white chocolate buttons
Holly and berry sprinkles
TIP: See my post for photos and watch the video at the bottom of the recipe
Directions
- Remove the pudding from its container then cut it into medium sized pieces. Place it in the bowl of a stand mixer fitted with the paddle attachment.
- Add the orange zest then set aside while you make the ganache.
- Make the ganache
- Wake up the chocolate: Measure 100g / 3.5 oz of the chocolate buttons into a microwave safe bowl and heat on HIGH (900w) for 30 seconds. Stir. Heat again for a further 20 seconds (HIGH), stir again, then leave in the microwave so the chocolate isn’t affected by the temperature in your kitchen. NOTE: The chocolate will not be melted at this stage but it will have ‘woken up’ so it will be a lot easier to incorporate when you add the hot cream.
- Heat the cream: Place the cream in a small saucepan. Heat over low heat stirring occasionally until the cream is very hot to touch.
- Combine the chocolate and cream
- Remove the bowl with the chocolate from the microwave. Pour over the hot cream and let it sit for 30 seconds.
- Now take a spatula or spoon and stir until the chocolate is completely melted and it has a smooth, glossy appearance.
- TIP: If for some reason your chocolate is still not fully incorporated, place the bowl back in the microwave and heat for 20 seconds on HIGH (900w). Stir well then check again. Repeat the process with 10 second bursts (stirring in between each burst) until no chocolate remains.
- Add the ganache
- Pour the warm ganache over the pudding and orange zest.
- Mix on low speed for 20 to 30 seconds until well combined.
- Scrape down the beater then remove the bowl from the stand mixer.
- Rest the mixture
- Cover the bowl with plastic wrap and place it in the fridge for 90 minutes to firm up (this will make rolling the truffles easier).
- Roll the truffles
- Line a large tray with baking paper.
- Remove the bowl of mixture from the fridge. Take a small amount of mixture (use a small ice cream scoop or tablespoon for consistency) and roll it into a ball. Place on the tray. Repeat until all the mixture has been used. TIP: Washing your hands every 10 balls or so will make them easier to roll. Don’t worry if the truffles look a bit rough as you will be able to re-roll them once they’ve firmed up in the fridge (next step).
- Firm up the truffles
- Place the tray in the fridge (uncovered) for 30 minutes.
- Melt the chocolate
- Remove the tray from the fridge then give the truffles another quick roll to smooth out their edges. Put them on a plate then add a fresh sheet of baking paper to the tray and set aside.
- Place the remaining chocolate buttons in a small microwave safe bowl deep enough to accommodate dipping the truffles. Microwave for 30 seconds on HIGH (900w) power, stir. Repeat again for 30 seconds, stir, then repeat again for 30 seconds until chocolate is completely melted. NOTE: Microwaves vary in power so always keep an eye on your chocolate so it doesn’t burn. You may need to reduce the time to be on the safe side – it will melt eventually!.
- Dip the truffles
- Insert a small fork or skewer into the top of the truffle then dip it into the melted chocolate. Allow it to run off the truffle then use your fingers to ease out the fork or skewer (the top will get covered in white chocolate so no need to worry about finger marks). Place the truffle on the tray. Repeat with remaining truffles. TIP: If the chocolate starts to thicken reheat it for 20 seconds in the microwave, stir before using.
- Set the truffles
- Place the tray back in the fridge for 15 minutes or until the chocolate is completely set.
- Trim the truffles
- Remove the tray from the fridge. Take a small knife and trim off any excess chocolate from the bottom on the truffles if required. Place them on a clean tray or plate.
- Add the white chocolate
- Measure the white chocolate buttons into a small microwave safe bowl. Heat on HIGH (900w) in 30 second bursts, stirring between each burst until completely melted (just like you did for the dark chocolate).
- Take a small teaspoon then drizzle a little over the top of four truffles; guiding it down the sides with the back of the spoon. Garnish with the holly sprinkle decorations.
- Repeat the process with the remaining truffles working with only four at a time so the white chocolate doesn’t set before you have a chance to add the garnish.
- Set (again)
- Leave the truffles to set on your bench before placing then in an airtight container lined with baking paper.
- Store
- Store in a sealed container in the fridge for up to two weeks.
- Freeze
- You can freeze the truffles after the first rolling stage (step 14) in a sealed container for up to 1 month. Defrost overnight on your bench before following the directions from step 15.
So delicious, a great addition to any Christmas celebration
Thanks so much for your lovely comment Bron. I agree – they really are delicous and a real crowd pleaser too!
How long could these sit out a room tempreture? On display
They would be OK for around 30 minutes if they came straight from the fridge and weren’t in direct sunlight or heat.