Finger sandwiches are the quiet heroes of Afternoon Tea. In this definitive guide, I’ll show you how to create beautifully refined sandwiches — the kind you’d expect in a five-star hotel — using simple techniques you can master at home.

A well-loved tradition
If you are hosting an afternoon tea at home, I strongly recommend including finger sandwiches (and perhaps a couple of additional savouries if you wish). Not only are they a cornerstone of a traditional afternoon tea menu, they are also one of the easiest and most cost-effective savoury options you can prepare.
Compared to multiple small savouries, finger sandwiches are:
- Simpler to make in larger quantities
- Easier to prepare ahead
- Economical if you stick to simple, crowd pleasing fillings such as Curried Egg, Ham & Cheese (with mustard, pickles, relish etc), Cucumber & Cream Cheese, or even just Cheese & Tomato or Cheese & Gherkin.
Done well, they deliver maximum impact with minimal stress – that’s a winner if you ask me!
In this guide
The anatomy of a 5-star finger sandwich
Five-star inspired finger sandwich recipes
Your step-by-step guide to making the best finger sandwiches
What’s important?
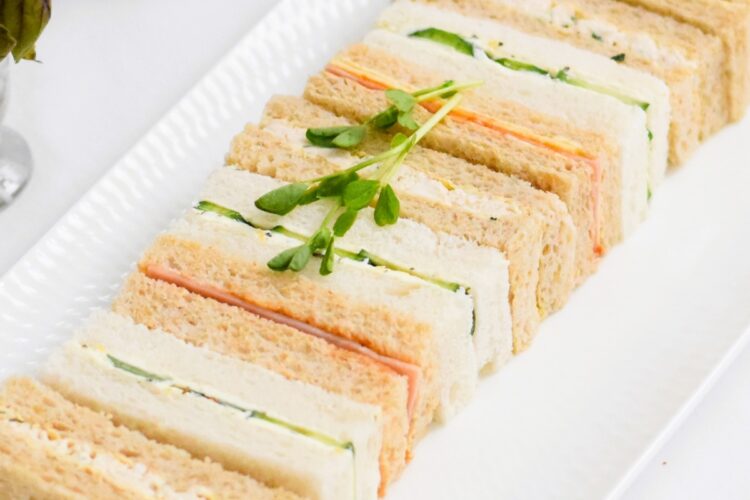
In the finest five-star hotels, afternoon tea finger sandwiches are always light, delicious, and remarkably consistent. This isn’t accidental — it’s the result of decades of refinement. Famous London hotel’s like Claridges, The Dorchester, and The Ritz, are famous for their finger sandwiches and pride themselves on using the very best ingredients sourced from Britain and around the world.
Finger sandwiches should be two-bite morsels that disappear quickly but leave a lasting impression. The bread must be soft, the filling perfectly balanced, and the flavour fresh and elegant. A dry, soggy, or overfilled sandwich would ruin the entire experience.
The Anatomy of a Five-Star Finger Sandwich
Five-star hotels tend to follow the same principles for a reason:
1. Balanced, traditional flavour selection
A classic afternoon tea menu typically includes a selection of finger sandwiches with:
- Two meat options (e.g. chicken and ham)
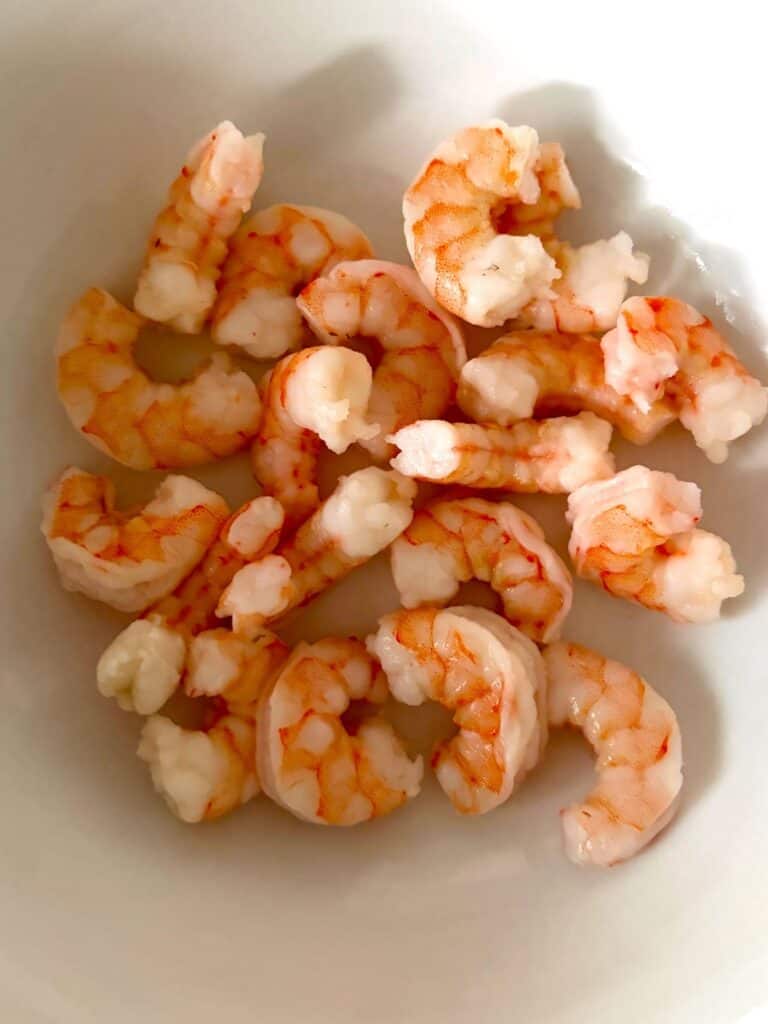
- One seafood option (commonly smoked salmon)
- One egg-based filling
- One simple vegetable filling (usually cucumber)
These flavours are light, fresh, and appropriate for the time of day.
2. The correct bread-to-filling ratio
The ideal ratio is two-thirds bread to one-third filling. This ensures that the sandwich is not filling dominant and untidy, the filling is not overwhelmed by the bread and cancels out the flavour, and all the sandwiches look alike. Bulky or chunky fillings create unstable sandwiches and ruin the visual harmony on a stand or platter. Each finger should also be the same width and height, regardless of filling.
Tip: If a filling is chunky, (such as lobster….how delicious), use a mini brioche slider or small dinner roll instead of forcing it into a finger sandwich.
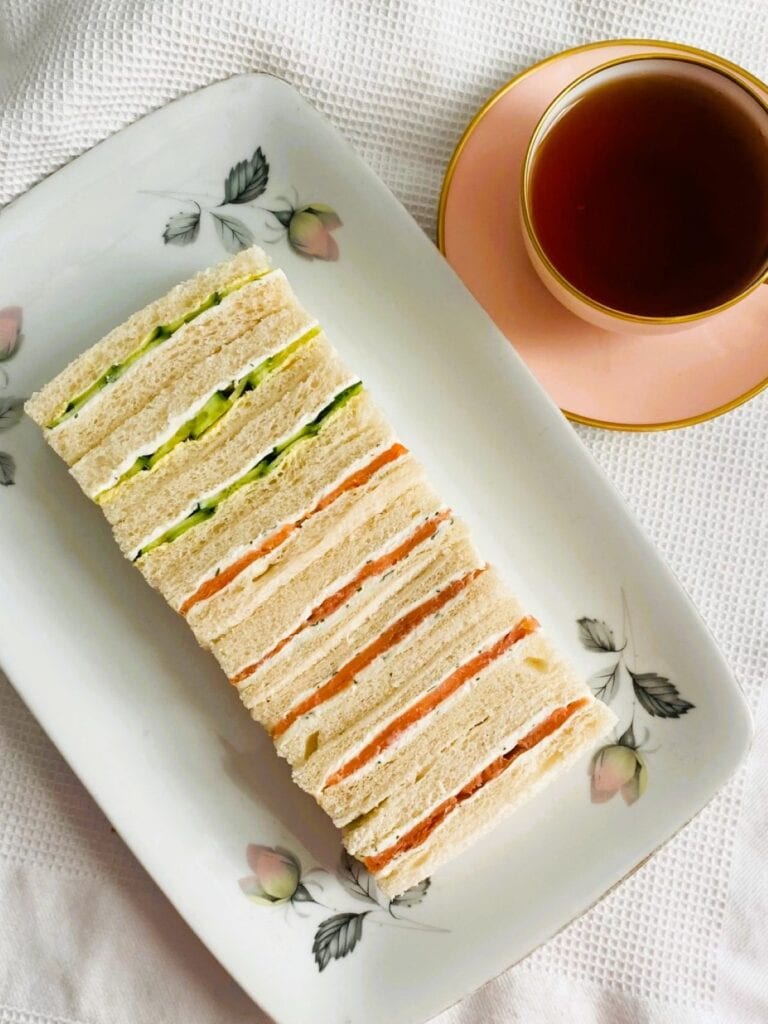
3. Simple fillings, varied breads
Five-star hotels keep fillings restrained but vary the bread:
- White
- Wholemeal
- Rye
- Multigrain
This adds visual interest and subtle flavour contrast without complicating the preparation. They also use loaves that are un-cut, instead preferring to cut the bread lengthways to avoid waste and increase efficiency. Click on this link to view a short clip showing how Claridges prepare their afternoon tea. The sandwiches are shown at 5.58 if you want to skip ahead. It’s fascinating to see sandwiches made this way. I have not tried this, instead I prefer to use sliced sandwich loaves (see tips below).
4. High-quality ingredients
Exceptional sandwiches rely on excellent ingredients:
- Best quality ham, chicken, seafood or vegetables
- Fresh herbs like parsley, dill, tarragon, or chives
- Good-quality unsalted butter, cream cheese, and whole-egg or Japanese mayonnaise
Many hotels even highlight these ingredients on their menus to enhance the luxury experience.
5. Flavoured spreads for impact
Flavoured butters, cream cheeses, mayonnaise, chutneys and spices add lots of flavour without increasing bulk. Remember, there isn’t a lot of space to work with in a finger sandwich. You’ll often find these complementing the fillings:
- Lemon butter
- Dill cream cheese
- Tarragon mayonnaise
- Cranberry butter
- Chutney, relish, spices like curry, smoky paprika
- Salt and pepper
Five-Star-Inspired Finger Sandwich Recipes
I’ve written lots of step-by-step recipes inspired by some of the finger sandwiches I have been fortunate to eat in some of the world’s most beautiful 5 star hotels. I’ve also included recipes for other sandwiches that are simple but full of flavour and eternally popular. Feel free to make a mix of both. Click on the recipe to view:
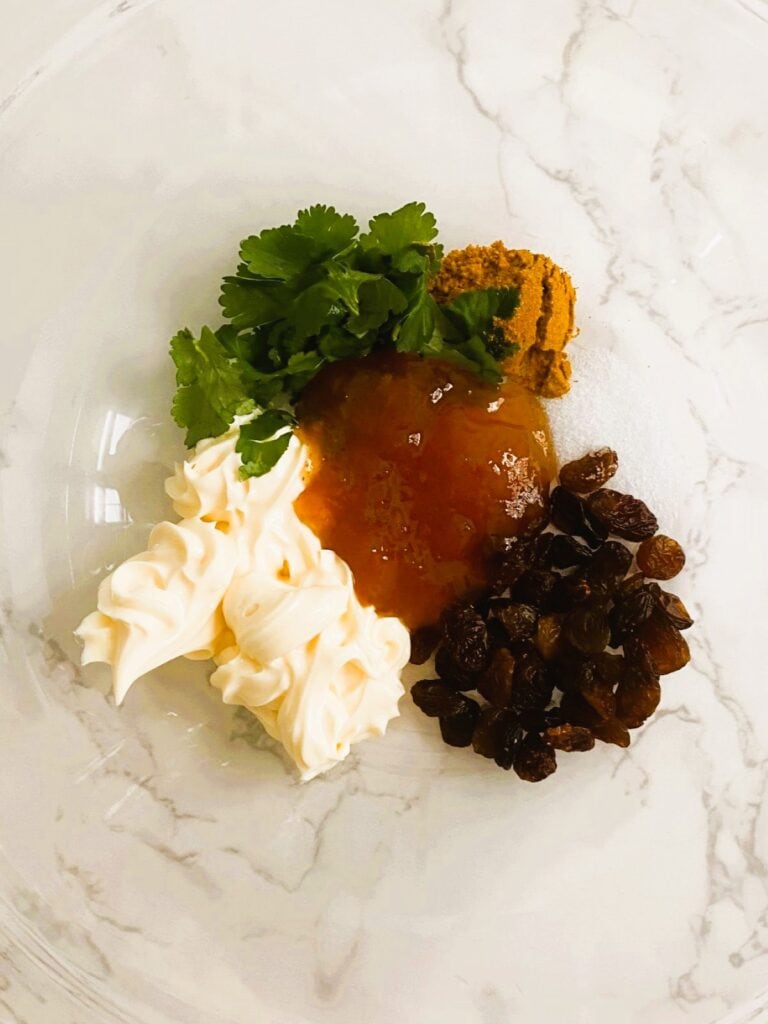
- Coronation chicken
- Turkey, cranberry & brie
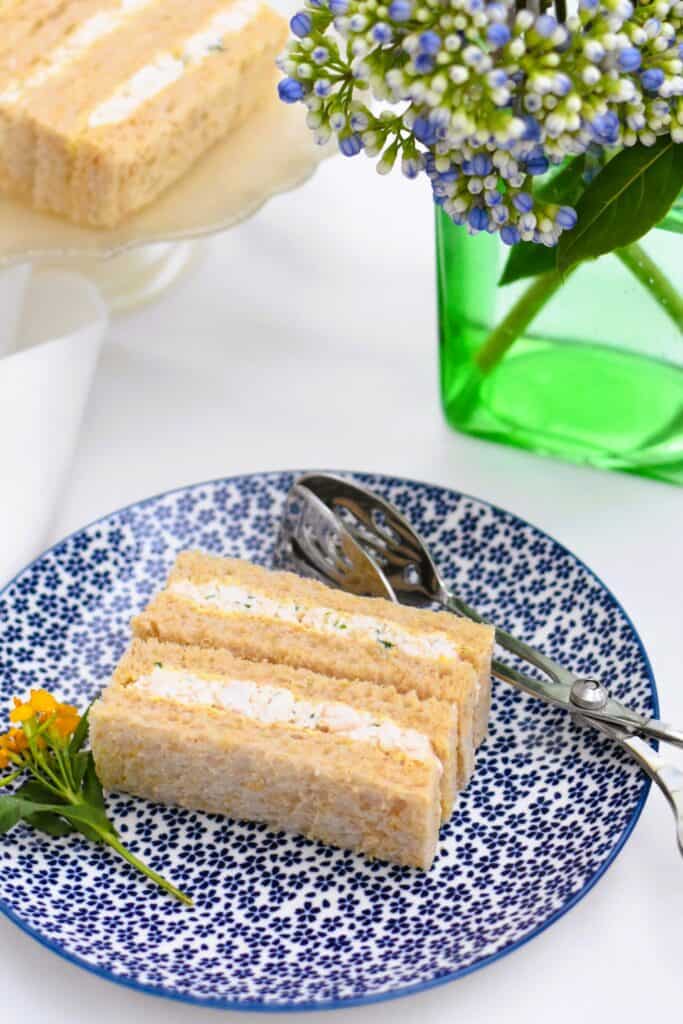
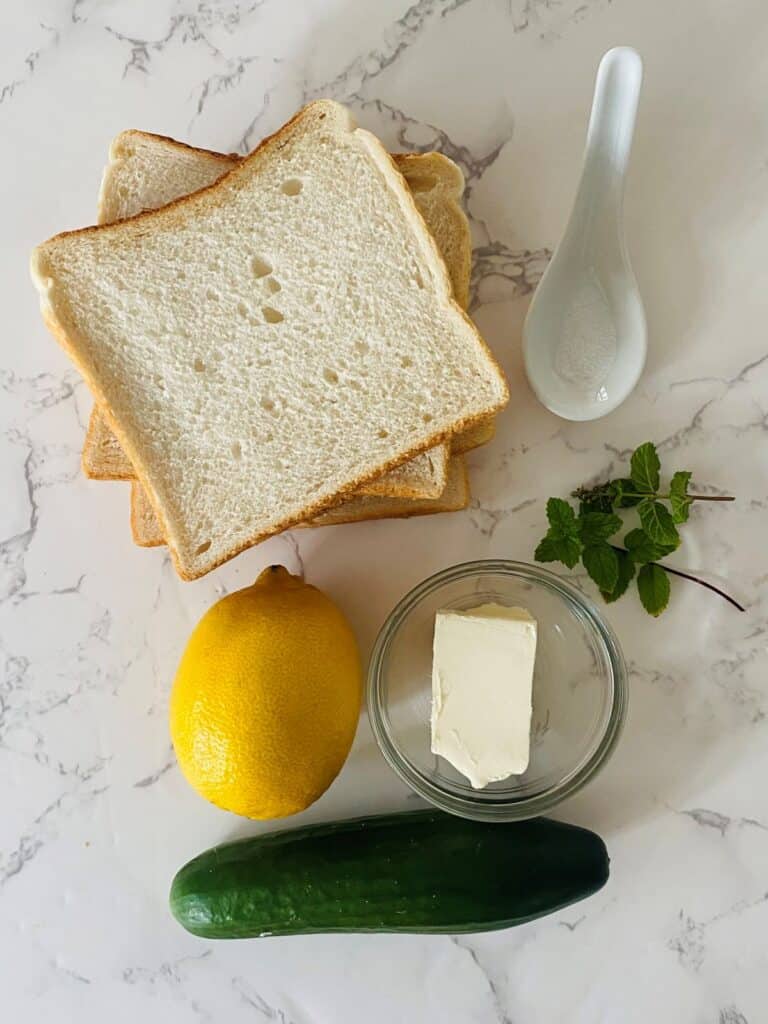
- Cucumber with mint & lemon butter
- Curried egg
- Smoked salmon
- Ham with cheddar & tomato relish
- Chicken with tarragon
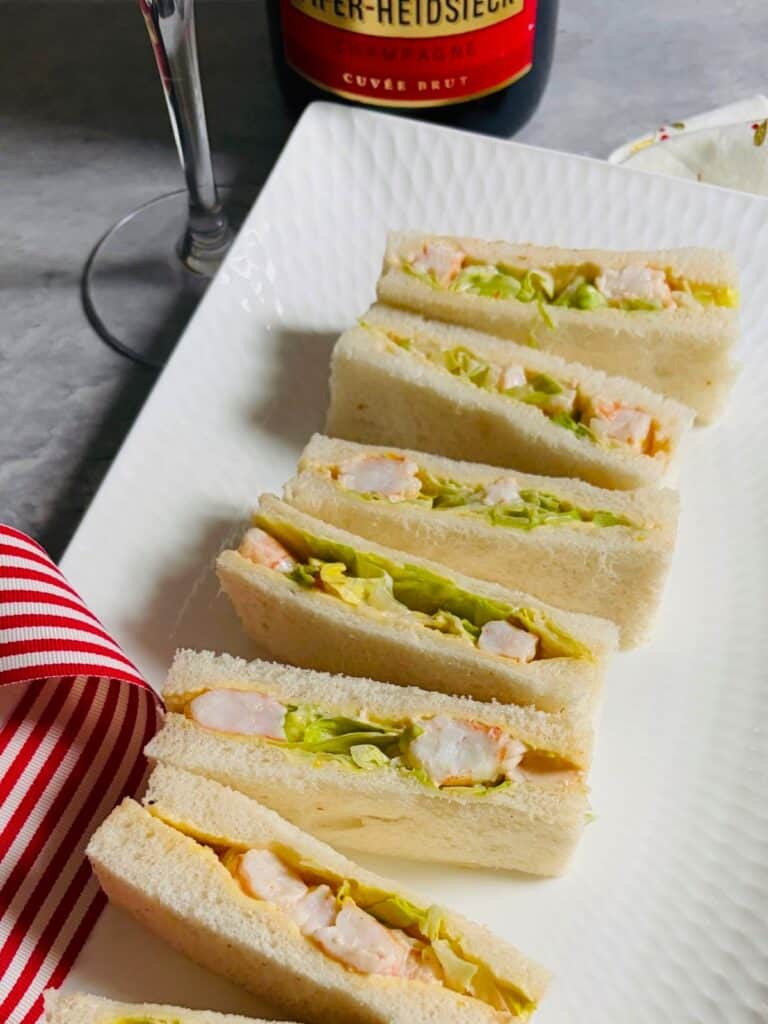
- Prawn cocktail
- Ham, cheese & mustard pickle
These are reliable, delicious and guaranteed crowd pleasers.
Your step by step guide to making the best finger sandwiches
Important: Read all the steps before you begin.
Step 1: Decide on your savoury menu
Before making sandwiches, decide whether they will be your only savoury, or served alongside other savouries such as:
Ham and mustard mini croissants
How much food should I serve and how many sandwiches will I need?
Below are some suggested Afternoon Tea combinations that allow for a minimum of 10 pieces of food per person. These are just a guide however, feel free to adapt to suit your occasion or guest numbers.
Per Person
| *Sandwiches | 2 fingers/2 flavours | 3 fingers/3 flavours | 4 fingers/4 flavours | 5 fingers/5 flavours |
| Scones | 1 or 2 flavours | 1 or 2 flavours | 1 or 2 flavours | 2 flavours |
| Savouries | 2 | 2 | 1 or 2 | 0 |
| Sweet treats | 5 | 4 | 3+ | 3+ |
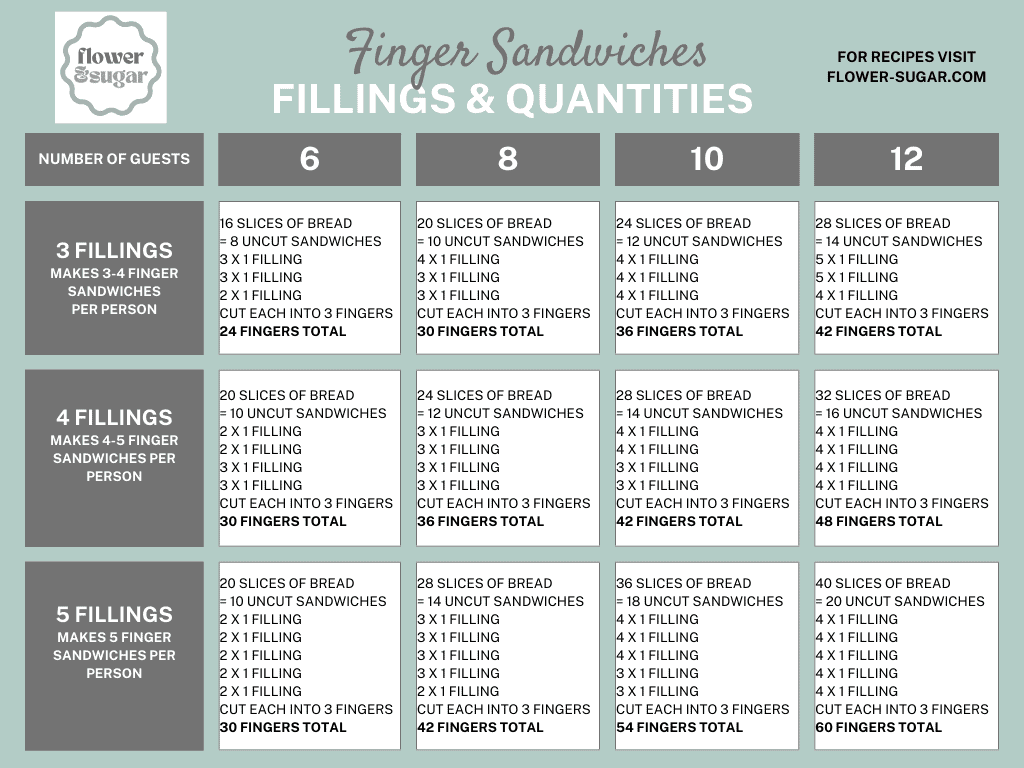
*See my Finger Sandwiches Fillings & Quantities Chart for how much bread you will need and how many sandwiches to make depending on how many flavours you wish to serve. The chart includes numbers for 3, 4 or 5 finger sandwich combinations for 6, 8, 10 and 12 guests.
If you fall between numbers, always round up — leftovers are far better than shortages.
Each sandwich filling recipe makes enough for 2 or 3 whole sandwiches (6-9 fingers), so adjust quantities according to:
- Number of guests
- Number of fillings
- Fingers per person
Step 2: Buy your ingredients
Keep it fresh
Shop for your fresh ingredients no more than two days before your afternoon tea.
Make sure you have plenty of unsalted butter plus other condiments such as relish, mustard, mayonnaise etc (if using) on hand. If not, purchase what you need and store until required.
Choose the right bread
Buy sliced SANDWICH loaves that are:
- Square not domed
- Close to the same size
- At least 700g / 25oz total weight
- As fresh as possible
Tip: Buying multiple loaves from the same brand will ensure the same slice height and area. Mix it up with white, wholemeal, multigrain or rye bread if you are making a few different flavours or just use two varieties if you prefer.
Step 3: Prepare ingredients ahead of time (if possible)
Advance preparation is critical, especially if you are hosting.
What you can prep the day before
- Flavoured butters and spreads (covered and refrigerated)
- Cream cheese mixtures and flavoured mayonnaise or cocktail sauce
- Flat fillings (ham, turkey, smoked salmon), trimmed or folded to size
- Mixed fillings such as curried egg, tuna, or chicken
Step 4: Make the sandwiches
Remove butter from the fridge 30 minutes before assembly, or soften in the microwave on 50% power in 30 second bursts. Stir between bursts.
Gather Your Equipment
You’ll need:
- A cutting board
- A sharp bread knife or knife with a serrated edge
- Softened butter and butter knife or a palette knife if you have one
- Prepared fillings
- Airtight container(s) lined with baking paper.
- Damp paper towel: Wet a number of sheets of paper towel, squeeze out the excess water.
Butter the bread
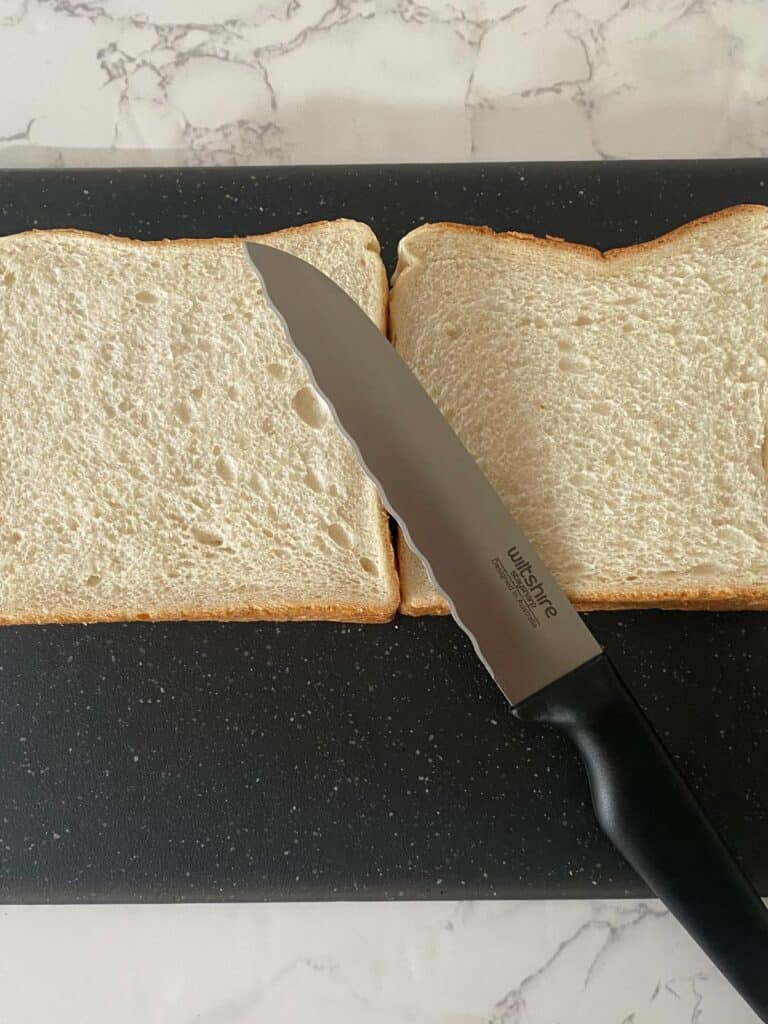
Lay two slices of bread on your board so they form a mirror image. This ensures that when the top slice is placed over the filling, all the edges line up neatly for perfectly even finger sandwiches.
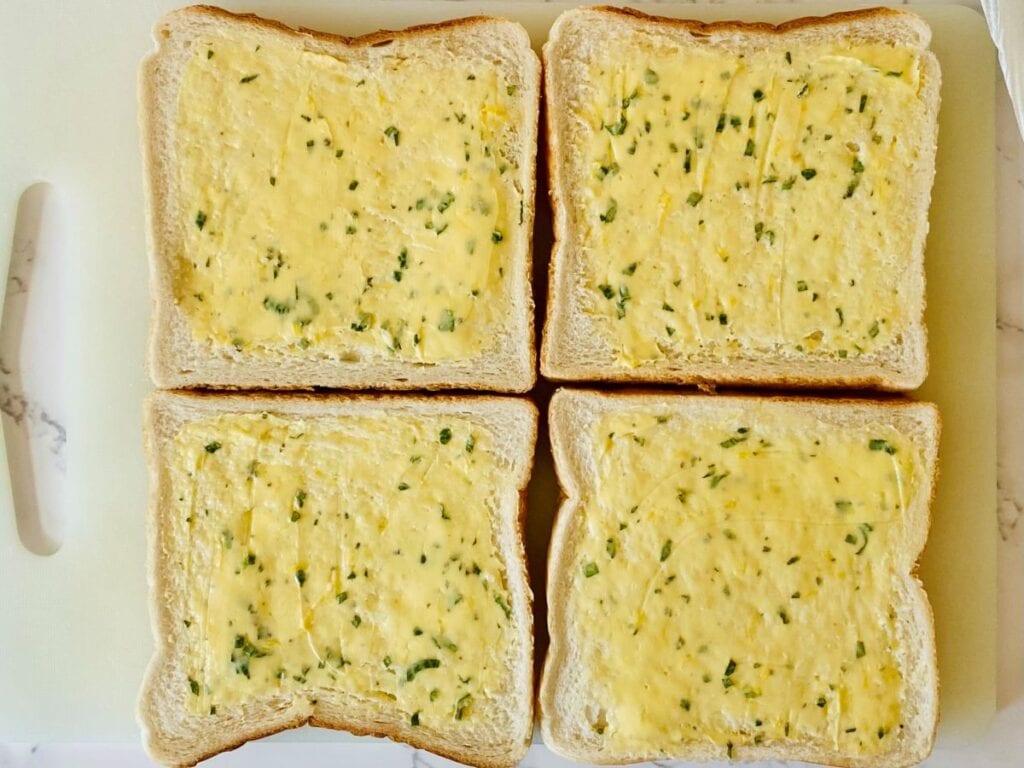
Spread each slice with softened butter or cream cheese (flavoured or unflavoured). Make sure you stay within the crusts – no point wasting butter on them as they will be removed.
Add the filling
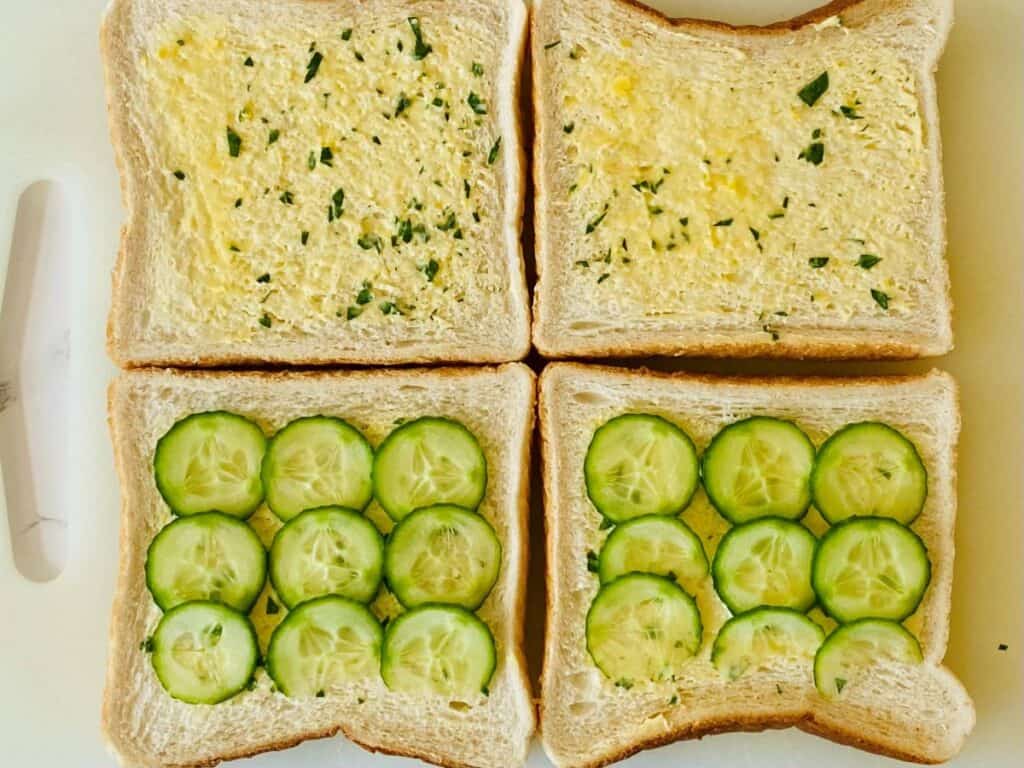
Spread the filling or lay out the filling (as per your recipe) on half of the bread slices. Take it right up to the inside edge of the crusts, it will give you a better finish.
Place the other slice of bread on top of each sandwich, ensuring all the edges line up neatly. Gently press down to seal.
Remove the crusts
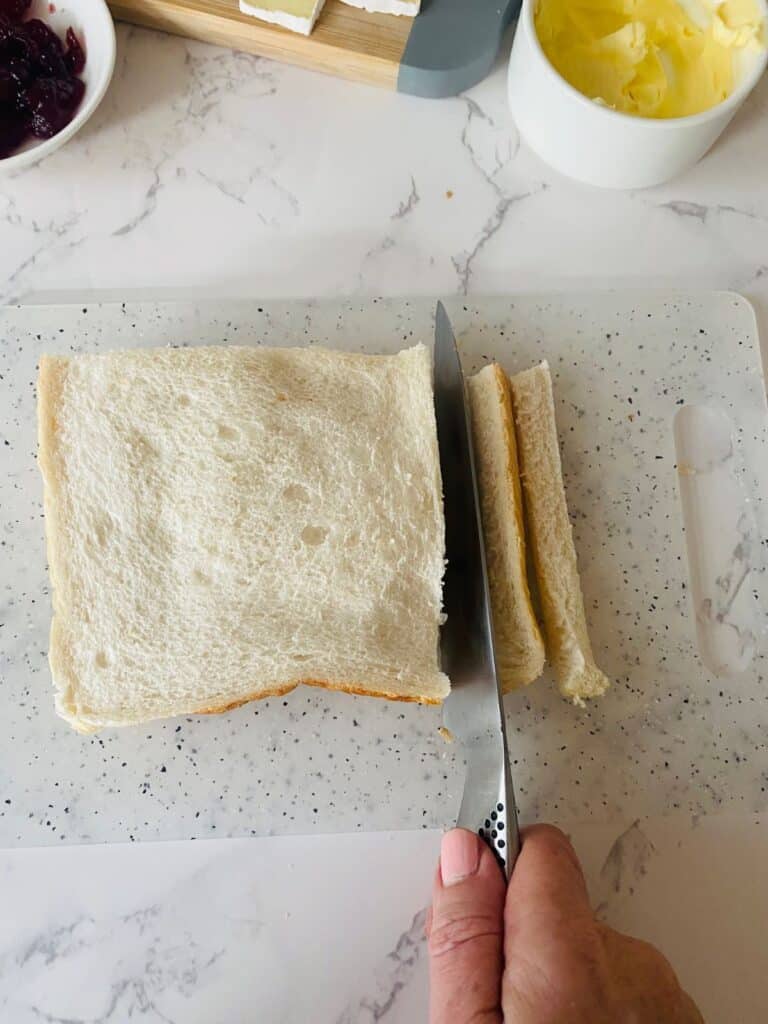
Place one hand on top of the sandwich then take a serrated/bread knife in the other and gently remove the crusts using a very light back and forth SAWING motion to cut off the crusts – DO NOT PRESS DOWN. Yes, this will take a bit longer than just pressing down and cutting as quickly as possible (like when you make yourself a sandwich at home), however the result will be high unsquashed edges just like those at fancy five star hotels!
Make each sandwich the same size
Stack one sandwich on top of the other then trim so they are the same size. Repeat if making more than two sandwiches of the same flavour.
Place in your sealed container lined with baking paper. Cover with damp paper towels and add the lid. Do not cut into fingers just yet.
Repeat the process
Make the next flavour of sandwiches following the steps in the recipe and suggestions above.
Remove the crusts. Use one of the sandwiches in the sealed container as the template and trim to the same size.
When you have made all the sandwiches
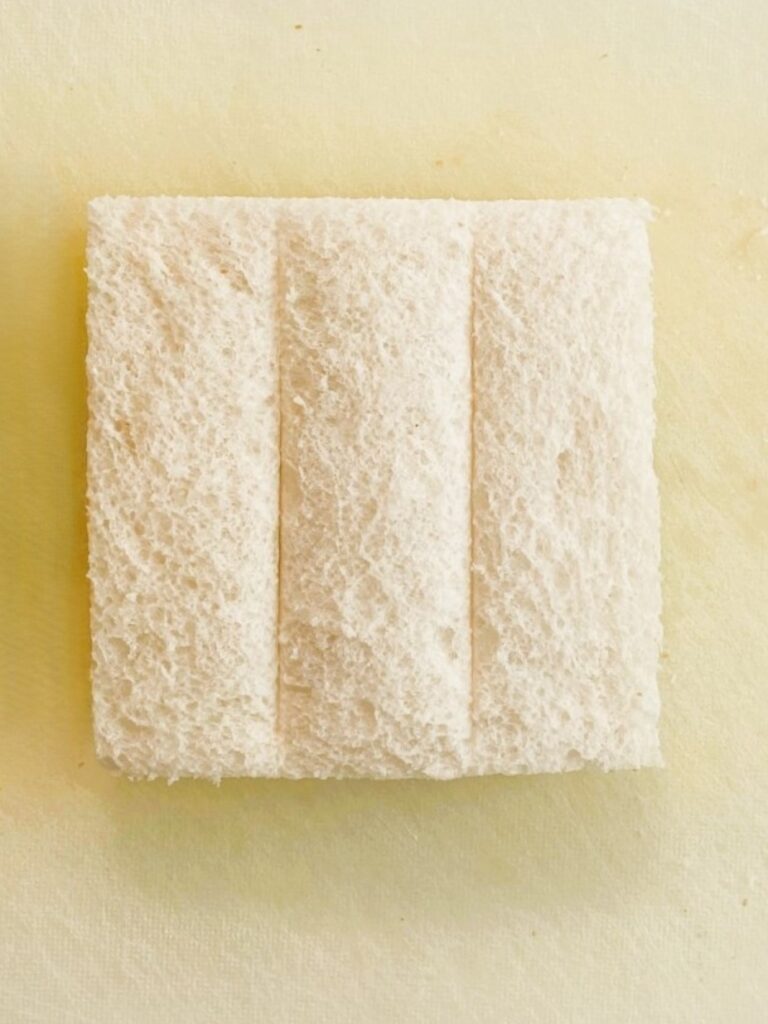
Take a sandwich and measure into thirds – use a ruler to guide you. Lightly score with your knife so you have a set of guidelines to follow (trust me, this helps A LOT).
Cut into fingers
Take your serrated edge knife / bread knife and using a very light sawing / back and forth motion (never pressing down) gently cut each sandwich into fingers. Place them on their side in the sealed container.
Repeat the steps with the remaining sandwiches. They should now all be around the same size and height.
Step 4: Store the sandwiches
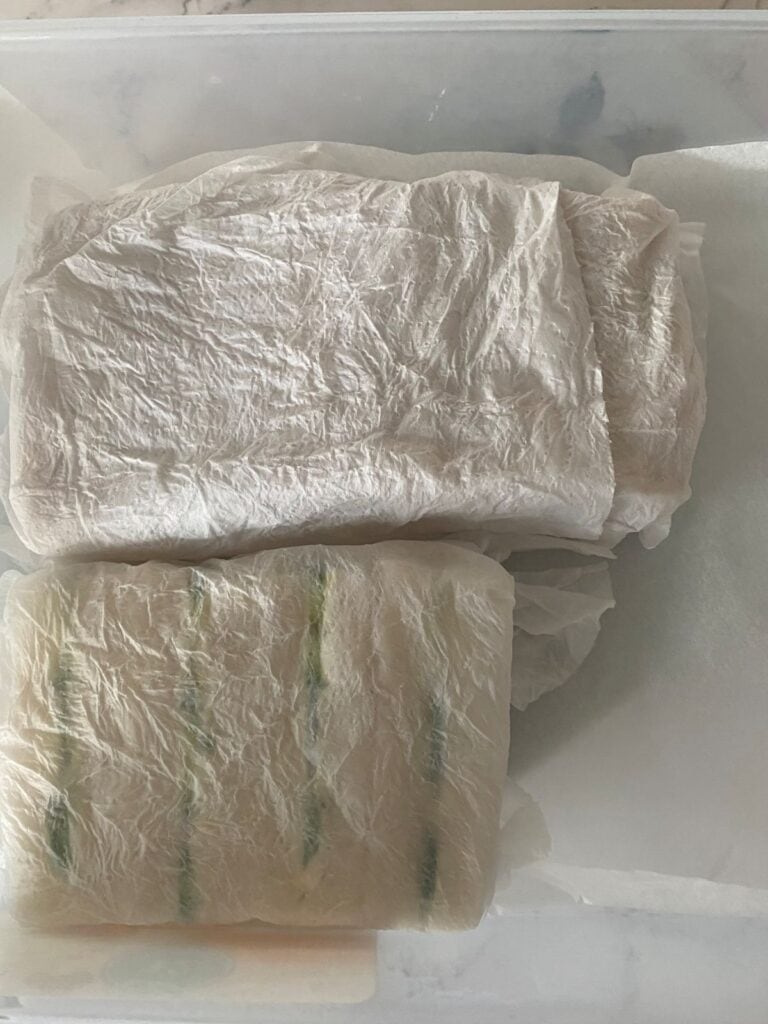
Wet a few sheets of paper towel then give them a good squeeze to remove the excess water, they should feel damp. Smooth them out then place them over the sandwich fingers. Make sure you tuck in the ends so the bread is not exposed or it will dry out. Put the lid on then store in the fridge as per the recipe(s).
Important: Some sandwiches can be stored overnight (like Ham with Cheddar and Tomato Relish) while some can only be made 1 hour ahead (like Prawn Cocktail). Make sure you check your recipes so you can factor this into your timeline.
Step 5: Serve your sandwiches

Place a mix of sandwich fingers on the bottom layer of a tiered stand, large plate or rectangular sandwich platter. Return any leftovers to the fridge. Serve.
Refresh as required
Refresh the stand and platters with spare fingers when they start to get low.
Keep any leftovers covered with damp paper towel in a sealed container in the fridge when not required.
Step 6: Final thoughts
Finger sandwiches may seem simple, but they are an integral part of an afternoon tea menu. With the right preparation, careful ratios, and thoughtful presentation, they can quietly become the highlight of the entire experience and a reliable savoury you can turn to again and again.