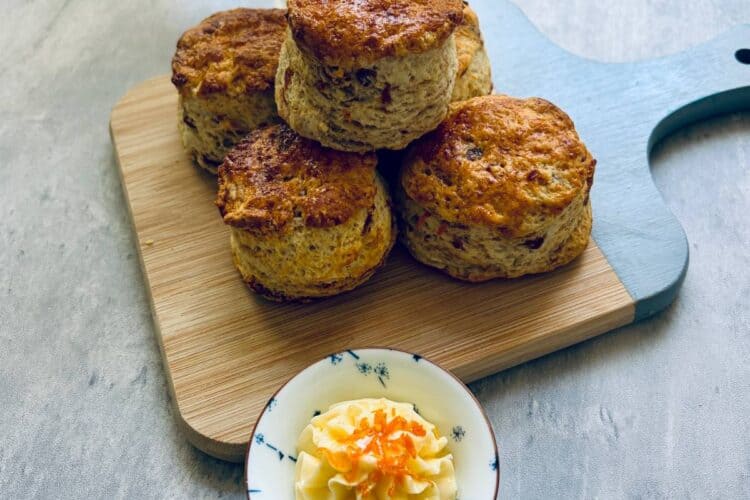
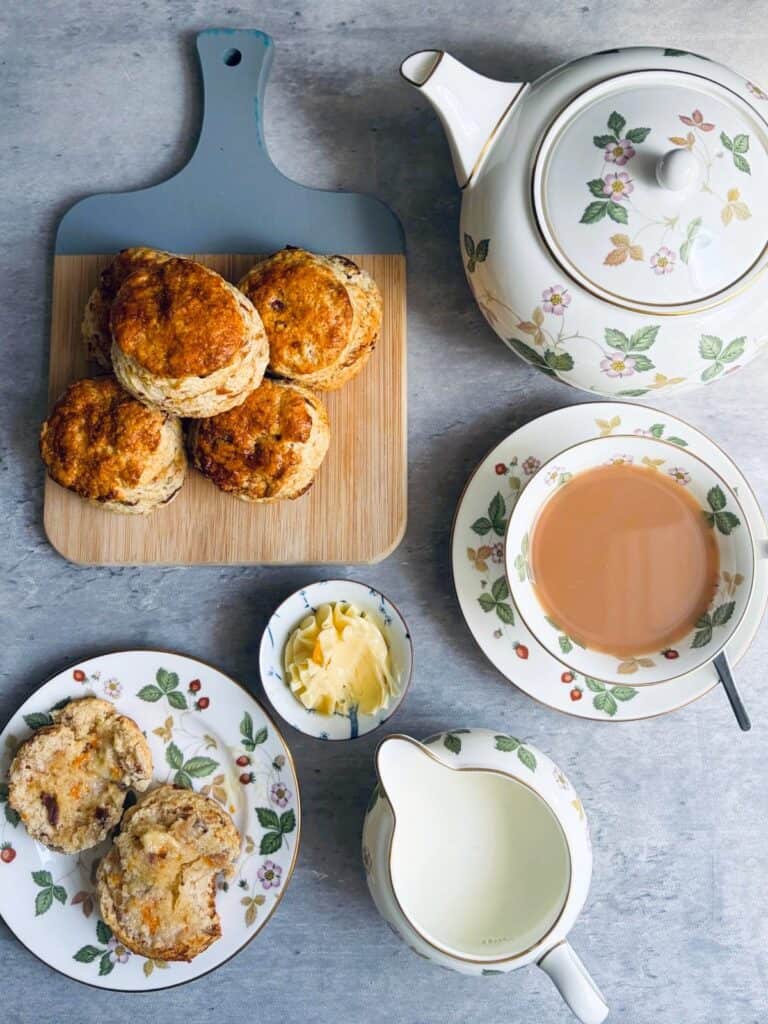
With just the right amount of sweetness, these Orange & Date Scones with Whipped Honey Butter are a beautiful twist on a classic Afternoon Tea favourite. Made using my reliable scone method for a light, fluffy texture, they’re filled with juicy dates and fresh orange zest, then served with silky whipped honey butter for an elegant finishing touch. Perfect for cosy afternoons with friends or a graceful addition to a tiered stand, this easy homemade scone recipe delivers perfect results every time.
Watch the short video below to see how to make them.
Why you’ll love these easy and delicious scones
Dates work their magic: The dates add an extra sweet hit as well as moisture. I’ve used Medjool dates in my recipe as they have a beautiful caramel flavour that really complements the orange.
Orange zest elevates: Slightly acidic, orange zest keeps the palate from getting fatigued while its oils permeate the scone.
Whipped honey butter provides an alternative topping: While I love jam and cream, the butter with its subtle sweetness and bursts of sea salt elevate the date and orange flavours to another level – so much so that you don’t miss the traditional toppings.

Good to know – Tips for making great scones every time
If you’ve not had much success with scones in the past then please read the following tips. They make such a difference to the results. They may sound a little pedantic (much like the recipe steps), but you will get the highest, fluffiest, tastiest scones you’ve ever made – I guarantee it.
Use a scale to measure ingredients to ensure accuracy: Cups can differ from country to country skewing your recipe and results.
Use fresh Self Raising flour: How old is your flour? Self Raising flour is plain flour with baking powder added to it. Baking powder loses its efficacy over time so it makes sense that if you are using old flour then your scones may fall flat.
TIP: Don’t use Self Raising flour that’s been opened longer than 6 months. Buy a fresh packet of Self Raising flour for your scones and write the date on it when you open it.
Use cold butter and milk: While a bit of a challenge to rub very cold butter into flour, it truly makes a big difference. So too does cold milk. When cold meets hot in the oven it creates steam resulting in a soft and fluffy textured scone with a good rise.
TIP: If your kitchen is warm, cut up your butter and measure out the milk as per the recipe but put it back into the fridge until you need it.
Mix with a knife not a spoon: Weird yes, but mixing with a flat-bladed knife helps to gently incorporate the ingredients without overworking the dough. This is crucial for achieving a light and fluffy texture.
Don’t knead for too long: With the previous tip in mind, don’t over work your dough. Remember that you will have to re-knead your scraps a number of times so kneading for too long at the start is risky.
Keep dough height consistent: Use a ruler to ensure your dough is the same height every time you re-form it. This will result in evenly sized scones that take the same time to cook. No more half overdone and half underdone scones.
Don’t twist the cutter: Use a stamping motion (straight down then pull up). Twisting will result in wonky scones.
Hosting an Afternoon Tea? Try these recipes
Chicken Waldorf Finger Sandwiches
How to make Orange & Date Scones with Whipped Honey Butter
Preheat the oven to 180 C fan / 350 F fan,
Read my tips for scone success (above), then prep all your ingredients and equipment so you can work quickly. This ensures the scone dough stays cool and you get a good rise and fluffy texture.
Preparation

Line a medium sized baking tray with baking paper such as Glad Bake or similar and set aside.
Find a ruler and put it on your bench.
Zest the orange. Reserve a small amount for garnishing the whipped honey butter (cover and refrigerate until required).
Roughly chop the dates. They will be broken up further once added to the flour.
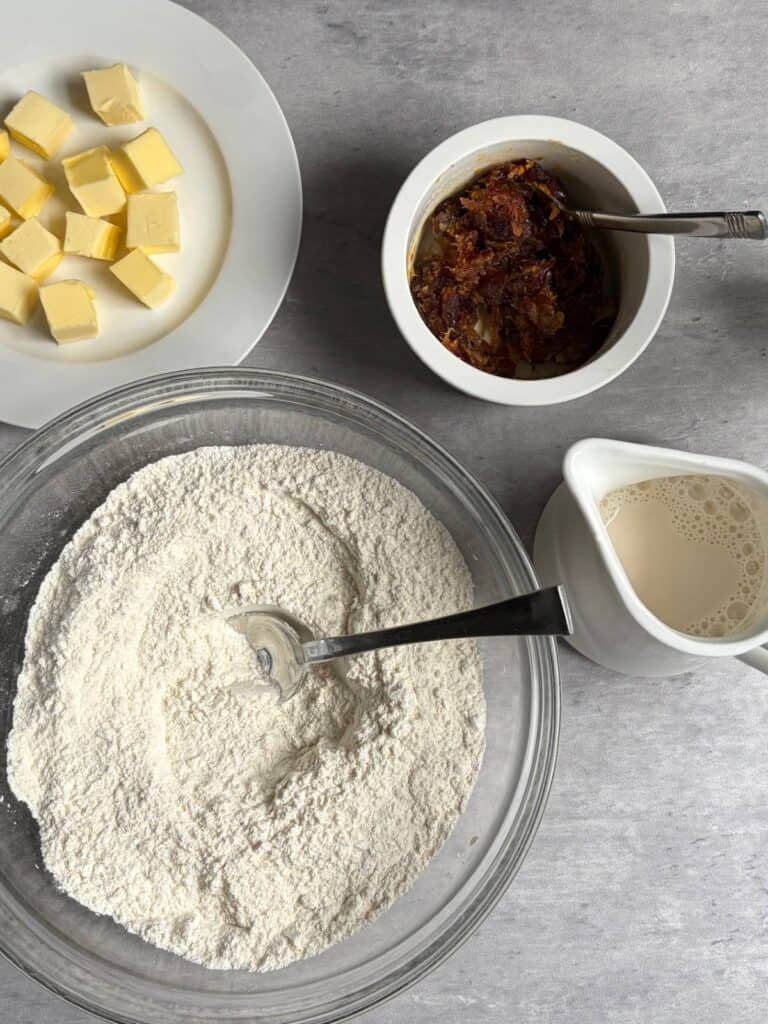
Cut the cold butter into small cubes, place in a small dish.
Place the self-raising flour in a large mixing bowl. Leave the packet on your bench as you will need a little extra to dust the board and cutter.
Weigh the sugar into a separate small bowl, add the salt then set aside.
Measure the milk into a jug, add the vanilla then set aside.
Place your 5.5cm round cutter, spoon for mixing flour/sugar (dessert spoon is fine), flat edged knife (e.g. butter knife), pastry brush and ruler on the bench in an easy to reach location.
Make the scone dough
Working quickly, add the cold butter to the flour. Using the tips of your fingers press the butter (it will be hard at first) into the flour. Keep working until all of the butter has been incorporated and the mixture resembles coarse breadcrumbs.
Add the zest, dates, sugar/salt mix and gently stir together with the spoon. Break up any larger pieces of date with the back of the spoon if you need to.
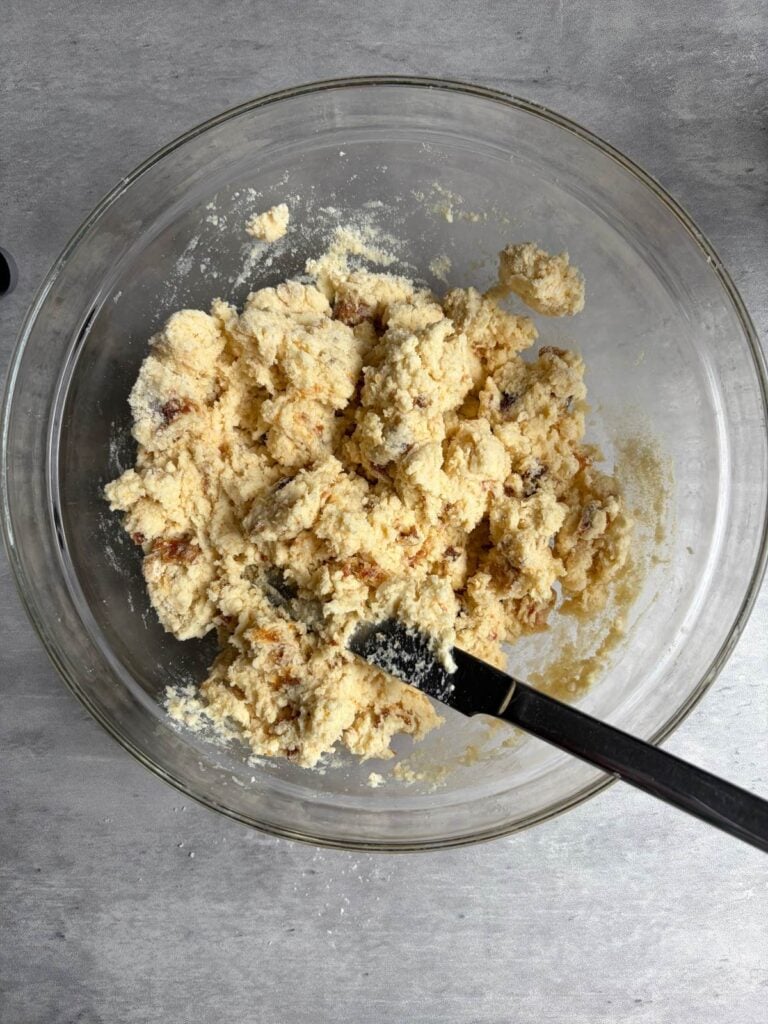
Make a well in the centre of the mixture. Slowly add the cold milk/vanilla. Using the flat bladed knife, mix together with a turning and slicing motion until all the flour is incorporated.
Shape the dough

Take some extra flour and dust your board, then tip the dough out. Bring it together with your hands and knead gently for no more than 40 seconds (use a timer if you need to). Note: Too much kneading will result in a tough scone.
Shape the dough into a ball then pat it down into a flat disc measuring 3cm high on your ruler.
Take a little extra flour from the packet and make a little mound in the top right hand corner of your board. Dip your cutter in the flour and spread a thin layer over the surface. This will prevent the cutter sticking to your scones.
Stamp out the scones
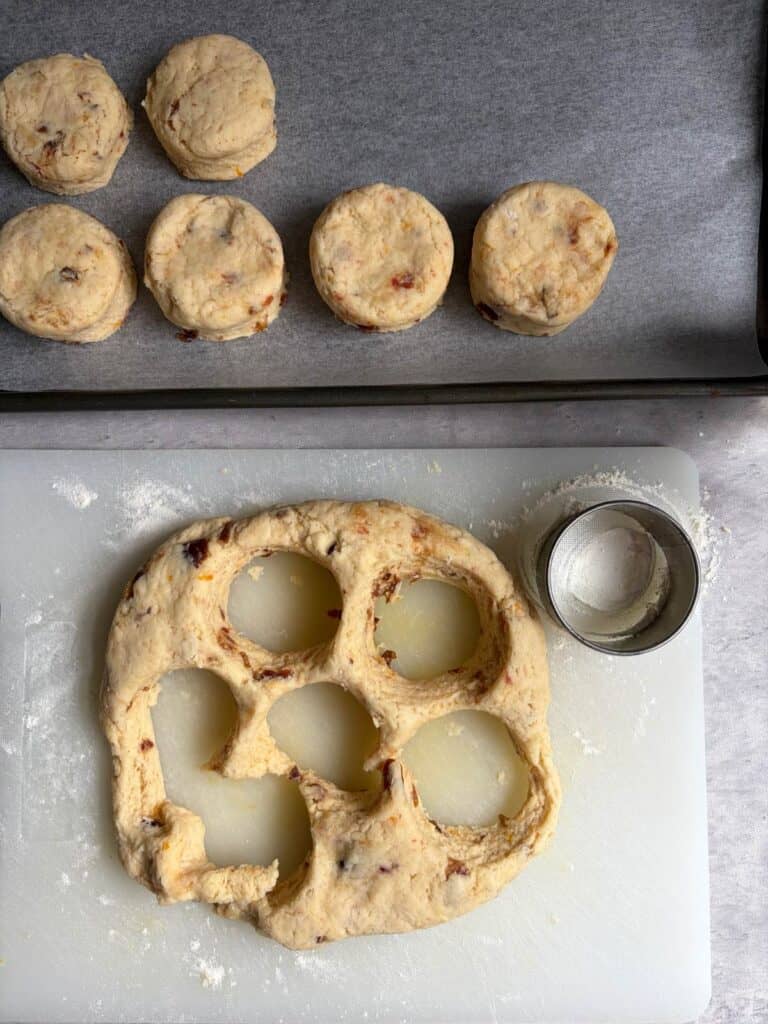
Now press the cutter into the mixture then pull it back out with a STAMPING motion not a twisting motion (or you’ll end up with wonky scones). If the mixture sticks gently push it out with your fingers. Place on your lined tray and repeat until you can’t cut out any more scones.
Bring the pieces of dough together as quickly as possible with minimal kneading and form into another round disc the same height as the previous one – 3cm. Use your ruler to ensure accuracy. Repeat until all the dough is used. The last scone is usually a small ball that you pat into the scone cutter to create a scone-like shape. Use your ruler to ensure it is the same height as all the others.
Rearrange the scones on your tray so they are close together but not touching – just under finger width. They will support each other as they rise and be less likely to lean over.
Brush the tops of the scones
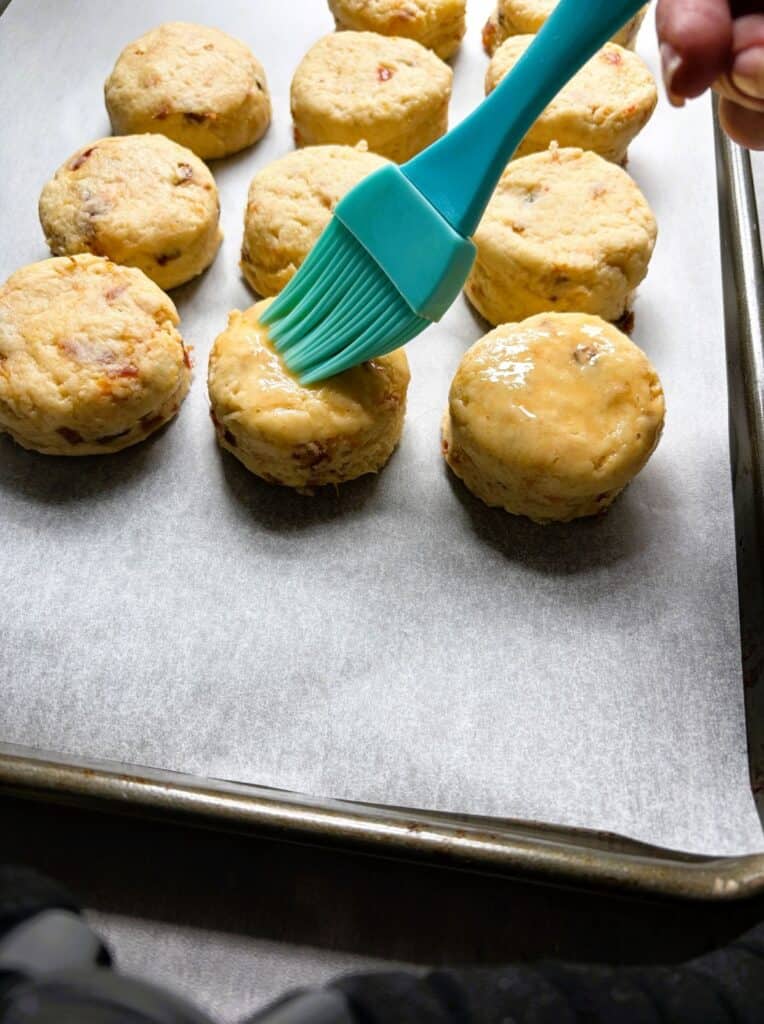
Beat the egg in a small dish then brush the tops of the scones with a pastry brush.
Bake in the oven on the middle shelf for 16 minutes, then turn your tray and bake for a further 4 minutes to ensure an even bake. If your tops are not brown, then bake for another 2 minutes max. Remove from the oven and place on a wire rack.
To serve
Wrap immediately in a clean tea towel or linen napkin to keep warm before serving with Whipped Honey Butter.
To store
Cool scones completely then freeze until required. Use a zip lock bag and expel all the air before sealing. Freeze up to 2 months. Defrost in the fridge overnight before reheating.
To reheat
Preheat the oven to 160 C fan / 320 F fan. Place the scones on a sheet of aluminium foil and fold up like a parcel. Place in the oven for 10 minutes. Remove and wrap in a clean tea towel or large linen napkin. Serve warm with whipped honey butter.
Whipped Honey Butter
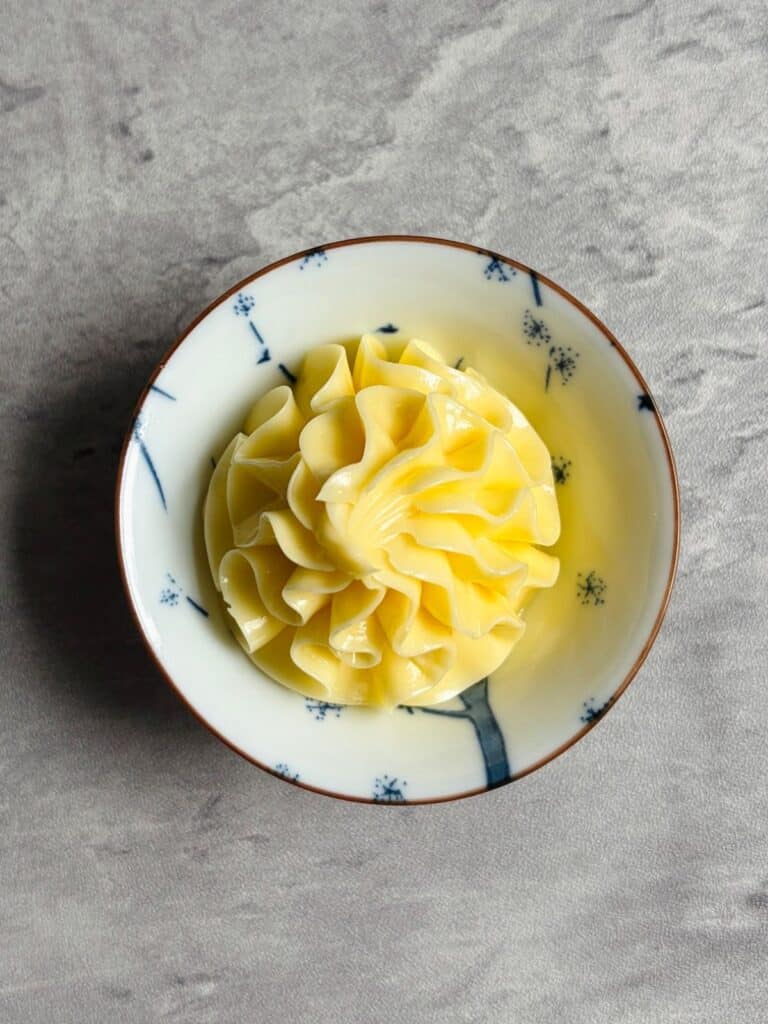
Beat the butter until pale and fluffy, then slowly mix in the honey and sea salt.
Fill a small piping bag fitted with an open or closed star tip (I’ve used an 857 ), and pipe the butter into two small dishes. Refrigerate for 30 minutes uncovered until set then cover loosely with plastic wrap and return to the fridge until required. Butter will keep for up to a week.
To serve: Remove from the fridge 30 minutes before serving (or longer if it’s a cool day). Drizzle with a little extra honey and finish with a little extra orange zest.
FAQs about Orange & Date Scones with Whipped Honey Butter
Can I use normal dates? Yes, you just won’t get the same caramel flavours that Medjool dates bring to the recipe but the scones will still taste great. Just remove the stones before chopping.

Orange & Date Scones with Whipped Honey Butter
10
scones15
minutes20
minutesEquipment
 Baking tray lined with baking paper
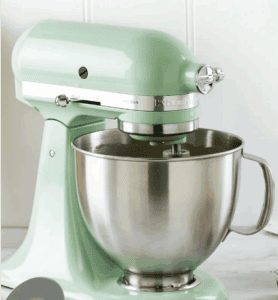 Stand mixer (or beaters)
 Digital scale
Other Equipment
5.5cm round cutter
Chopping board
Large mixing bowl
Pastry brush
Small and medium bowls
Measuring spoons
Chef’s knife
Butter knife
Dessert spoon
Keep the screen of your device on
Ingredients
- Orange & Date Scones
1 1 orange, zested (reserve a small amount for whipped honey butter)
6 6 Medjool dates, pitted
400 g 14 oz self-raising flour, plus extra for dusting the board and cutter
75 g 2 2/3 oz unsalted butter, cubed
1/4 teaspoon 1/4 tsp fine table salt
75 g 2 2/3 oz white sugar
175 ml 6 fl oz full cream / full fat milk
1 teaspoon 1 vanilla extract
1 1 egg for brushing the tops
- Whipped Honey Butter
125 g 4 2/5 oz unsalted butter, softened
2 tbsp 2 tbsp honey, plus extra for drizzling
Tiny pinch of sea salt
Extra orange zest for garnish
Directions
- Preparation
- Line a medium sized baking tray with baking paper such as Glad Bake or similar and set aside. Find a ruler and put it on your bench.
- Zest the orange. Reserve a small amount for garnishing the whipped honey butter (cover and refrigerate until required).
- Roughly chop the dates. They will be broken up further once added to the flour.
- Cut the cold butter into small cubes, place in a small dish.
- Place the self-raising flour in a large mixing bowl. Leave the packet on your bench as you will need a little extra to dust the board and cutter.
- Weigh the sugar into a separate small bowl, add the salt then set aside.
- Measure the milk into a jug, add the vanilla then set aside.
- Place your 5.5cm round cutter, spoon for mixing flour/sugar (dessert spoon is fine), flat edged knife (e.g. butter knife), pastry brush and ruler on the bench in an easy to reach location.
- Make the scone dough
- Working quickly, add the cold butter to the flour. Using the tips of your fingers press the butter (it will be hard at first) into the flour. Keep working until all of the butter has been incorporated and the mixture resembles coarse breadcrumbs.
- Add the zest, dates, sugar/salt mix and gently stir together with the spoon. Break up any larger pieces of date with back of the spoon if you need to.
- Make a well in the centre of the mixture. Slowly add the cold milk/vanilla. Using the flat bladed knife, mix together with a turning and slicing motion until all the flour is incorporated.
- Take some extra flour and dust your board, then tip the dough out. Bring it together with your hands and knead gently for no more than 40 seconds (use a timer if you need to). Note: Too much kneading will result in a tough scone.
- Shape the dough into a ball then pat it down into a flat disc measuring 3cm high on your ruler.
- Take a little extra flour from the packet and make a little mound in the top right hand corner of your board. Dip your cutter in the flour and spread a thin layer over the surface. This will prevent the cutter sticking to your scones.
- Now press the cutter into the mixture then pull it back out with a STAMPING motion not a twisting motion (or you’ll end up with wonky scones). If the mixture sticks gently push it out with your fingers. Place on your lined tray and repeat until you can’t cut out any more scones.
- Bring the pieces of dough together as quickly as possible with minimal kneading and form into another round disc the same height as the previous one – 3cm. Use your ruler to ensure accuracy. Repeat until all the dough is used. The last scone is usually a small ball that you pat into the scone cutter to create a scone-like shape. Use your ruler to ensure it is the same height as all the others.
- Rearrange the scones on your tray so they are close together but not touching – just under finger width. They will support each other as they rise and be less likely to lean over.
- Beat the egg in a small dish then brush the tops of the scones with a pastry brush.
- Bake in the oven on the middle shelf for 16 minutes, then turn your tray and bake for a further 4 minutes to ensure an even bake. If your tops are not brown, then bake for another 2 minutes max. Remove from the oven and place on a wire rack.
- To serve
- Wrap immediately in a clean tea towel or linen napkin to keep warm before serving with Whipped Honey Butter.
- To store
- Cool scones completely then freeze until required. Use a zip lock bag and expel all the air before sealing. Freeze up to 2 months. Defrost in the fridge overnight before reheating.
- To reheat
- Preheat the oven to 160 C fan / 320 F fan. Place the scones on a sheet of aluminium foil and fold up like a parcel. Place in the oven for 10 minutes. Remove and wrap in a clean tea towel or large linen napkin. Serve warm with whipped honey butter.
- Whipped Honey Butter
- Beat the butter until pale and fluffy, then slowly mix in the honey and sea salt.
- Fill a small piping bag fitted with an open or closed star tip (I’ve used an 857 ), and pipe the butter into two small dishes. Refrigerate for 30 minutes uncovered until set then cover loosely with plastic wrap and return to the fridge until required. Butter will keep for up to a week.
- To serve: Remove from the fridge 30 minutes before serving (or longer if it’s a cool day). Drizzle with a little extra honey and finish with a little extra orange zest.