
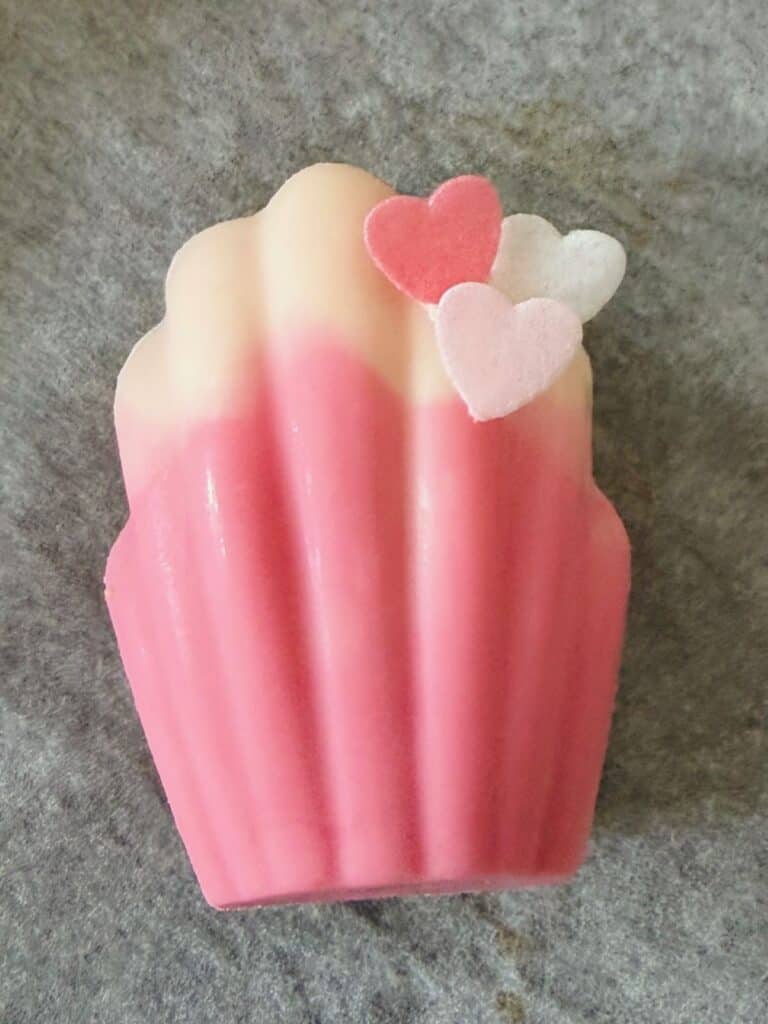
With their little wafer hearts, these super easy ombre style white chocolate madeleines taste as pretty as they look. Soft, fluffy and coated in a crisp shell, they make the perfect afternoon tea sweet treat for Valentine’s Day, Baby Showers or Bridal Showers. My recipe includes step by step photos to ensure success as well as plenty of do-ahead advice.

My top tip for covering Madeleines in chocolate
I have to admit that chocolate covered madeleines have (in the past) been a bit of a nemesis. While I could bake beautiful fluffy madeleines in my traditional metal madeleine pan – little hump, crispy edges, and super moist and fluffy; covering them in a sweet chocolate shell was a different story. Batch after batch I’d bake and batch after batch they’d stick in the pan! When I would finally get one or two to release, the texture would be dry as a bone because I had to freeze them so they’d come out!
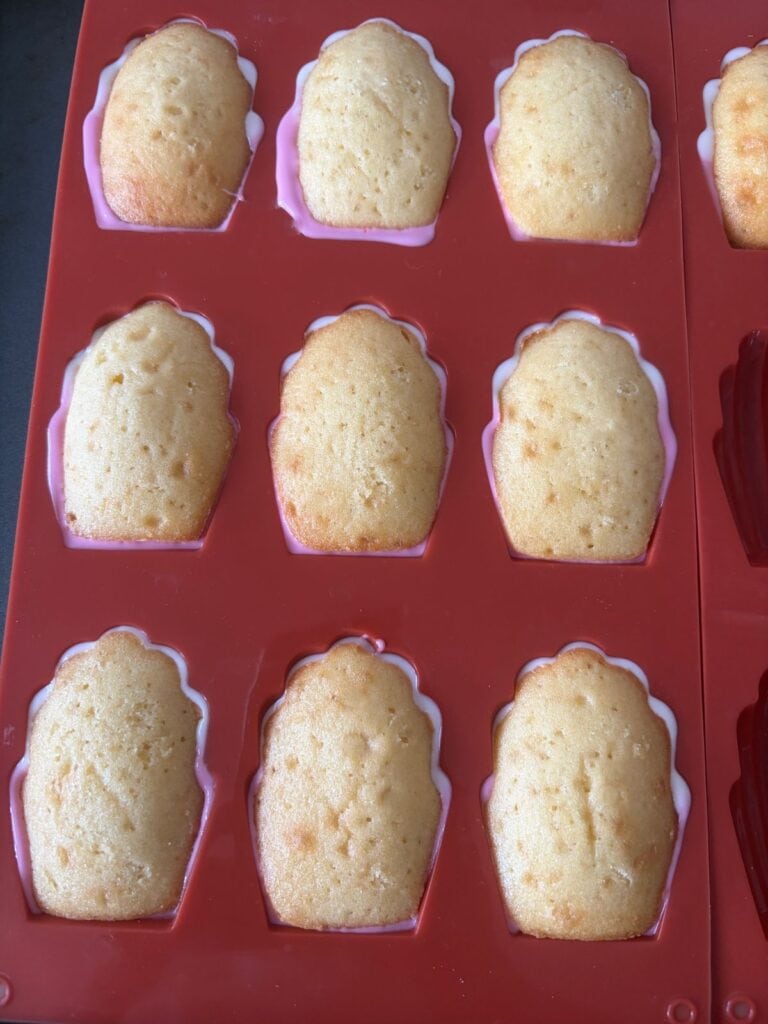
So here’s my tip: Bake your madeleines in a silicone pan if you want to cover them in chocolate. You may not get a super large hump as the pan won’t get as hot as a metal one, but you will get beautifully covered, shiny chocolate coated madeleines. Visit my Amazon Shop to purchase the exact one I used to make these. Note: As an Amazon Affiliate I receive a small commission on purchases from my shop.
Why You’ll Love These Easy Ombre White Chocolate Madeleines
- Soft and fluffy texture that melts in the mouth
- White chocolate shell adds another dimension and elevates these beyond your standard Madeleine, and adding a little coconut oil will give you a lovely shine too
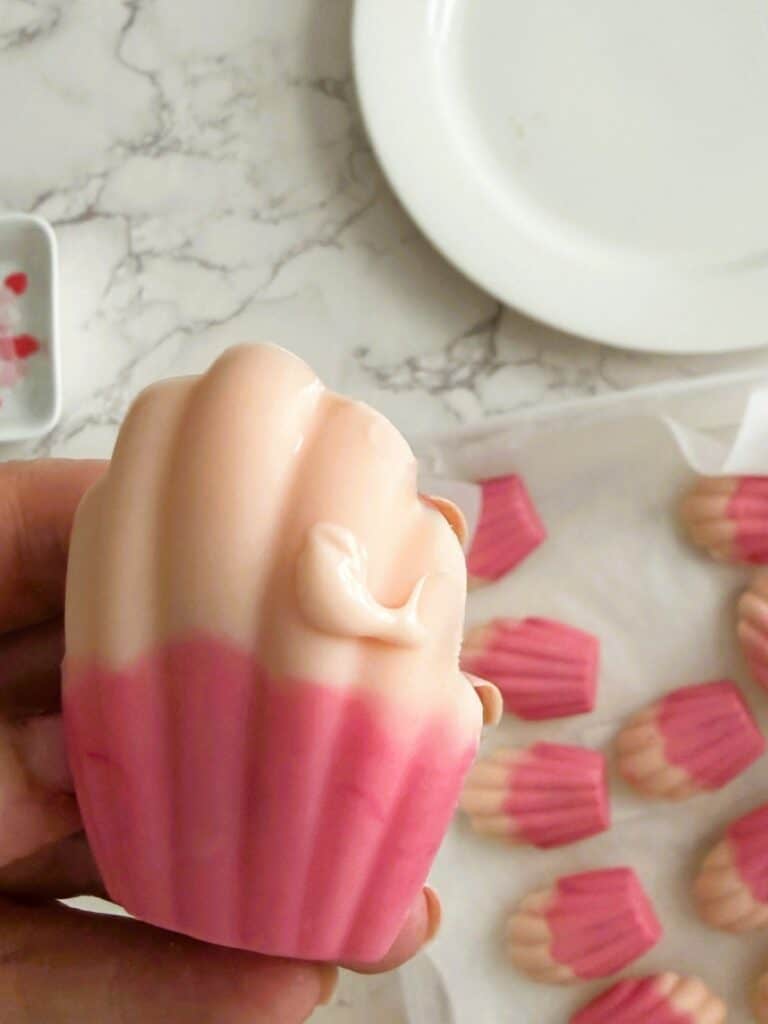
- Ombre colours with little hearts make these extra special and perfect to give as gifts
- Very simple to make, full of flavour and the perfect complement to coffee or tea
Good to know
- You will have to rest the mixture in the fridge for a minimum of 2 hours
- Use digital scales for perfect results
- A silicone madeleine pan will make the chocolate covered madeleines easier to remove
- A stand mixer or hand beaters will make your life easier
Planning an Afternoon Tea at Home? Here are some handy links to get you started
Important Note
You will need to rest the batter for a minimum of two hours however you can also rest it overnight if it’s more convenient.
Preparation
Melt the butter in a small saucepan or a microwave safe jug (30 second bursts on HIGH -stir between each burst) and allow it to cool. Add the vanilla extract. Stir.
Measure out the flour into a medium bowl with the salt and baking powder. Stir to combine.
Prepare the Batter
Add the eggs and sugar to the bowl of a stand mixer fitted with the whisk attachment.
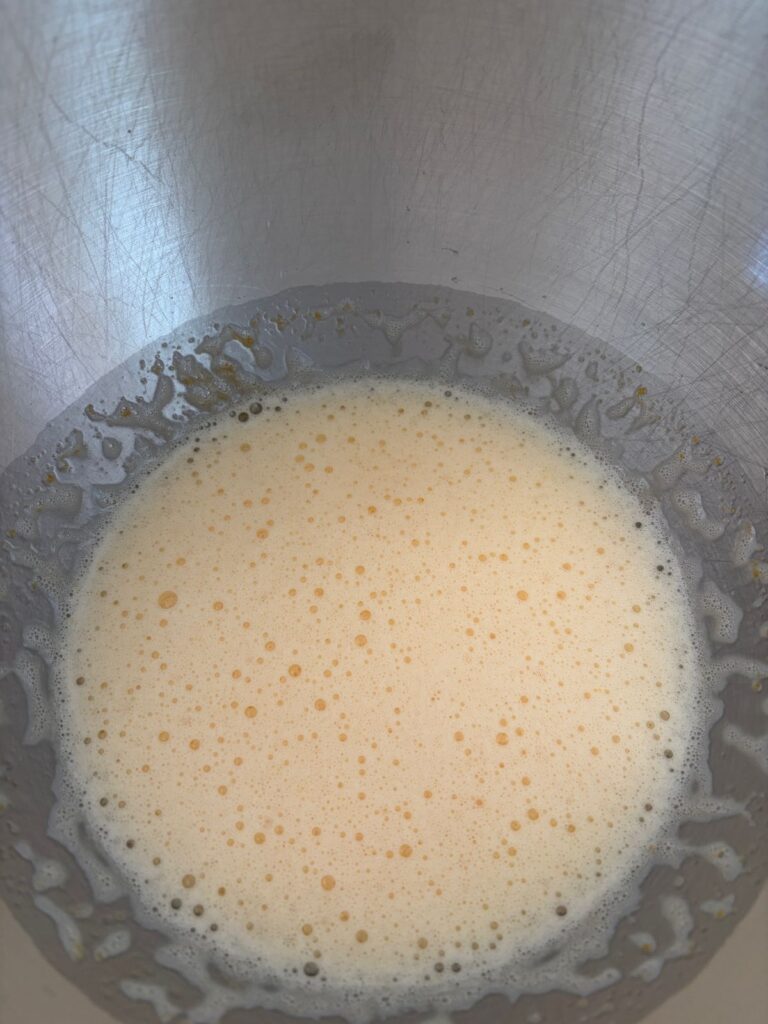
Whisk on medium (speed 4 on a KitchenAid) until pale and creamy in texture (about 3-4 minutes).
Remove the bowl from the stand mixer. Add one third of the flour mixture and gently fold through with a spatula until combined. Repeat one third at a time until you have no flour left and no flour remains on the sides of the bowl.
Add half the melted butter, fold in then add the other half, fold in again.
Cover the mixture with plastic wrap making sure it touches the surface then place it in the fridge for a minimum of two hours or overnight if you prefer.
When you are ready to bake….
Grease and fill the silicone madeleine pans
Preheat your oven to 180°C fan / 350°F fan.
Place your rack in the middle position.
Melt a little butter in a small microwave safe bowl. Using a pastry brush, coat your madeleine pans thoroughly including the top edge. Put the pans on a tray (this will make it easier to get them in and out of the oven) and set aside.
Remove the batter from the fridge. Take a spatula and carefully fold the mixture over three times to loosen it a little -it will be stiff because of the butter.
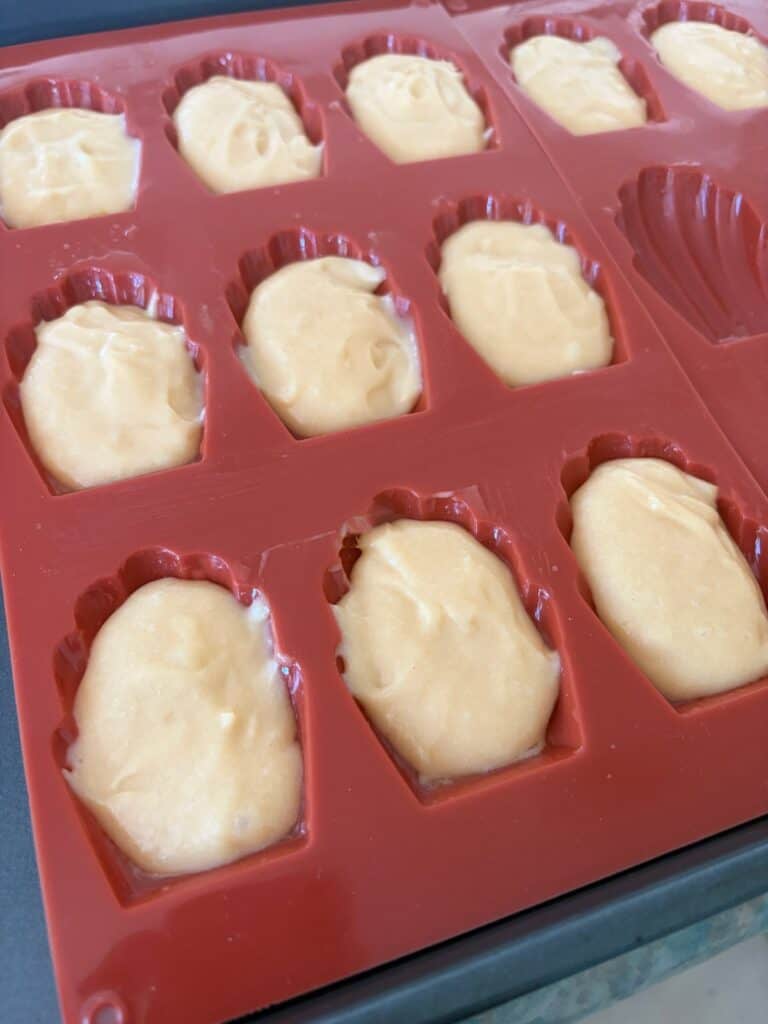
Take two dessert spoons and divide the batter evenly between the 12 madeleine cavities.
Bake the Madeleines

Place the tray in the oven and bake for 15 minutes, or until the edges are slightly golden.
Remove from the oven, rest for 3 minutes then tip out onto a wire rack. Wash your madeleine pans and dry well with paper towels.
Make the white chocolate shell
Once the madeleines have cooled completely, place the clean madeleine pans on a medium baking sheet – this will help keep them stable. TIP: Check that the sheet will fit in your fridge.
Melt and colour the chocolate: Break up the chocolate into small pieces then place it in a microwave safe bowl. Heat on HIGH (900w) in 20 second bursts, stirring between bursts, until completely melted. Add the coconut oil, stir well, then pour half of the chocolate into a separate small bowl. Using an oil-based food colouring (I like Colour Mill Raspberry), colour one bowl of chocolate a light pink and the other bowl of chocolate a deeper pink shade.
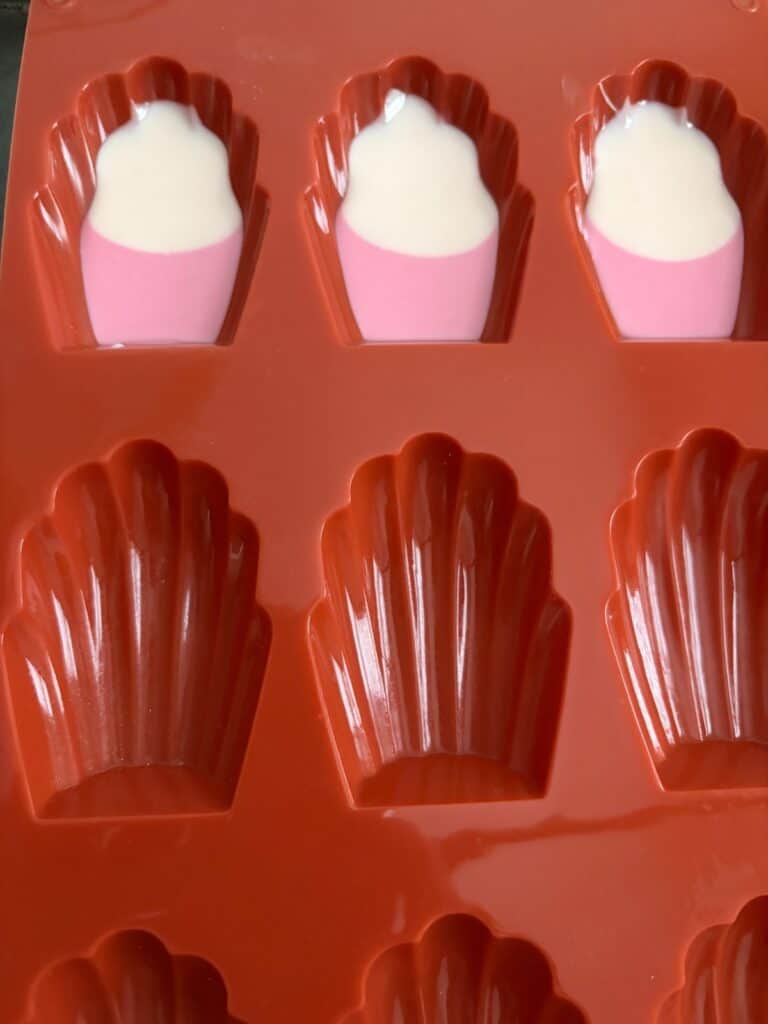
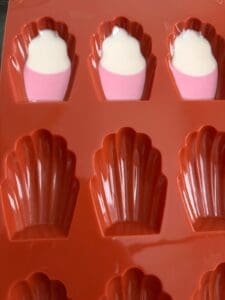
Coat the madeleines: Place a small amount of the darker pink shade on the bottom half of the mould and a small amount of the light shade in the top half. Using the handle of a teaspoon, gently blend the bottom (darker) colour into the top (lighter) colour.
Place a madeleine on top shell side down and press with even, gentle pressure until the chocolate just starts to ooze out of the top edge of the cavity (see photo above).
TIP: Work as quickly as possible, however if the chocolate starts to thicken up, re-heat in the microwave for 10 seconds, stir.
IMPORTANT: Save a little of the lightest coloured chocolate for attaching the heart sprinkles later on. Cover with plastic wrap and leave on your bench.
Set the chocolate
Cover the madeleines loosely with foil, then tuck in the edges. Place in the refrigerator for 30 minutes to set.
Turn out the madeleines onto a plate. Admire how shiny they look!
Garnish the Ombre White Chocolate Madeleines with the hearts
Melt the left-over lightest shade of chocolate in 10 second bursts, stirring in between bursts.
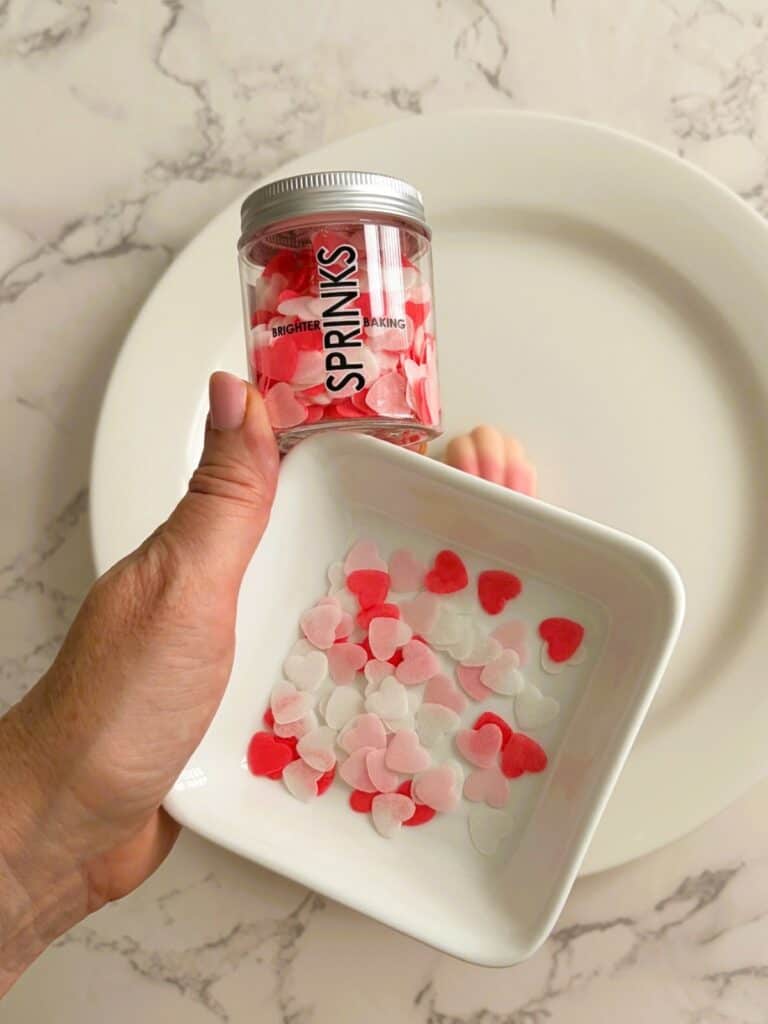
Take a toothpick and add a small dot of melted chocolate in the top right-hand corner of a madeleine. Add a few hearts then repeat with the rest of the madeleines. Allow the chocolate to set before serving.
Store in a cool place
Store chocolate covered madeleines in an airtight container lined with baking paper then place them in a cool place until required. Madeleines are best eaten on the day they’re made.
Frequently Asked Questions
Can I add flavouring? Yes! Just make sure it goes with white chocolate. A teaspoon of lemon zest or some fresh whole raspberries would be perfect.

Easy Ombre White Chocolate Madeleines
12
servings15
minutes15
minutes120
minutesEquipment
 Silicone madeleine pan(s)Visit my amazon shop
 Digital scale
 Stand mixer with whisk attachment
Other equipment
Pastry brush
Microwave safe jug and bowl
Measuring spoons
Wire rack
Baking tray
Keep the screen of your device on
Ingredients
- Madeleine batter
65 g 2 2/7 oz unsalted butter, plus extra for greasing the pans
1/2 teaspoon 1/2 tsp vanilla extract
90 g 3 1/6 oz plain / all purpose flour
1/2 teaspoon 1/2 tsp baking powder
pinch pinch salt
2 2 eggs
65 g 2 2/7 oz caster / superfine sugar
- White chocolate shell
180 g 6 1/3 oz white chocolate block
1/2 teaspoon 1/2 tsp coconut oil, melted
pink oil based food colouring – try to match the shade with the sprinkles
- Garnish
Heart sprinkles
Directions
- Important Note
- You will need to rest the batter for a minimum of two hours however you can also rest it overnight if it’s more convenient.
- Preparation
- Melt the butter in a small saucepan or a microwave safe jug (30 second bursts on HIGH -stir between each burst) and allow it to cool. Add the vanilla extract. Stir.
- Measure out the flour into a medium bowl with the salt and baking powder. Stir to combine.
- Prepare the Batter
- Add the eggs and sugar to the bowl of a stand mixer fitted with the whisk attachment.
- Whisk on medium (speed 4 on a KitchenAid) until pale and creamy in texture (about 3-4 minutes).
- Remove the bowl from the stand mixer. Add one third of the flour mixture and gently fold through with a spatula until combined. Repeat one third at a time until you have no flour left and no flour remains on the sides of the bowl.
- Add half the melted butter, fold in then add the other half, fold in again.
- Cover the mixture with plastic wrap making sure it touches the surface then place it in the fridge for a minimum of two hours or overnight if you prefer.
- When you are ready to bake….
- Preheat your oven to 180°C fan / 350°F fan.
- Place your rack in the middle position.
- Melt a little butter in a small microwave safe bowl. Using a pastry brush, coat your madeleine pans thoroughly including the top edge. Put the pans on a tray (this will make it easier to get them in and out of the oven) and set aside.
- Remove the batter from the fridge. Take a spatula and carefully fold the mixture over three times to loosen it a little -it will be stiff because of the butter.
- Take two dessert spoons and divide the batter evenly between the 12 madeleine cavities.
- Bake the Madeleines
- Place the tray in the oven and bake for 15 minutes, or until the edges are slightly golden.
- Remove from the oven, rest for 3 minutes then tip out onto a wire rack. Wash your madeleine pans and dry well with paper towels.
- Make the white chocolate shell
- Once the madeleines have cooled completely, place the clean madeleine pans on a medium baking sheet – this will help keep them stable. TIP: Check that the sheet will fit in your fridge.
- Melt and colour the chocolate: Break up the chocolate into small pieces then place it in a microwave safe bowl. Heat on HIGH (900w) in 20 second bursts, stirring between bursts, until completely melted. Add the coconut oil, stir well, then pour half of the chocolate into a separate small bowl. Using an oil-based food colouring (I like Colour Mill Raspberry), colour one bowl of chocolate a light pink and the other bowl of chocolate a deeper pink shade.
- Coat the madeleines: Place a small amount of the darker pink shade on the bottom half of the mould and a small amount of the light shade in the top half. Using the handle of a teaspoon, gently blend the bottom (darker) colour into the top (lighter) colour.
- Place a madeleine on top shell side down and press with even, gentle pressure until the chocolate just starts to ooze out of the top edge of the cavity (see photo above).
- TIP: Work as quickly as possible, however if the chocolate starts to thicken up, re-heat in the microwave for 10 seconds, stir.
- IMPORTANT: Save a little of the lightest coloured chocolate for attaching the heart sprinkles later on. Cover with plastic wrap and leave on your bench.
- Set the chocolate
- Cover the madeleines loosely with foil, then tuck in the edges. Place in the refrigerator for 30 minutes to set.
- Turn out the madeleines onto a plate. Admire how shiny they look!
- Garnish with the hearts
- Melt the left-over lightest shade of chocolate in 10 second bursts, stirring in between bursts.
- Take a toothpick and add a small dot of melted chocolate in the top right-hand corner of a madeleine. Add a few hearts then repeat with the rest of the madeleines. Allow the chocolate to set before serving.
- Store
- Store chocolate covered madeleines in an airtight container lined with baking paper then place them in a cool place until required. Madeleines are best eaten on the day they’re made.