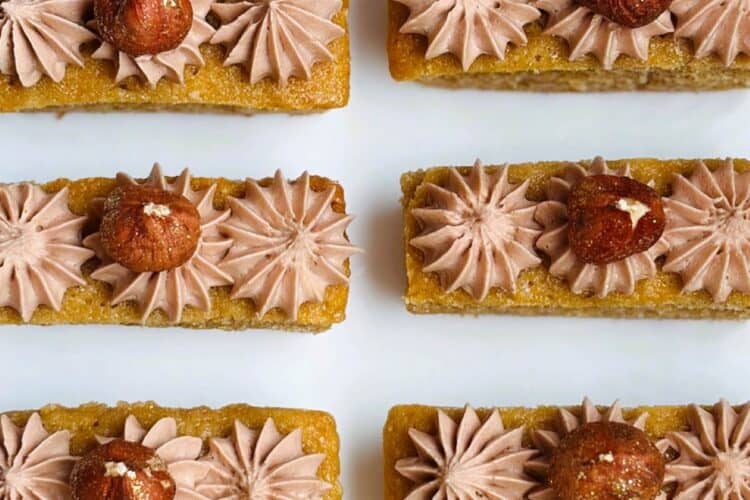
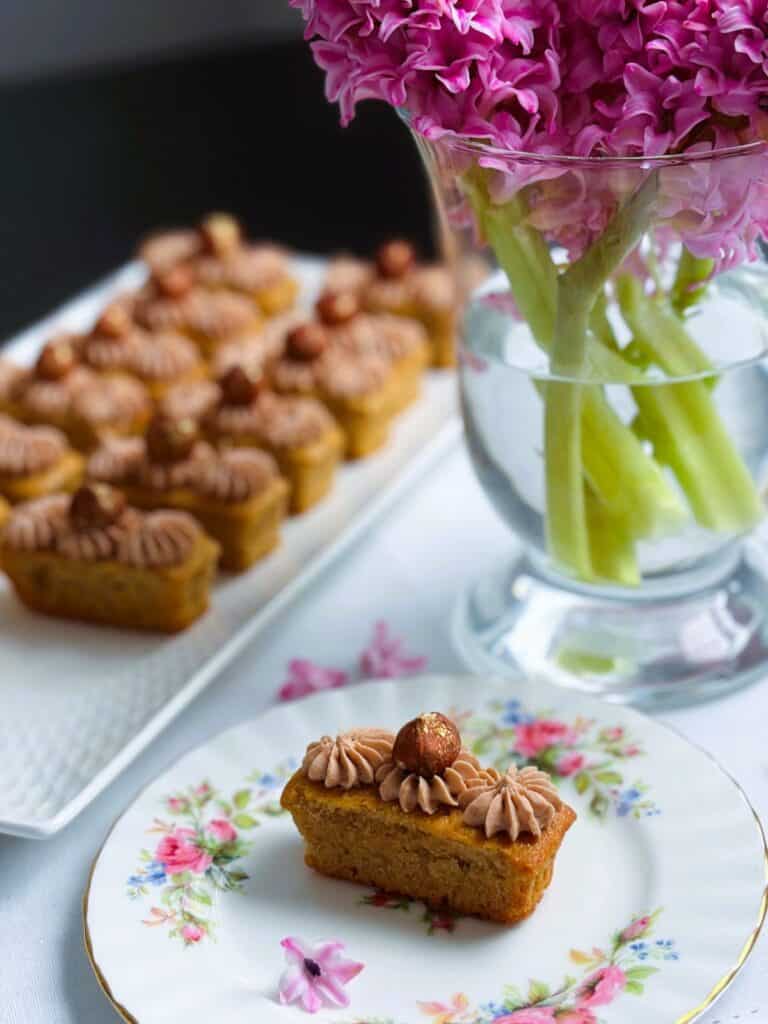
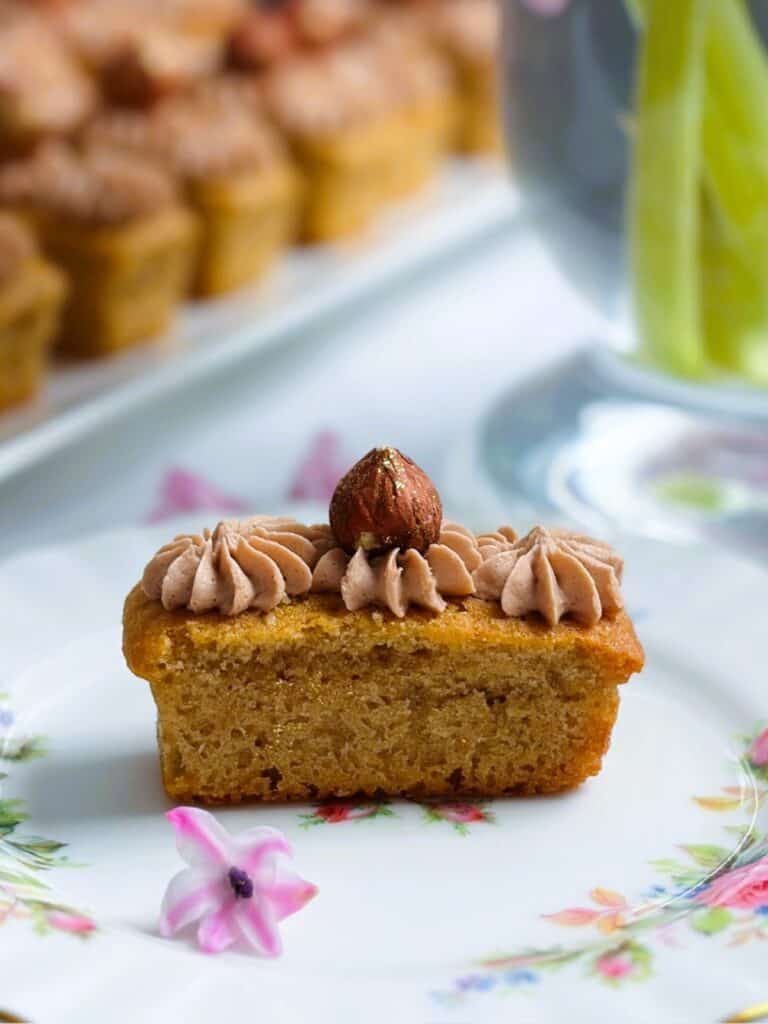
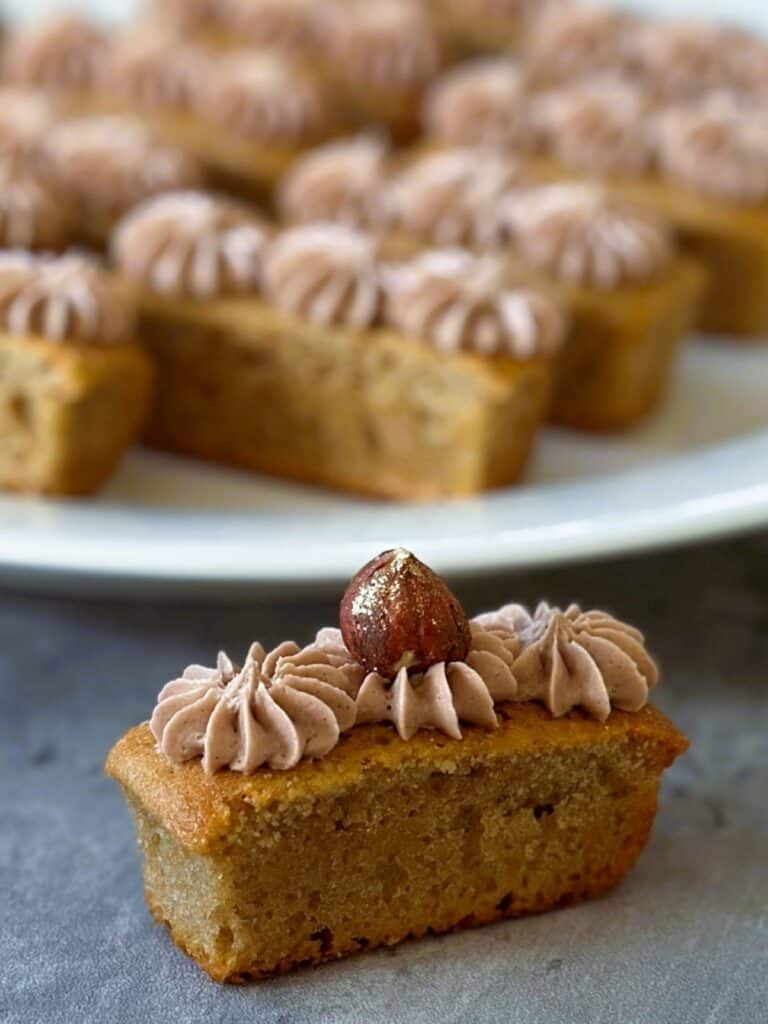
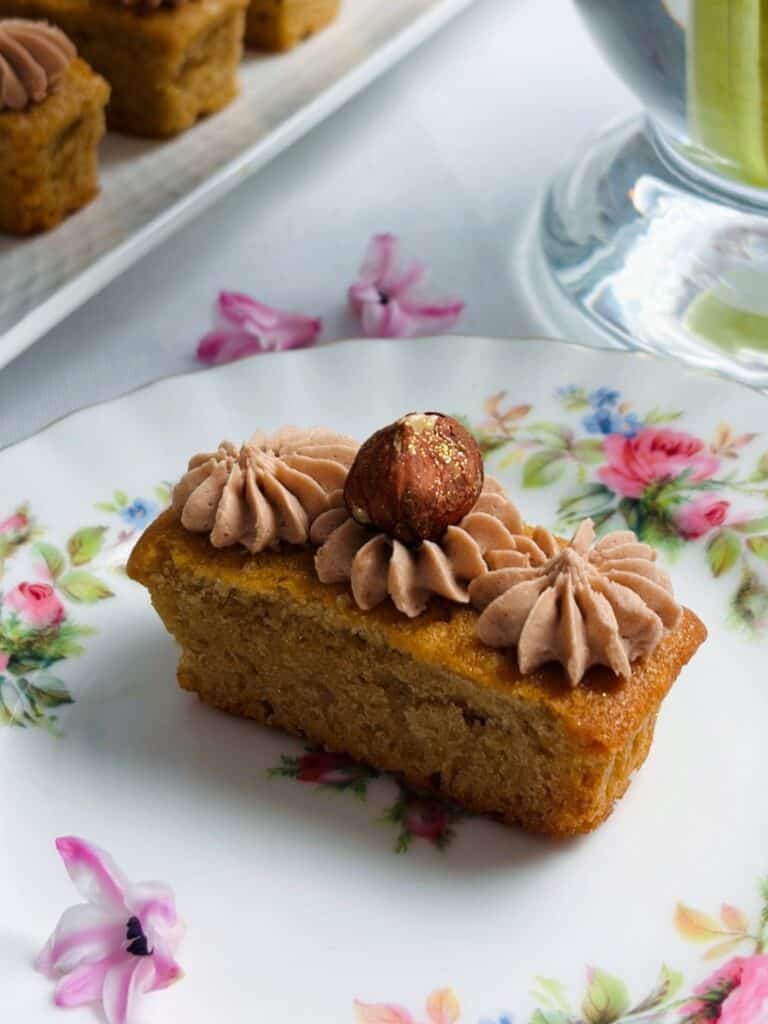
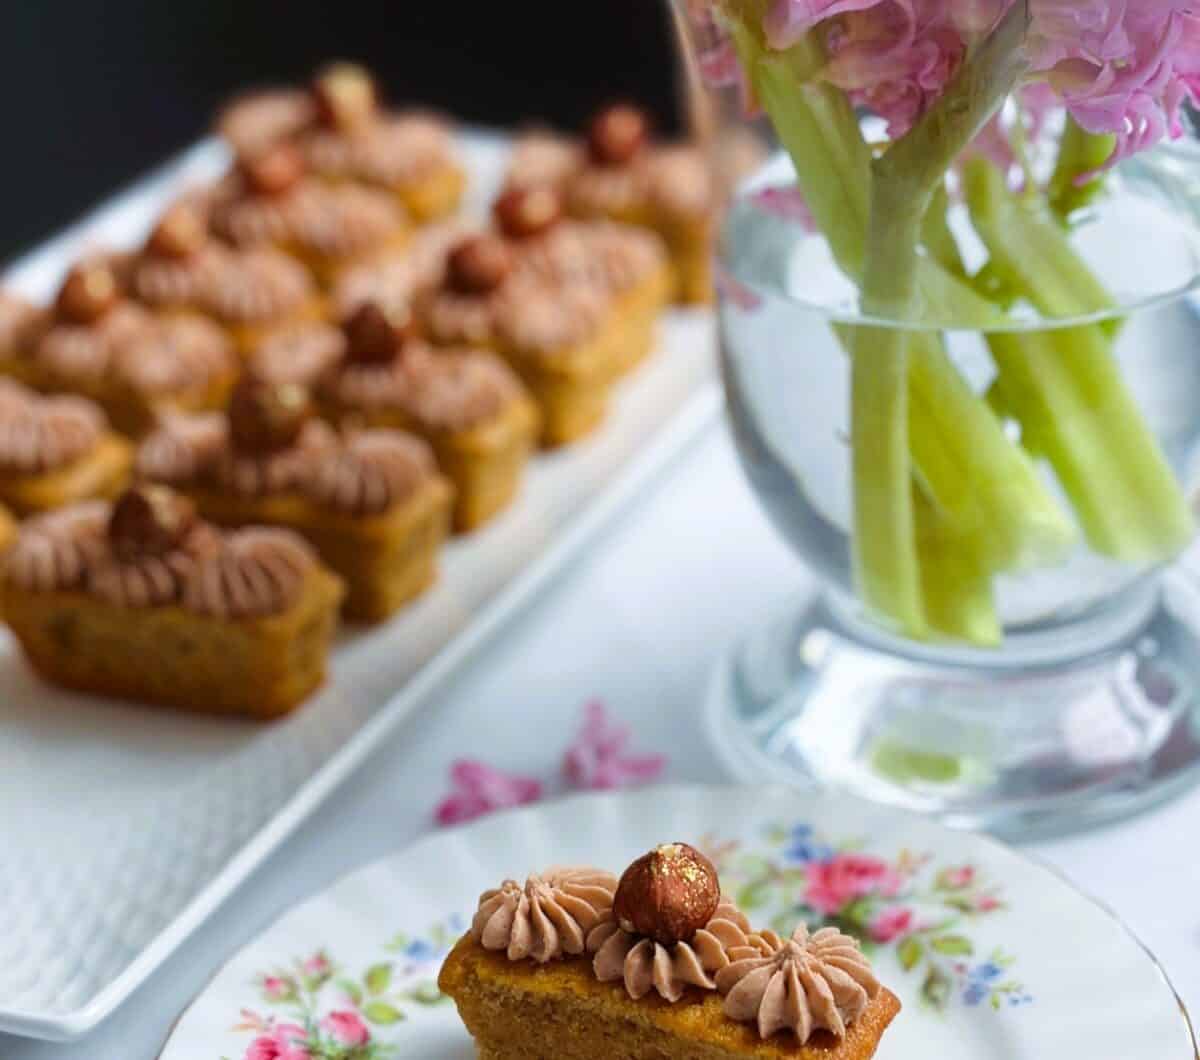
If you’re looking for an elegant, bite-sized treat for entertaining, these hazelnut latte fingers are the perfect addition to your afternoon tea table. Featuring soft, coffee-infused cake fingers topped with a silky hazelnut icing, each one is finished with a whole gold dusted hazelnut for a beautiful, five star-style finish.
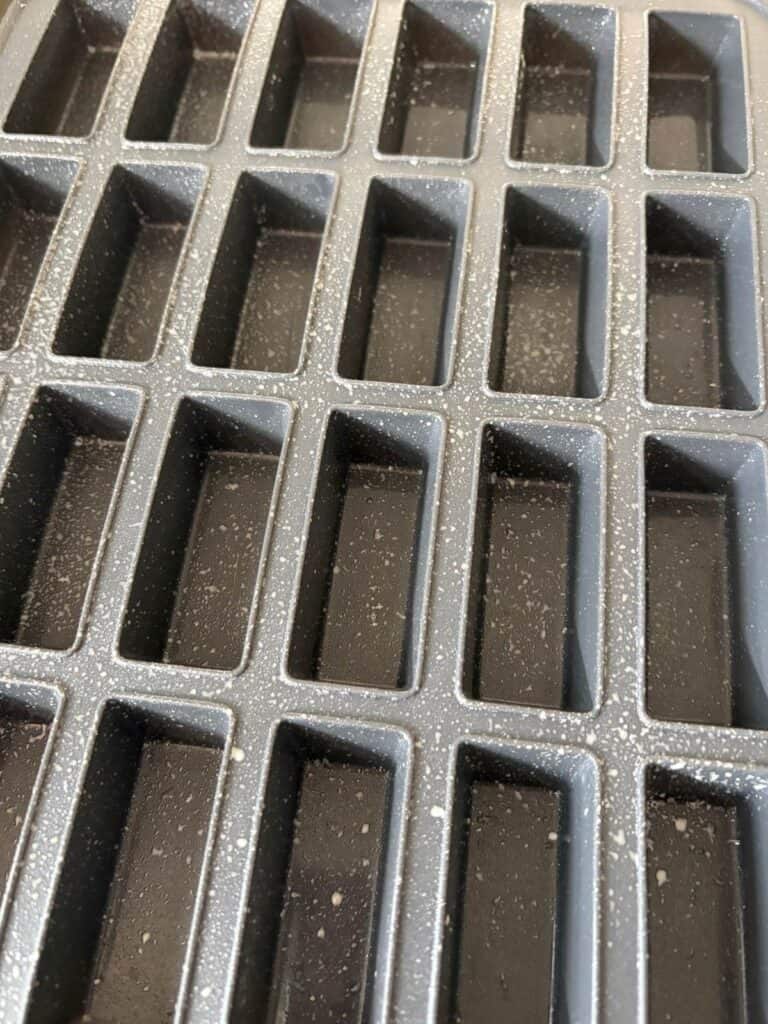
Made with a silicone mini bar pan from Daily Bake for perfectly portioned, sealed-edge cakes that stay moist, these two-bite delights are ideal for any occasion. With secret ingredients like sour cream so they last for days plus Nutella in the icing for extra flavour, my easy hazelnut latte fingers recipe delivers professional quality results at home.
Note: The mini bar pan can also be used for my Carrot Cake Fingers!
Why You’ll Love These Hazelnut Latte Fingers
- Perfect for entertaining – Elegant, bite-sized portions made for tiered stands and afternoon tea platters
- Soft and flavourful – Coffee-infused cake paired with rich hazelnut icing
- Stay moist for longer – Sealed edges help prevent drying out when serving
- Easy to make – Simple ingredients with impressive results
- Hotel-style finish – Topped with hazelnuts coated in a little edible gold dust for an extra fancy touch
More Afternoon Tea recipes to try
Coronation Chicken Finger Sandwiches
Scorched Almond Chocolate Tartlets
How to make hazelnut latte fingers
Adjust your oven rack so it is in the centre position.
Preheat the oven to 160 C fan / 320F fan.
Prep your ingredients
Spray each finger cavity with canola spray then place on a tray.
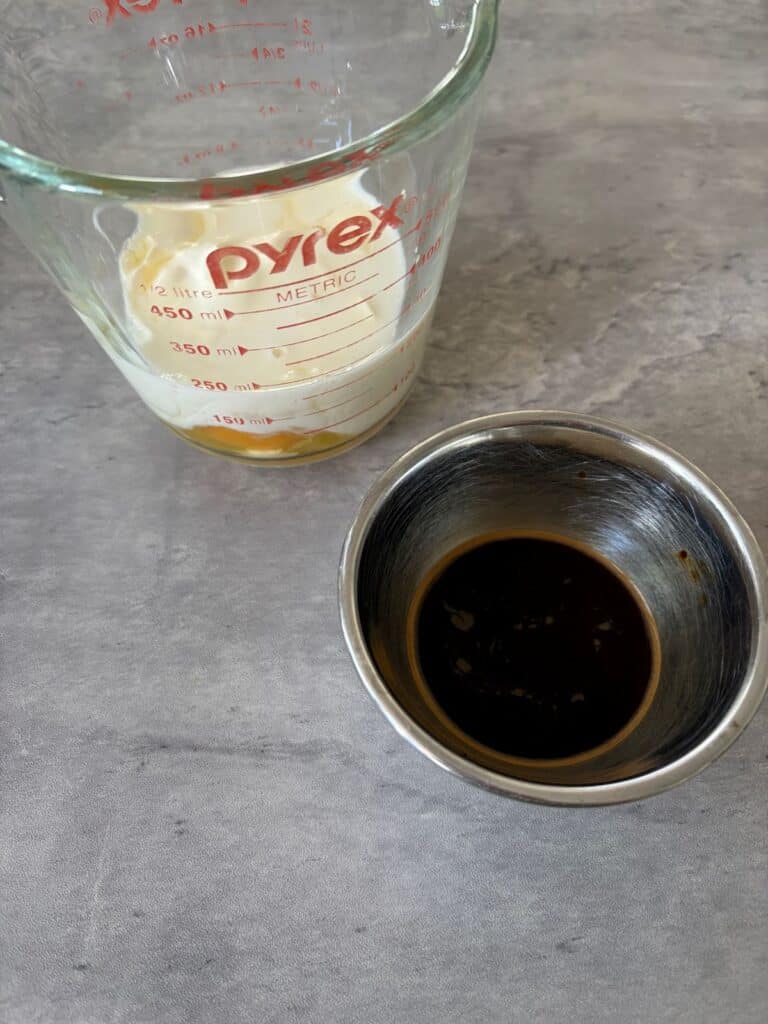
Place the instant coffee granules in a small bowl then add the tablespoon of hot water.
Weigh the flour and sugar into the stand mixer bowl, making sure you zero between ingredients. Add the baking powder, baking soda and salt. Set aside for now.
Place the eggs, sour cream and milk in a medium sized microwave safe jug and stir with a fork until combined. Bring to room temperature by microwaving on high for 20 seconds (900w). Stir. Test. If still a little cool, microwave for an extra 10 seconds. Sit the jug next to the stand mixer.
Cut the butter into even sized cubes and place in a medium microwave safe bowl. Soften in the microwave on HIGH for 20 seconds (900w). Stir. Heat again for 10 seconds and stir.
Place it next to the stand mixer with a tablespoon.
Make the cake batter
Fit a stand mixer with the paddle attachment then mix the flour mixture for 15 seconds on low speed.
With the motor running add the softened butter and mix until all the butter has been incorporated – it should look like coarse sand.
Now add the egg/milk/sour cream mixture as well as the coffee. Mix until combined then raise the speed to medium speed (4 on a KitchenAid) and beat for 20 seconds – use a timer! Don’t exceed this time or you will activate the gluten in the flour and the cake will have a gummy texture.
Stop the mixer, scrape down the sides and paddle attachment with a spatula and stir manually to incorporate.
Fill each finger cavity no more than half full with the mixture.

Bake on the middle shelf for 20 minutes. Test for doneness by inserting a skewer in the middle of both cakes. If the skewer comes out clean, remove the cakes from the oven. If not, bake for an extra 5 minutes.
When done, remove the cakes from the oven and cool in the finger mould for 5 minutes before turning out onto a wire rack. Turn right side up then leave to cool completely.
Make the icing
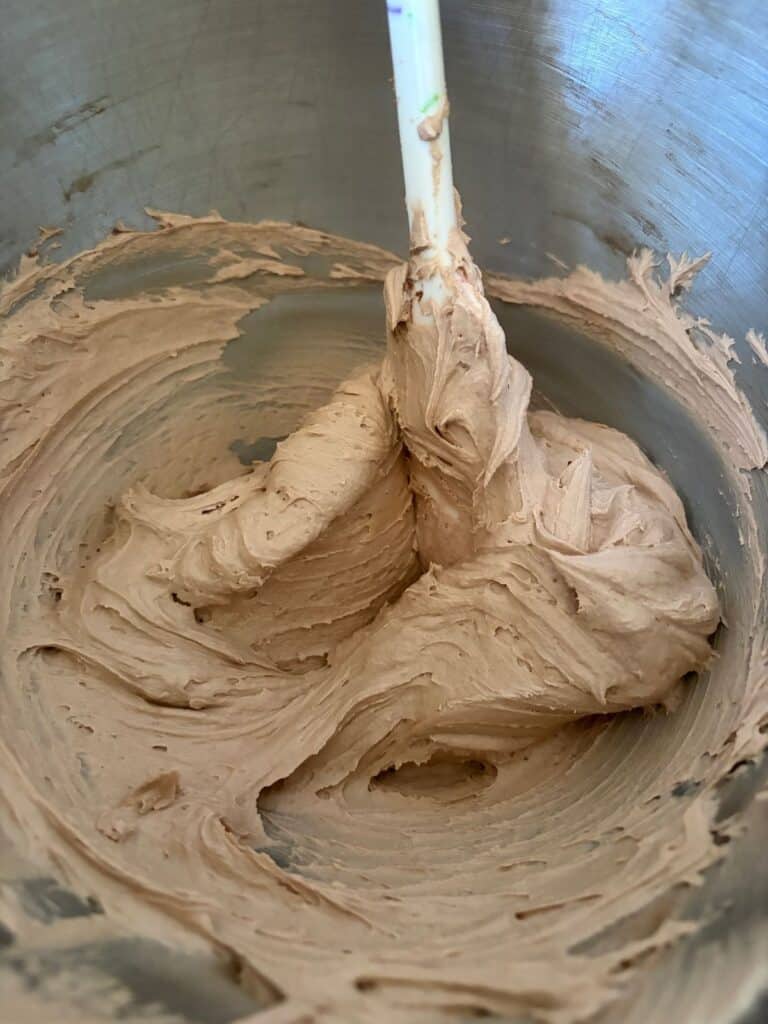
Place the softened butter in the bowl of a stand mixer fitted with the paddle attachment and beat on medium speed until light and fluffy.
Reduce the speed to the lowest setting and add the icing sugar one tablespoon at a time until well incorporated. Stop the mixer, scrape down the sides, then add the milk and Nutella. Beat on medium speed for 30 seconds until light and fluffy. Scrape down when you need to.
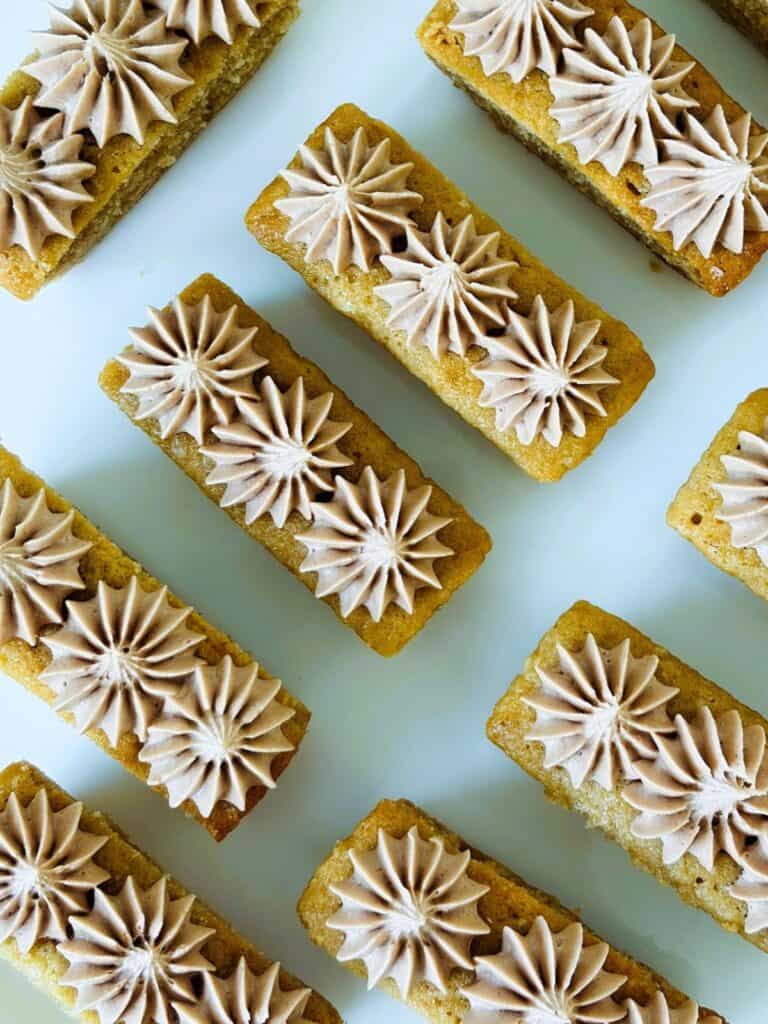
Ice the fingers
Fit a large disposable piping bag with an open star tip such as a 6B or 864. Fill the bag with the icing then twist the end until a small blob comes out of the tip.
Take a finger and holding the bag directly above and close to the finger’s surface, pipe three stars of icing on top. Repeat with the remaining fingers.
Garnish the fingers
Place 24 hazelnuts in a small zip lock bag together with some gold dust – use the handle of a teaspoon to scoop a little in, you won’t need much.
Using tweezers (if you have them) add one whole hazelnut to the centre of each flower. If you don’t have tweezers you can use your fingers then sprinkle over a little extra dust if required.
To serve
Serve immediately on your prettiest platter, tiered stand or decorative plate or store (see below).
To store
Line an airtight container with baking paper, add the fingers, replace the lid, then store in the refrigerator for up to 2 days. Remove the container from the fridge 30 minutes before serving but keep the lid on.
To freeze
You can freeze the fingers before adding the icing. Simply place them in an airtight container lined with baking paper. Defrost overnight in the fridge (leave in the container) then ice and garnish as described above.
Frequently Asked Questions about Hazelnut Lattte Fingers
Do I need a silicone mini bar pan?
A silicone mini bar pan gives the neatest shape and those sealed edges that help keep the cakes moist. However, you can use a mini loaf tin or even a standard muffin tin if needed—just adjust the baking time and keep an eye on doneness.
Can I use brewed coffee instead of instant coffee?
Yes, you can substitute with strong brewed coffee. Just make sure it’s cooled slightly before adding, and keep the quantity the same to maintain the balance of the batter.
Can I make these without Nutella?
If you prefer, you can replace the Nutella with one teaspoon of vanilla extract for a classic vanilla buttercream. You’ll lose a little of the hazelnut richness, but they will still be delicious. You can still keep the hazelnut garnish or go nut-free with a sprinkling of chocolate powder for an elegant cappuccino-inspired finger.
How strong is the coffee flavour?
The coffee flavour is subtle and balanced rather than overpowering, much like a latte.
What equipment do I need?
- Digital scales
- Stand mixer with bowl and paddle attachment
- Daily Bake Silicone 24 Cup Mini Bar Pan
- Large disposable piping bag fitted with a large open star tip such as a 6B or 864 (this is what I used)
- Microwave safe jug or bowl
- Spatula
- Sifter or strainer
- Measuring spoons
- Cooling rack
- Small ziplock bag
Hazelnut latte fingers for Afternoon Tea
24
servings30
minutes20
minutesEasy hazelnut latte fingers with coffee cake, Nutella icing and gold-dusted hazelnuts—perfect bite-sized treats for afternoon tea.
Keep the screen of your device on
Key Equipment (see FAQs for full list)
 Daily Bake silicone 24 cup mini bar panBuy on Amazon
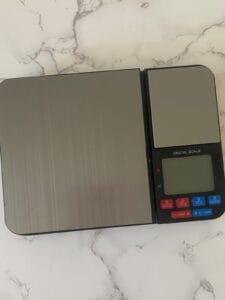 Digital scale
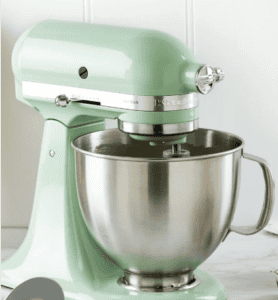 Stand mixer, bowl and paddle
Ingredients
- Coffee cakes
Canola spray or baking spray for the finger tin
1 tsp 1 tsp instant coffee dissolved in 1 tbsp hot water (or 1 tbsp espresso shot)
160 g 5 2/3 oz plain / all-purpose flour
140 g 5 oz sugar
1/2 tsp 1/2 tsp baking powder
1/4 tsp 1/4 tsp bicarb soda
Pinch Pinch salt
120 g 4 1/4 oz unsalted butter
2 large 2 large eggs (from a 600g carton)
50 g 1 3/4 oz sour cream
50 ml 1 2/3 fl oz full fat/full cream milk
- Hazelnut buttercream
100 g 3 1/2 oz butter, softened
150 g 5 2/7 oz icing sugar, sifted
50 g 1 3/4 oz Nutella hazelnut spread
2 teaspoons 2 tsp whole milk
- Garnish
24 24 whole unskinned hazelnuts
Edible gold dust or gold leaf (optional)
Directions
- How to make hazelnut latte fingers
- Adjust your oven rack so it is in the centre position.
- Preheat the oven to 160 C fan / 320F fan.
- Prep your ingredients
- Spray each finger cavity with canola spray then place on a tray.
- Place the instant coffee granules in a small bowl then add the tablespoon of hot water.
- Weigh the flour and sugar into the stand mixer bowl, making sure you zero between ingredients. Add the baking powder, baking soda and salt. Set aside for now.
- Place the eggs, sour cream and milk in a medium sized microwave safe jug and stir with a fork until combined. Bring to room temperature by microwaving on high for 20 seconds (900w). Stir. Test. If still a little cool, microwave for an extra 10 seconds. Sit the jug next to the stand mixer.
- Cut the butter into even sized cubes and place in a medium microwave safe bowl. Soften in the microwave on HIGH for 20 seconds (900w). Stir. Heat again for 10 seconds and stir.
- Place it next to the stand mixer with a tablespoon.
- Make the cake batter
- Fit a stand mixer with the paddle attachment then mix the flour mixture for 15 seconds on low speed.
- With the motor running add the softened butter and mix until all the butter has been incorporated – it should look like coarse sand.
- Now add the egg/milk/sour cream mixture as well as the coffee. Mix until combined then raise the speed to medium speed (4 on a KitchenAid) and beat for 20 seconds – use a timer! Don’t exceed this time or you will activate the gluten in the flour and the cake will have a gummy texture.
- Stop the mixer, scrape down the sides and paddle attachment with a spatula and stir manually to incorporate.
- Fill each finger cavity no more than half full with the mixture.
- Bake on the middle shelf for 20 minutes. Test for doneness by inserting a skewer in the middle of both cakes. If the skewer comes out clean, remove the cakes from the oven. If not, bake for an extra 5 minutes.
- When done, remove the cakes from the oven and cool in the finger mould for 5 minutes before turning out onto a wire rack. Turn right side up then leave to cool completely.
- Make the icing
- Place the softened butter in the bowl of a stand mixer fitted with the paddle attachment and beat on medium speed until light and fluffy.
- Reduce the speed to the lowest setting and add the icing sugar one tablespoon at a time until well incorporated. Stop the mixer, scrape down the sides, then add the milk and Nutella. Beat on medium speed for 30 seconds until light and fluffy. Scrape down whenever you need to.
- Ice the fingers
- Fit a large disposable piping bag with an open star tip such as a 6B or 864. Fill the bag with the icing then twist the end until a small blob comes out of the tip.
- Take a finger and holding the bag directly above and close to the finger’s surface, pipe three stars of icing on top. Repeat with the remaining fingers.
- Garnish the fingers
- Place 24 hazelnuts in a small zip lock bag together with some gold dust – use the handle of a teaspoon to scoop a little in, you won’t need much.
- Using tweezers (if you have them) add one whole hazelnut to the centre of each flower. If you don’t have tweezers you can use your fingers then sprinkle over a little extra dust if required.
- To serve
- Serve immediately on your prettiest platter, tiered stand or decorative plate or store (see below).
- To store
- Line an airtight container with baking paper, add the fingers, replace the lid, then store in the refrigerator for up to 2 days. Remove the container from the fridge 30 minutes before serving but keep the lid on.
- To freeze
- You can freeze the fingers before adding the icing. Simply place them in an airtight container lined with baking paper. Defrost overnight in the fridge (leave in the container) then ice and garnish as described above.